
How to Add a Liner to Crochet (or Knit) Christmas Stockings
Learn how to add a liner to crochet (or knit) Christmas stockings with this free tutorial. It includes sew and no-sew instructions.
This post contains affiliate links. At no extra cost to you, I may receive a small commission from purchases made through affiliate links, which helps me to keep bringing awesome free content!
I LOVE crocheted Christmas stockings. I think they are so cute and add the perfect homey touch to holiday decor.

However, yarn stockings have one little issue: they stretch… a lot. You can combat some of the stretch by using a 100% cotton yarn, but crochet stockings also have little holes where stuff can poke through. Don’t fret, there is a solution: fabric liner!
This is my husband’s stocking… yep, I’m the proud wife of a geek! lol
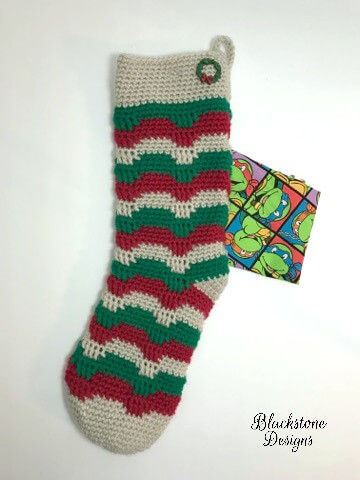
They are quick and easy to do, and well worth the time. Plus, you can add a little more flair to your stockings by choosing fun fabrics for the inside!

Materials
100% Cotton Quilter’s Fabric or Lining Fabric.
-One fat quarter will fit the standard crochet Christmas stocking, but grab two if you’re unsure of the measurements
Sewing Machine / Needle & Thread / Hem Tape (Super Hold)

Click on the image to be redirected to that post.
Instructions
1. Iron Fabric as needed

2. Lay stocking on top of fabric and trace around the sides (but not across the top)
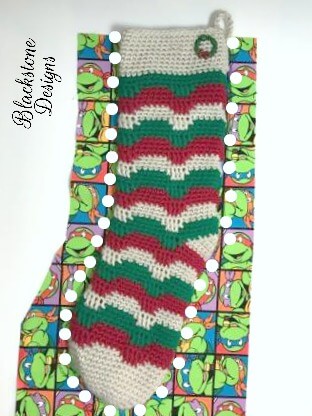
3. Add a 1/4″ (around the trace mark) and cut it out.
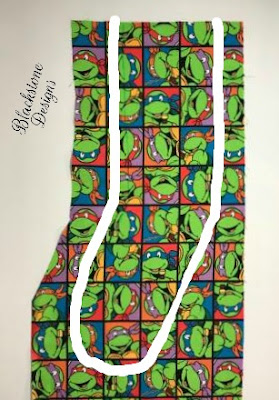

4. Lay it mirror image on the fabric, trace, and cut it out (do not add 1/4″ to this piece).
5. Lay pieces with wrong sides together and pin or clip the pieces together

6. Sew 1/2″ in from edge, or place Hem Tape between the 2 layers of fabric (lining the hem tape up to the edge of the fabric) and iron.
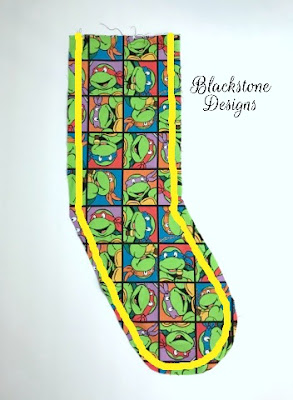
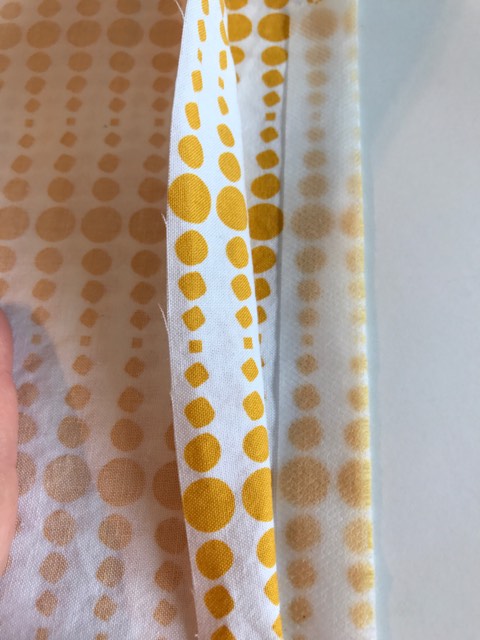
>>Note: You can shorten this process by placing the liner pieces right sides together and sewing around the outside, but woven fabrics have unstable seams when sewn and the fabric can “shred”, so make sure to use a good fray check around the edge (or hem tape instead of sewing) for this method.
7. Notch your curves for rounder toe when turning inside out and press seams open.

8. Fold top edge of liner down 1/2″. Fold toward the wrong side, so the right side of the fabric is showing. Pin in place, iron, and sew. Or place a piece of hem tap under the fold and iron.

Click on the image to be redirected to that post.

Click on the image to be redirected to that post.

This fold is exaggerated to make this step more clear.
9. Turn liner inside out (as shown above).
10. Slip liner inside of the stocking (so the wrong sides are together). Optional: Sew into place 1/4″ down from the top (of liner) OR add a piece of hem tape between the liner and the stocking. WARNING: If using hem tape and acrylic yarn, make sure your iron is on the proper heat setting (lowest setting). Acrylic yarn will melt on a high heat setting.

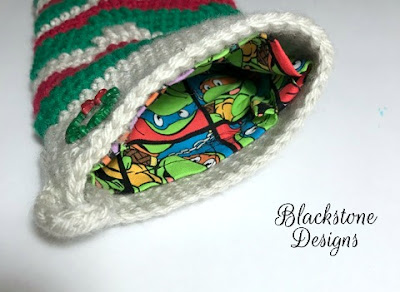
I used a simple 1″ tack stitching on the front and back of liner to hold in place
I hope you found this tutorial helpful! Don’t forget to share it with your friends and Pin-it!


Keep up to date with my designs by joining the Blackstone Designs Crochet Community! Hope to see you there!!

Written Pattern © 2017 Sonya Blackstone of Blackstone Designs. Please do not sell, share, or modify this pattern, but instead share the link to where the pattern can be found. You may sell items you make with this pattern. This pattern, as with all Blackstone Designs/Sonya Blackstone patterns, are not for educational use without written permission from the designer.
We are a participant in the Amazon Services LLC Associates Program, an affiliate advertising program designed to provide a means for us to earn fees by linking to Amazon.com and affiliated sites.




Brilliant! This is exactly what I was looking for. I have very little sewing experience and was disappointed to realize my crochet stocking was going to stretch too much. The pictures help so much!
Hi Brooke!
I’m so glad you found it helpful!
-Sonya