How to Make the New Baby Gift Card Holder – Free Crochet Pattern
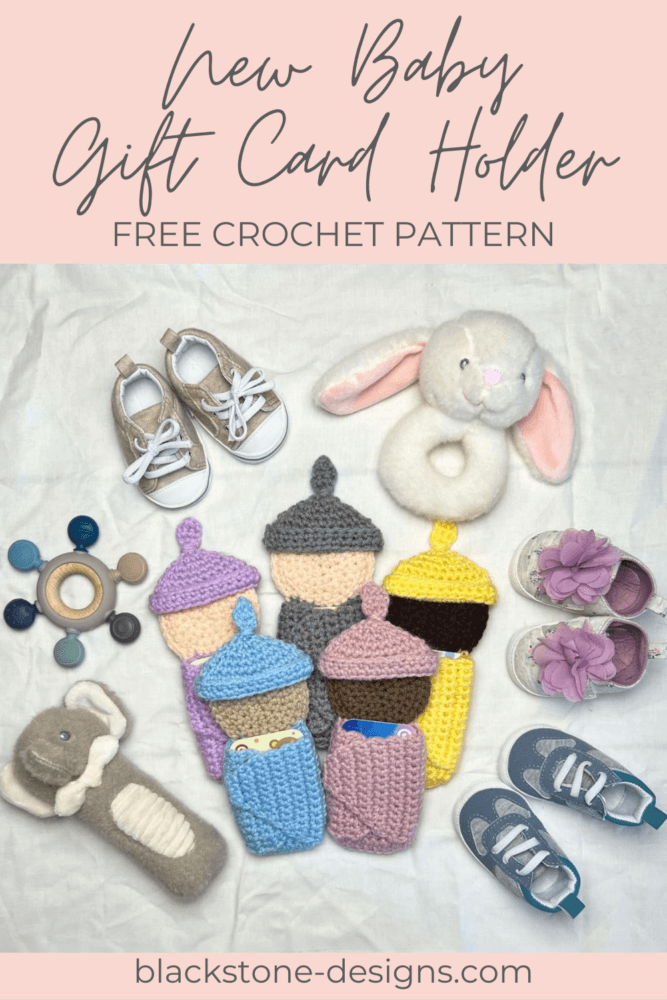
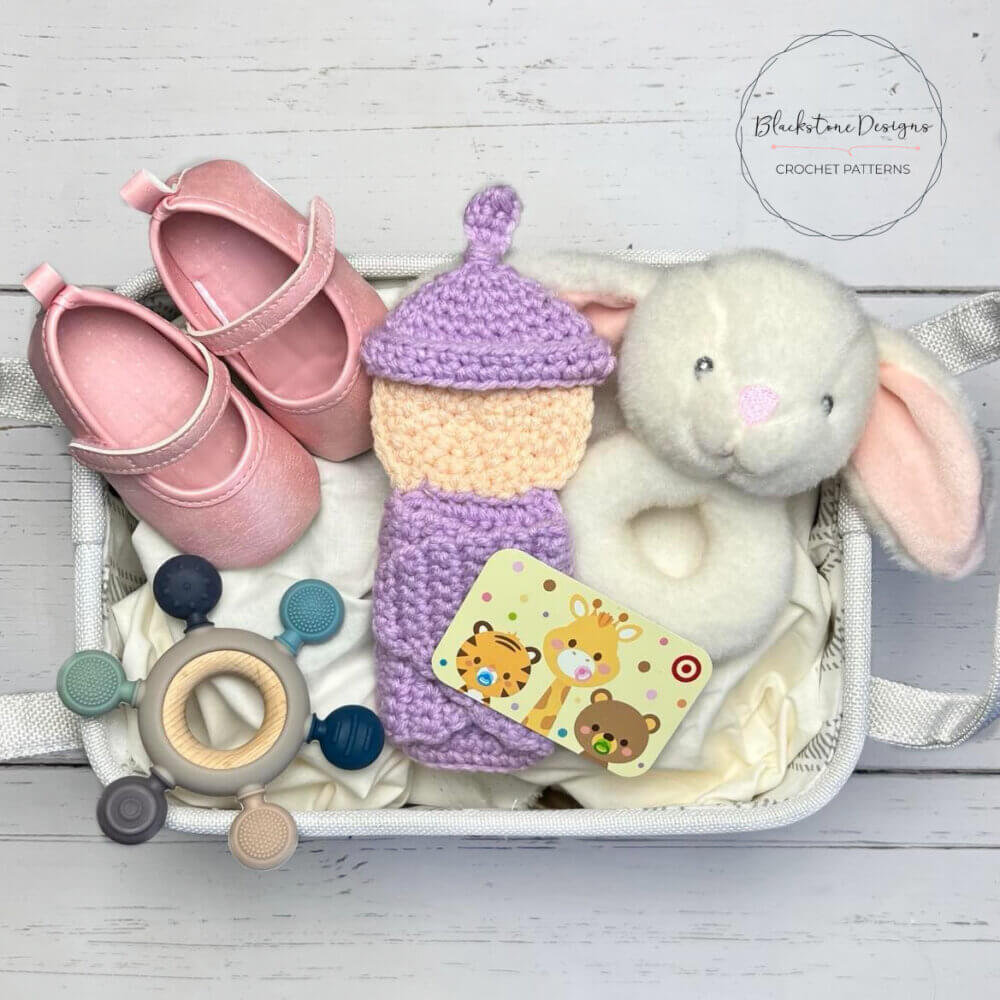
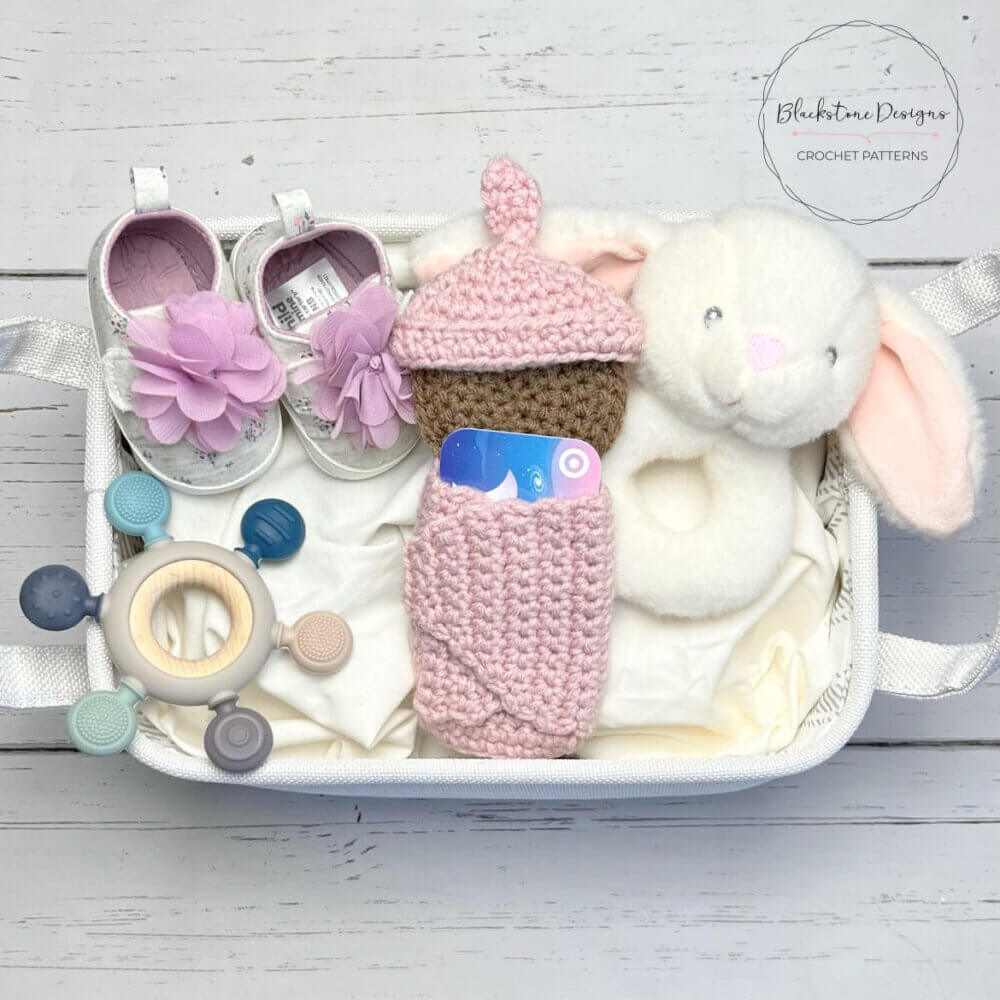
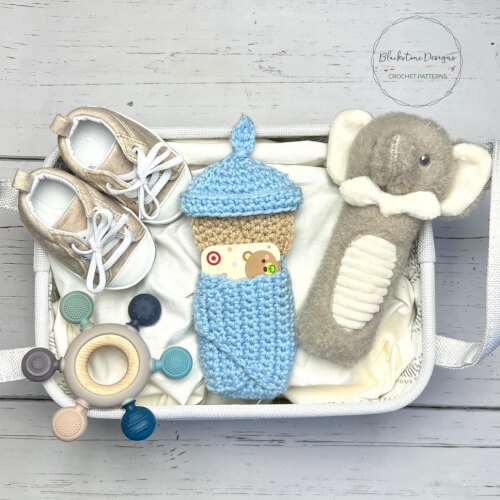
The New Baby Gift Card Holder crochet pattern makes the perfect gift for new parents! Give them a gift card to stock up on all the new baby essentials.
This post contains affiliate links. At no extra cost to you, I may receive a small commission from purchases made through affiliate links, which helps me to keep bringing awesome free content!
The customization possibilities are endless with this gift card holder!
You can grab fabric paint or embroidery floss and add a face or you could add baby themed buttons to the blanket.
You could even add a string to the top of the hat, so it can hang from a Christmas tree for Baby’s 1st Christmas.
And you could add gift tags to the side that say “new baby”, “Baby’s 1st Christmas”, or simply “For You”.
If you’re a confident crocheter, you could change the blanket from one solid color into a striped blanket!
Or simply use a variegated yarn with short color changes!
The New Baby Gift Card Holder could easily be your go to gift, because the possibilities keep this pattern fresh!
I originally designed this project without pacifiers, so you’ll see a lot of those photos in this pattern, but the instructions for making a pacifier have been added!

Materials
Worsted Weight Yarn (#4)
- Skin Tone – 25 yards
- Blanket Color – 75 yards
G/6/4.00mm Crochet Hook
Yarn Needle
Scissors
Hot Glue Gun/Sticks
Optional Materials:
3/8 – 1/2″ 4-Hole Button (Pacifier Base)
12mm Jump Ring (Pacifier handle)
Light Gray Embroidery Floss (Attach jump ring to button)
Black Embroidery Floss or Puffy Paint (faces)
Pink Crayon or Blush (cheeks)
Popsicle Stick (Extra stability)
Stitch Markers
Gauge
Gauge is not critical for this project
Finished Measurements
3″W x 8″H (from tip of hat to bottom)
Stitch Guide
arnd = around
ch = chain
dec = single crochet decrease
FLO = front loop only
sc = single crochet
sc3tog = See Special Stitches
sl st(s) = slip stitch(es)
WS = wrong side
Skill Level
Intermediate
Written in U.S. Terms

Notes
- Beginning chains do not count as stitches.
- Where asterisks appear, repeat the instructions between them.
- Follow head instructions carefully to keep it round.
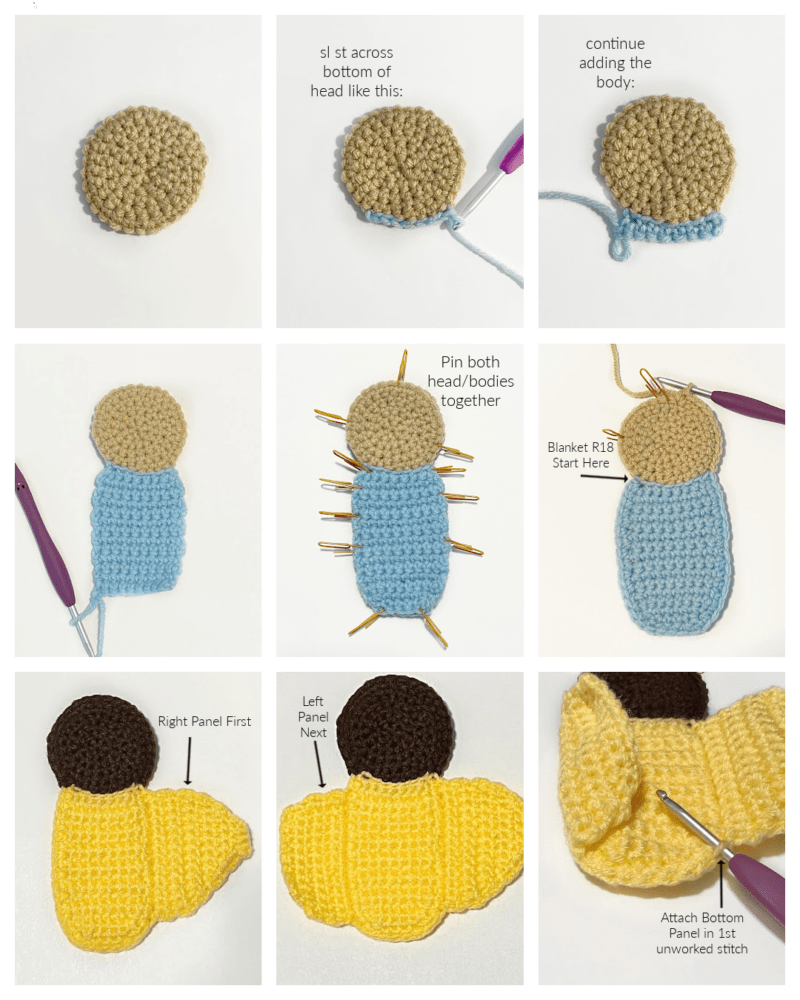
- There are photo tutorials on the last page.
- Optional: add faces to the babies with embroidery floss or 3D fabric paint.
- Tutorial photos at the end.
Special Stitches
single crochet three together (sc3tog) = draw up a loop in the three stitches indicated, then draw yarn through all the loops on the hook to combine these stitches into one.
Instructions
HEAD (Make 2)
With Skin Tone,
R1. Make magic ring, ch 1, 6 sc in ring (6)
R2. 2 sc arnd (12)
R3. *2 sc, sc* arnd (18)
R4. *sc x 2, 2 sc* arnd (24)
R5. sc, *2 sc, sc x 3* arnd; Fasten. (30)
BLANKET
With Blanket Color,
R6. Attach yarn to any stitch on WS of R5 of head: sl st x 7, turn (7)
R7. Working in the bottom loop only: Ch 1, 2 sc, sc x 5, 2 sc, turn (9)
R8-15. Ch 1, sc in each st across, turn (9)
R16. Ch 1, sc, skip 1, sc x 5, skip 1, sc, turn (7)
R17. Ch 1, sc, skip 1, sc x 3, skip 1, sc; Fasten. (5)
Repeat blanket instructions on second head piece
R18. Hold the two pieces together (place a popsicle stick between them if desired for extra head stability) matching up the row ends (place stitch markers as needed), and making sure the WS of the head is facing out;
Attach yarn to the top of the blanket on left side: Ch 1, sc in same st as join, sc in the end of each row and in each stitch arnd the blanket, switch to skin tone yarn and sc in each st arnd the head portion, sl st to join in 1st blanket stitch; Fasten.
RIGHT BLANKET PANEL
With Blanket Color,
R1. Attach yarn to FLO of 2nd stitch down from head; Ch 1, FLO sc in same space as ch and in next 12 sts, turn (13)
R2-4. Ch 1, sc across, turn (13)
R5. Ch 1, sc x 11, skip 1, sc, turn (12)
R6. Ch 1, sc, skip 1, sc x 10, turn (11)
R7. Ch 1, sc x 9, skip 1, sc, turn (10)
R8. Ch 1, sc, skip 1, sc x 8, turn (9)
R9. Ch 1, sc x 7, skip 1, sc, turn (8)
R10. Ch 1, sc, skip 1, sc x 4, skip 1, sc, turn (6)
R11. Ch 1, sc, skip 1, sc x 2, skip 1, sc, turn (4)
R12. Ch 1, sc across; Fasten. (4)
LEFT BLANKET PANEL
With Blanket Color,
R1. Attach yarn to FLO of 14th stitch down from head; Ch 1, FLO sc in same space as ch and in next 12 sts, turn (13)
R2-4. Ch 1, sc across, turn (13)
R5. Ch 1, sc, skip 1, sc x 11, turn (12)
R6. Ch 1, sc, skip 1, sc x 8, skip 1, sc, turn (10)
R7. Ch 1, sc, skip 1, sc x 6, skip 1, sc; Fasten. (8)
BOTTOM BLANKET PANEL
With Blanket Color,
R1. Attach yarn to FLO of first unworked stitch on the bottom: Ch 1, sc in same space as ch and across all unworked sts, turn (9)
R2-4. Ch 1, sc across; Fasten at the end of R4. (9)
KNOT HAT
With Blanket Color,
R1. Ch 26, join to form a ring (be careful not to twist the chain), sc in each ch arnd, sl st to join (26)
R2. Ch 1, sc arnd, sl st to join, turn (26)
R3. Ch 1, FLO sc in each st arnd, sl st to join (26)
R4-5. Ch 1, sc arnd, sl st to join (26)
R6. Ch 1, sc x 5, dec x 2, sc x 9, dec x 2, sc x 4, sl st to join (22)
R7. Ch 1, sc x 4, dec x 2, sc x 7, dec x 2, sc x 3, sl st to join (18)
R8. *dec, sc* arnd (12)
R9. dec arnd; Fasten. (6)
R10. Lay hat flat, so decreases are on the sides; Insert hook through both layers of R9 (furthest stitch on right), attach yarn, ch 1, sc across (working through both layers), turn (3)
R11-12. Ch 1, sc across, turn (3)
R13. Ch 1, sc3tog; Fasten; Leave a long tail. (1)
Weave tail down through R13, R12, R11 on backside: wrap tail around the R10 several times to give the appearance of a “knot”, tuck the tail under the wraps; Fasten.
Button Pacifier
Sew jump ring to the center of the button; make one pass from top to bottom in left holes, then one pass from top to bottom in right holes. Repeat for one more pass. Turn button over and triple knot the tails. Trim excess floss.
Finishing
- Hide all strings.
- Blanket “folds” in this order:
bottom panel, left panel, then right panel lays across the top. - Secure the Left and Right Blanket Panels in place with hot glue like this:
fold up bottom panel (DO NOT GLUE), fold left panel over the top of the bottom panel and add hot glue only where the left panel touches the bottom panel to secure it to the bottom panel. Fold right panel over the left panel and bottom panel and add hot glue only where the right panel touches the left panel and bottom panel to secure it in place. - Fold up brim of hat (R1&2), put hot glue on the inside of the hat at approximately R8, and place the hat on head in desired position. Then add hot glue to the inside of the hat at R3 and secure it to the head.
- Add faces to the front of the head as desired with embroidery floss or 3D fabric paint.
And that’s how you crochet the New Baby Gift Card Holder!
Happy Crocheting!

Written pattern and photographs © 2022 Sonya Blackstone of Blackstone Designs. Please do not sell, share, or modify this pattern, but instead share the link to where the pattern can be found. You may sell items you make with this pattern. This pattern, as with all Blackstone Designs/Sonya Blackstone patterns, are not for educational use without written permission from the designer. All rights reserved.
Sonya Blackstone is a participant in the Amazon Services LLC Associates Program, an affiliate advertising program designed to provide a means for us to earn fees by linking to Amazon.com and affiliated sites.