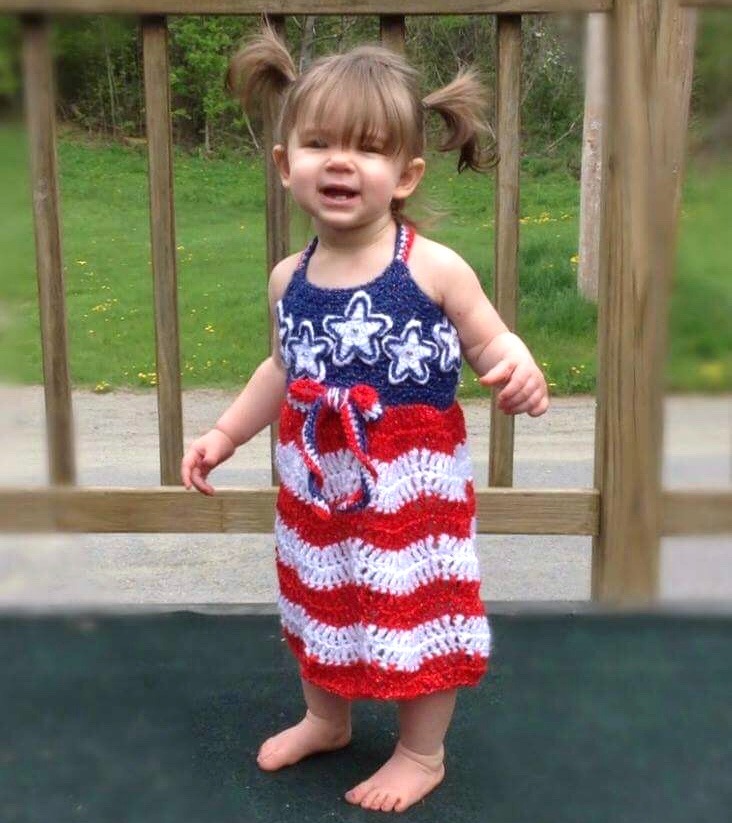
Oversized Granny Stitch Cardigan – Free Crochet Pattern for Adults

Sharing is caring!

If there’s one crochet garment you’ll reach for again and again, it’s this Oversized Granny Stitch Crochet Cardigan! It’s cozy, breathable, and made with one of the most iconic stitch patterns in the crochet world – the granny stitch. Whether you’re layering up for fall or adding a breezy top layer on a cool summer night, this cardigan checks all the boxes.

This post contains affiliate links. At no extra cost to you, I may receive a small commission from purchases made through affiliate links, which helps me to keep bringing awesome free content!


In this blog post, I’ll walk you through everything you need to know about the pattern, tips for customization, styling ideas, yarn suggestions, and more. So grab your hook, some yarn you love, and let’s dive into the cozy world of granny stitch goodness.


Why You’ll Love The Granny Stitch Crochet Cardigan

This granny stitch crochet cardigan has that effortless slouchy fit everyone loves. It drapes beautifully and has a soft, comfy vibe that makes it perfect for lounging, running errands, or dressing up with jeans and boots. And the best part? It’s made using the granny stitch, so it works up faster than you might think!

Here’s why this pattern is a crowd favorite:

  • Easy construction
  • Uses the classic granny stitch for fast rows
  • Light, airy texture with great movement
  • Easy to customize

If you’ve ever wanted to make your own handmade cardigan but felt intimidated by garment construction, this is the perfect place to start.


What is the Granny Stitch?

The granny stitch is a timeless crochet technique that involves clusters of three double crochets separated by chain spaces. It’s most commonly seen in traditional granny squares, but here, we’re using it in straight rows to create panels for a cardigan.

This stitch is:

  • Great for beginners
  • Easy to memorize
  • Works up quickly
  • Light and breathable for layering

By using the granny stitch in rows, you get that nostalgic, vintage-inspired look with a modern twist. It adds just the right amount of texture without being bulky.


Construction Overview

This crochet granny stitch cardigan is an easy make:

  1. One body piece
  2. Two sleeves
  3. Seamed together before the trim is added

Each panel is worked in rows using the granny stitch, and the sleeves can be made flat or in the round; the instructions are specific to a flat work, but you could choose to join the rows before turning.

Sizing + Fit

This crochet granny stitch cardigan pattern is designed to be loose and oversized, with roomy sleeves and an open front. It’s meant to fit comfortably with a lot of ease, so it looks great on a range of body types.

The pattern includes adult sizes from XS to 5X, with instructions on how to adjust for length or width if you prefer a more fitted or extra-slouchy version.

However, the size Medium fits on an extra large body, so if you’re looking for more of a fitted look, follow the instructions for a smaller size (please refer to the size chart and remember this cardi is written with 6-8″ positive ease).


Matching with the Child Version

There’s a matching child-sized granny stitch cardigan pattern too! That means you can crochet a cardigan for yourself and your little for an adorable mommy & me look.

Matching handmade sweaters? Always yes!
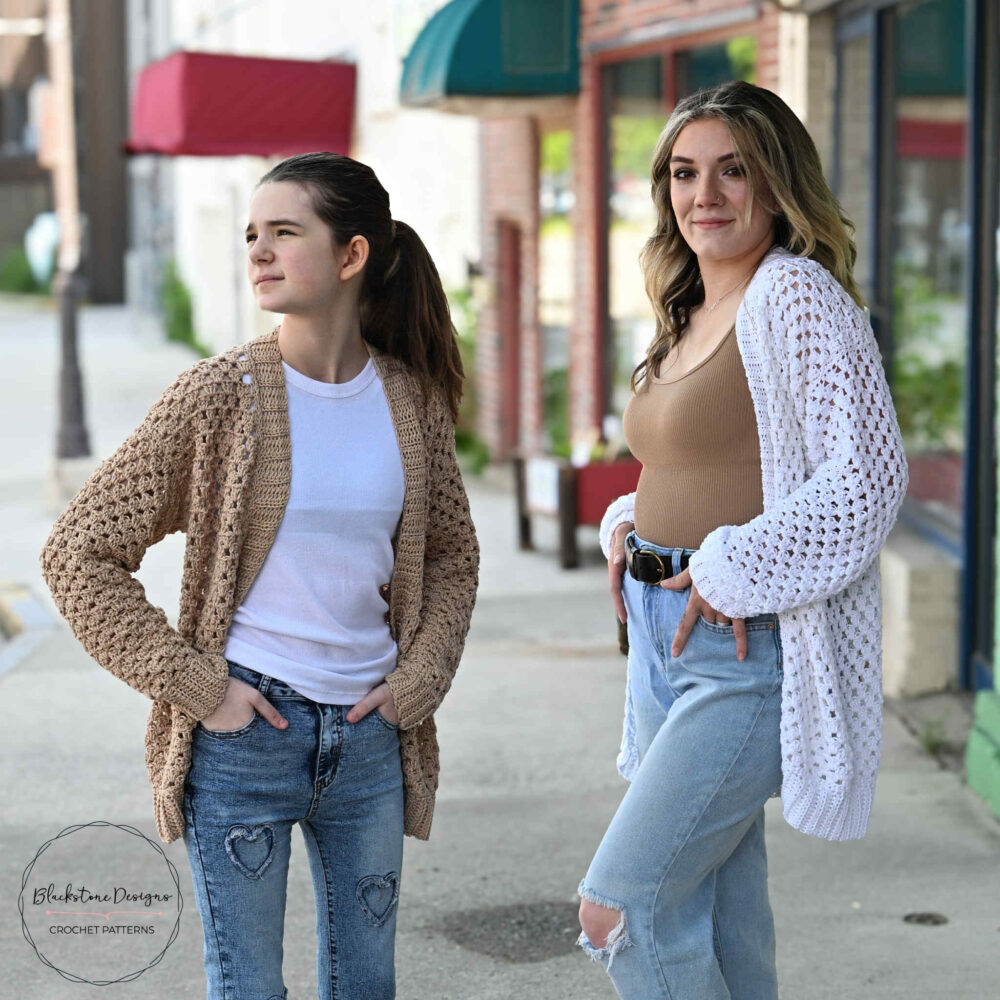
Woman and Child in Oversized crochet Cardigan


Customization Ideas

This granny stitch cardigan is a great base for personalization. Here are a few fun ideas to make it your own:

  • Use color-blocking or stripes for a bold, playful look
  • Try earthy neutrals for a modern minimalist vibe
  • Go full retro with brights or variegated yarns
  • Add pockets (because everything’s better with pockets!)
  • Adjust the sleeve length for short sleeves or elbow-length options

This cardigan is also a great stash buster! Each granny stitch cluster is like a little window of color, so it’s perfect for mixing and matching your leftover yarns.


Styling Your Granny Stitch Cardigan

You’ll be surprised how versatile this cardigan is when it comes to styling! Try it:

  • Layered over a tank top and jeans for a casual weekend outfit
  • Tossed over a sundress or shorts for breezy summer evenings
  • Worn with leggings and a turtleneck in colder months
  • Belted at the waist for a more structured look

Because it’s lightweight and breathable, it’s the kind of piece you can wear year-round – making it a true wardrobe staple.

Tips for Success

If this is your first time making a garment, don’t stress! Here are a few beginner-friendly tips:

  • Check your gauge: This helps make sure your finished piece fits the way you want it to.
  • Use stitch markers to mark your panel edges – this helps when you’re seaming pieces together.
  • Block your panels before seaming if possible – it helps smooth things out.
  • Choose yarn wisely – soft, durable, and lots of drape is best!
  • Pre-wash your yarn – especially if it’s hand-dyed or multi-color

The granny stitch is naturally relaxing once you get into a rhythm, so you might find this is the perfect “binge-watch” project.

Time Commitment and Skill Level

This is an Intermediate skill level crochet project due to it being a garment with shaping and ribbing. However, the granny stitch is beginner-friendly and the basic shaping is easy.

As far as time, the woman’s size medium took me approximately 24 total hours. I didn’t time it exactly, but I worked on it over 3 days time.

How to Get the Adult Oversized Granny Stitch Cardigan Pattern

Women's Oversized Granny Stitch Cardigan in White Coboo Yarn on a woman standing in front of stone wall
how to get the

Adult Oversized Granny Stitch Cardigan Crochet Pattern

Option 1: Continue scrolling for free pattern instructions on this site

Option 2: Purchase the ad-free PDF that includes tutorial photos from one of my shops


About the Materials

The Oversized Granny Stitch Cardigan was made with Cotton-Bamboo DK Weight Yarn, specifically Lion Brand Coboo, but any fibers can be used! Other good options are Paintbox Yarns Cotton Mix DK, WeCrochet Swish DK, and Premier Cotton Sprout Speckles!

You will also need an I/9/5.50mm and H/8/5.00mm crochet hooks, stitch markers to section off the panels, sewing clips for adding the sleeves, yarn needles for joining panels and sleeves, plus hiding loose tails, and of course a good pair of scissors!


The Crochet Pattern

Keep reading for a list of what you need to make the Adult Oversized Granny Stitch Cardigan, including the stitch pattern instructions!

pin it to pinterest
Child's Oversized Granny Stitch Cardigan


Materials

DK Weight Yarn (#3)

  • 1160(1270,1390,1500,1520,1850,2080,2300,2550)yds

I/9/5.50mm Hook (Body)

H/8/5.00mm Hook (Trim)

Stitch Markers

Yarn Needle

Scissors

Optional Materials

Sewing Clips


Gauge

4 clusters x 8 rows = 4”


Sizes

Women’s (Bust) 

XS(28-30”)[71-76cm] 

S (32-34”)[81-86cm] 

M (36-38”)[91-96cm] 

L (40-42”)[102-107cm] 

XL (44-46”)[112-117cm] 

2X (48-50”)[122-127cm] 

3X (52-54”)[132-137cm] 

4X (56-58”)[142-147cm] 

5X (60-62”)[152-157cm]


Stitch Guide

arnd = around

alt. dc = See Special Stitches

ch(s) = chain(s) 

CL = See Special Stitches

dc = double crochet

hdc = half double crochet 

sc = single crochet 

st(s) = stitch(es) 

YO = yarn over


Skill Level

Intermediate


Pattern Written in U.S. Terms


Notes
  • Chain 2 can be used in place of alternate double crochet.
  • This cardigan is worked from the bottom-up.
  • Where asterisks appear, repeat the instructions between them.
  • Pattern is written for smallest size, with changes for larger sizes in parenthesis.
  • Pay close attention at the end of the sleeves; sizes are separated out because they each finish a bit differently.
  • This cardigan has a 6-8” positive ease.
  • To make a gauge swatch: ch 18, work given instructions for 9 rows total.
  • Bottom, Panels, and Sleeves are made using a 5.50mm Hook; All Trim pieces are made using a 5.00mm Hook.
  • To adjust the length: add or remove rows from the bottom portion, before moving to panel instructions.
  • Lion Brand Coboo was used for cardigan shown.
  • Tutorial photos and schematics are at the end.


Special Stitches

Alternate Double Crochet (alt. dc) – Place a single crochet in the indicated stitch, then place another single in the center of the first one.
Cluster (CL) – Place three double crochet in the same space.


Instructions

BOTTOM

R1. (RS) Ch 107(119,131,143,155,167,179,191,203), sc in back bump of 2nd ch from hook and in each ch across, turn (106)[118,130,142,154,166,178,190,202]

R2. Alt. dc, skip 2 sc, *CL, skip 2 sc* across, dc in last sc, turn (34 CL, 2 dc)[38 CL, 2 dc//42 CL, 2 dc//46 CL, 2 dc//50 CL, 2 dc//54 CL, 2 dc//58 CL, 2 dc//62 CL, 2 dc//66 CL, 2 dc]

R3. Alt. dc in dc, CL between dc and 1st CL, *CL between CLs* across, CL between last CL and alt. dc, dc in alt. dc, turn (35 CL, 2 dc)[39 CL, 2 dc//43 CL, 2 dc//47 CL, 2 dc//51 CL, 2 dc//55 CL, 2 dc//59 CL, 2 dc//63 CL, 2 dc//67 CL, 2 dc]

R4. Alt. dc in dc, skip 1st CL, *CL between CLs* across, skip last CL, dc in top of alt. dc, turn (34 CL, 2 dc)[38 CL, 2 dc//42 CL, 2 dc//46 CL, 2 dc//50 CL, 2 dc//54 CL, 2 dc//58 CL, 2 dc//62 CL, 2 dc//66 CL, 2 dc]

R5-28(28,28,30,30,32,34,36,38). Repeat R3-4;

Continue to front panel 1

FRONT PANEL 1
R1. Alt. dc in dc, CL between dc and 1st CL, *CL between CLs* 7(8,9,10,11,12,13,14,15)X, skip last CL, dc in next space, turn; Leave remaining sts unworked (8 CL, 2 dc)[9 CL, 2 dc//10 CL, 2 dc//11 CL, 2 dc//12 CL, 2 dc//13 CL, 2 dc//14 CL, 2 dc//15 CL, 2 dc//16 CL, 2 dc]

R2. Alt. dc in dc, CL between alt. dc and 1st CL, *CL between CLs* across, skip last CL, dc in top of alt. dc, turn (8 CL, 2 dc)[9 CL, 2 dc//10 CL, 2 dc//11 CL, 2 dc//12 CL, 2 dc//13 CL, 2 dc//14 CL, 2 dc//15 CL, 2 dc//16 CL, 2 dc]

R3. Alt. dc in dc, skip 1st space and 1st CL, CL in next space, *CL between CLs* across, skip last CL, dc in top of alt. dc, turn (7 CL, 2 dc)[8 CL, 2 dc//9 CL, 2 dc//10 CL, 2 dc//11 CL, 2 dc//12 CL, 2 dc//13 CL, 2 dc//14 CL, 2 dc//15 CL, 2 dc]

R4. Alt. dc in dc, CL between alt. dc and 1st CL, *CL between CLs* 6(7,8,9,10,11,12,13,14)X , skip last CL and space, dc in top of alt. dc, turn (7 CL, 2 dc)[8 CL, 2 dc//9 CL, 2 dc//10 CL, 2 dc//11 CL, 2 dc//12 CL, 2 dc//13 CL, 2 dc//14 CL, 2 dc//15 CL, 2 dc]

R5-14(16,16,18,18,20,20,22,22). Repeat R3-4 until only 5(5,6,7,8,9,10,11,12)CL remain, then stop decreasing and work rows to total amount listed in row count; Fasten, leave a long tail for sewing.
(5 CL, 2 dc)[5 CL, 2 dc//6 CL, 2 dc//7 CL, 2 dc//8 CL, 2 dc//9 CL, 2 dc//10 CL, 2 dc//11 CL, 2 dc//12 CL, 2 dc]

Continue to front panel 2.

FRONT PANEL 2
Flip cardigan over and join yarn in dc from end of R28(28,28,30,30,32,34,36,38):

Repeat same instructions as Front Panel 1.

Continue to back panel.

BACK PANEL

Join yarn in same space R1 from Front Panel 1 ended in: 

R1. Alt. dc in same space as join, skip 1st CL, *CL between CLs* across, dc in same space R1 from Front Panel 2 ended in, turn (16 CL, 2 dc)[18 CL, 2 dc//20 CL, 2 dc//22 CL, 2 dc//24 CL, 2 dc//26 CL, 2 dc/28 CL, 2 dc//30 CL, 2 dc//32 CL, 2 dc]

R2. Alt. dc in same space, CL between dc and 1st CL, *CL between CLs* across, CL between last CL and alt. dc, dc in alt. dc, turn (17 CL, 2 dc)[19 CL, 2 dc//21 CL, 2 dc//23 CL, 2 dc//25 CL, 2 dc//27 CL, 2 dc/29 CL, 2 dc//31 CL, 2 dc//33 CL, 2 dc]

R3. Alt. dc in dc, skip 1st CL, *CL between CLs* across, dc in top of alt. dc, turn (16 CL, 2 dc)[18 CL, 2 dc//20 CL, 2 dc//22 CL, 2 dc//24 CL, 2 dc//26 CL, 2 dc/28 CL, 2 dc//30 CL, 2 dc//32 CL, 2 dc]

R4. Alt. dc in same space, CL between dc and 1st CL, *CL between CLs* across, CL between last CL and alt. dc, dc in alt. dc, turn (17 CL, 2 dc)[19 CL, 2 dc//21 CL, 2 dc//23 CL, 2 dc//25 CL, 2 dc//27 CL, 2 dc/29 CL, 2 dc//31 CL, 2 dc//33 CL, 2 dc]

R5-14(16,16,18,18,20,20,22,22). Repeat R3-4; leave a long tail for sewing.

Sew front panels to back panel by lining up the edges and sewing across the shoulder (Armholes formed).

BOTTOM TRIM

With H Hook,

R1. Attach yarn to either bottom corner st, ch 13, hdc in 2nd ch from hook and across, sl st x 3 on bottom of cardi, turn (12)

R2. Ch 1, BLO hdc across hdcs, turn (12)

R3. Ch 1, BLO hdc across, sl st x 3 on bottom of cardi, turn (12)

Repeat R2&3 to other corner; Fasten.

SLEEVES (Make 2)

R1. (RS) Ch 35(35,38,41,41,44,44,47,47), sc in 2nd ch from hook and in each ch across, turn (34)[34,37,40,40,43,43,46,46]

R2. Alt. dc, skip 2 sc, *CL, skip 2 sc* across, dc in last sc, turn (10 CL, 2 dc)[10 CL, 2 dc//11 CL, 2 dc//11 CL, 2 dc//11 CL, 2 dc//12 CL, 2 dc//12 CL, 2 dc//13 CL, 2 dc//13 CL, 2 dc]

R3. Alt. dc in dc, CL between dc and 1st CL, *CL between CLs* across, CL between last CL and alt. dc, dc in alt. dc, turn (11 CL, 2 dc)[11 CL, 2 dc//12 CL, 2 dc//12 CL, 2 dc//12 CL, 2 dc//13 CL, 2 dc//13 CL, 2 dc//14 CL, 2 dc//14 CL, 2 dc]

R4. Alt. dc in dc, skip 1st CL, *CL between CLs* across, skip last CL, dc in top of alt. dc, turn (10 CL, 2 dc)[10 CL, 2 dc//11 CL, 2 dc//11 CL, 2 dc//11 CL, 2 dc//12 CL, 2 dc//12 CL, 2 dc//13 CL, 2 dc//13 CL, 2 dc]

R5-6. Repeat R3&4

R7. Alt. dc in dc, ch 1, CL between dc and 1st CL, *CL between CLs* across, CL between last CL and alt. dc, ch 1, dc in alt. dc, turn (11 CL, 2 dc)[11 CL, 2 dc//12 CL, 2 dc//12 CL, 2 dc//12 CL, 2 dc//13 CL, 2 dc//13 CL, 2 dc//14 CL, 2 dc//14 CL, 2 dc]

R8. Alt. dc in dc, CL in ch-1 space, skip 1st CL below, *CL between CLs* across, skip last CL below, CL in ch-1 space, dc in top of alt. dc, turn (12 CL, 2 dc)[12 CL, 2 dc//13 CL, 2 dc//13 CL, 2 dc//13 CL, 2 dc//14 CL, 2 dc//14 CL, 2 dc//15 CL, 2 dc//15 CL, 2 dc]

R9-11. Repeat R4&3 (Odd rows repeat R4, Even rows repeat R3)

R12. Repeat R7 

R13. Repeat R8 (13 CL, 2 dc)[13 CL, 2 dc//14 CL, 2 dc//14 CL, 2 dc//14 CL, 2 dc//15 CL, 2 dc//15 CL, 2 dc//16 CL, 2 dc//16 CL, 2 dc]

R14-16. Repeat R3&4 (Odd rows repeat R3, Even rows repeat R4)

R17. Repeat R7

R18. Repeat R8 (14 CL, 2 dc)[14 CL, 2 dc//15 CL, 2 dc//15 CL, 2 dc//15 CL, 2 dc//16 CL, 2 dc//16 CL, 2 dc//17 CL, 2 dc//17 CL, 2 dc]

R19-21. Repeat R4&3 (Odd rows repeat R4, Even rows repeat R3)

R22. Repeat R7

R23. Repeat R8 (15 CL, 2 dc)[15 CL, 2 dc//16 CL, 2 dc//16 CL, 2 dc//16 CL, 2 dc//17 CL, 2 dc//17 CL, 2 dc//18 CL, 2 dc//18 CL, 2 dc]

R24-26. Repeat R3&4 (Odd rows repeat R3, Even rows repeat R4)

R27. Repeat R7

R28. Repeat R8 (16 CL, 2 dc)[16 CL, 2 dc//17 CL, 2 dc//17 CL, 2 dc//17 CL, 2 dc//18 CL, 2 dc//18 CL, 2 dc//19 CL, 2 dc//19 CL, 2 dc]

R29-31. Repeat R4&3 (Odd rows repeat R4, Even rows repeat R3)

R32. Repeat R7

Continue to Individual Sizes

XS-M ONLY:

R33. Repeat R8 (17 CL, 2 dc)[17 CL, 2 dc//18 CL, 2 dc]

R34-35. Repeat R3&4 (Odd rows repeat R3, Even rows repeat R4); Continue to Cuff

L-XL ONLY:

R33. Repeat R8 (18 CL, 2 dc)[18 CL, 2 dc]

R34. Repeat R4

R35. Repeat R7

R36. Repeat R8 (19 CL, 2 dc)[19 CL, 2 dc]; Continue to Cuff

2X-5X ONLY:

R33. Repeat R8

R34. Alt. dc in dc, ch 1, CL in ch-1 space, skip 1st CL below, *CL between CLs* across, skip last CL below, CL in ch-1 space, ch 1, dc in top of alt. dc, turn (19 CL, 2 dc)[19 CL, 2 dc//20 CL, 2 dc//20 CL, 2 dc]

R35.Repeat R7

R36. Repeat R8 (20 CL, 2 dc)[20 CL, 2 dc//21 CL, 2 dc//21 CL, 2 dc]; Continue to Cuff

CUFFS

With H Hook,

R1. Ch 13, hdc in 2nd ch from hook and across, sl st x 3 on bottom of cardi, turn (12)

R2. Ch 1, BLO hdc across hdcs, turn (12)

R3. Ch 1, BLO hdc across, sl st x 3 on bottom of cardi, turn (12)

Repeat R2&3 across; Fasten.

COLLAR

With H Hook

R1. Attach yarn to either bottom corner st, ch 1, *2 sc, sc* up the front panel, across the top of the back panel, and down the other front panel. [I placed 2 sc in the dc with a space next to them, and 1 sc in the dc with a cluster next to it].

R2. Ch 11, hdc in 2nd ch from hook and across, sl st x 3 across scs, turn (10 hdc, 3 sl st)

R3. Ch 1, BLO hdc across hdcs, turn (10 hdc)

R4. Ch 1, BLO hdc across, sl st x 3 across scs, turn (10 hdc, 3 sl st)

Repeat R2&3 up front panel, across top of back panel, and down other front panel to corner; Fasten.

Finishing
  • Fold sleeves in half, wrong sides together, and sew along the long edge to join. Turn right side out.
  • Attach Sleeve: With Cardigan wrong side out, lay flat and find the shoulder crease, then mark it with a stitch marker. Insert sleeve (still right  side out) into armhole from the inside of the cardigan, so that the seam is facing down and matches up to the space between dcs (where front and back panel split/bottom of armhole) and the top crease of the sleeve matches with the shoulder crease. Optional: place sewing clips at the shoulder crease, sleeve seam, one centered on front panel of armhole and one centered on back panel of armhole to hold the sleeve in place. Sew the sleeve into the armhole. [See Photo Below]
  • Hide all strings.
  • Turn cardigan right side out and attach any leather tags or sizing tags! 

That’s the Oversized Granny Stitch Cardigan Crochet Pattern!
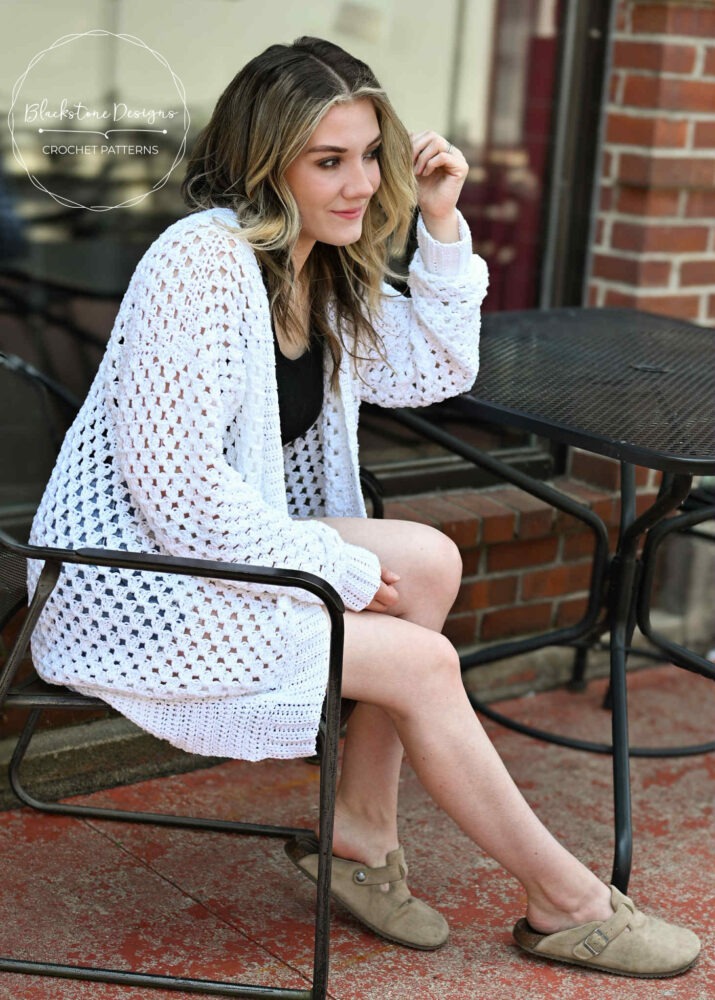
Women's Oversized Granny Stitch Cardigan in White Coboo Yarn on a woman sitting at black table


Don’t forget to share!

If you make the Oversized Granny Stitch Cardigan, I’d love to see them! Tag me on Instagram at @blackstone_designs or use the hashtag #GrannyStitchCardi so I can share your makes with the community.


Join our crochet community group!

Come on over and join the Blackstone Designs Crochet Community on Facebook for fun CALs and giveaways, plus exclusive sales, pattern support, and so much more!


Written pattern and photographs © 2025 Sonya Blackstone of Blackstone Designs. Do not sell, share, or modify this pattern, but instead share the link to where the pattern can be found. You may sell items you make with this pattern. This pattern, as with all Blackstone Designs/Sonya Blackstone patterns, are not for educational use without written permission from the designer.  All rights reserved.

Sonya Blackstone is a participant in the Amazon Services LLC Associates Program, an affiliate advertising program designed to provide a means for us to earn fees by linking to Amazon.com and affiliated sites.
Similar Posts

Leave a Reply

Your email address will not be published. Required fields are marked *