
How to Make a Rose Coin Purse – Free Crochet Pattern
Follow this free crochet pattern and learn how to make the Rose Coin Purse. Coin purses are one of the most handy items to have and since I’m in constant need of storage and organization inside my handbag, I made the Rose Coin Purse to store my small items.
Of course their intended use is a place to hold your spare change, but they also work great for chapsticks, ear buds, and even tiny candies!
This post contains affiliate links. At no extra cost to you, I may receive a small commission from purchases made through affiliate links, which helps me to keep bringing awesome free content!
Add a touch of charm to your everyday essentials with this handmade crochet coin purse, featuring a delicate rose applique on top.
Carefully crafted with soft, durable yarn, this purse combines functionality with elegance. The intricate rose detail adds a vintage-inspired accent, perfect for those who love a classic, feminine style.
Sized just right for coins, cash, or small essentials, this coin purse is a lovely accessory to slip into your bag or hold as a mini-clutch.
Whether you’re treating yourself or looking for a thoughtful handmade gift, this rose-adorned coin purse is sure to please!
Why crochet a coin purse?
Crocheting a coin purse offers a range of benefits beyond simply creating a stylish accessory. Here are some reasons why it’s worth making one:
- Personalized Design: Crocheting your own coin purse allows you to customize it to your style. You can choose your favorite colors and add embellishments, like the rose applique, for a one-of-a-kind look.
- Cost-Effective: Crocheting a coin purse typically requires small amounts of yarn, making it a budget-friendly project. It’s a great way to use up leftover yarn from other projects.
- Quick Project: A coin purse is a relatively small project, making it perfect for those with limited time or those new to crochet. You can complete it in just a few hours.
- Functional and Practical: Coin purses are great for organizing loose change, small items, or even as a minimalist wallet. They fit easily into larger bags or pockets and help keep things organized.
- Eco-Friendly: By making your own coin purse, you’re creating a sustainable, reusable item instead of buying a plastic or synthetic one. Plus, handmade items often last longer due to the attention to detail and sturdy craftsmanship.
- Gift-Worthy: A crocheted coin purse makes a thoughtful handmade gift. It’s personal, unique, and practical, perfect for friends, family, or special occasions.
- Skill Building: Crocheting small accessories like a coin purse helps build essential skills, like shaping, adding zippers to crochet projects, and adding decorative appliques, which are useful for more complex projects later.
- Portable Project: Small enough to bring anywhere, a coin purse is ideal for crocheting on the go. It’s easy to slip the project into your bag and work on it during commutes, in waiting rooms, or at lunch breaks.
- Creativity Boost: Adding details like a rose applique encourages creativity and lets you experiment with colors and textures, enhancing your design skills.

Rose Coin Purse
Crochet Pattern
Option 1: Continue scrolling for free pattern instructions on this site
Option 2: Purchase the ad-free PDF that includes tutorial photos from one of my shops
Materials
100% Cotton Worsted Weight Yarn
~White (1oz/29g) {Main “Base” Color}
~Red (.5oz/14g) {Rose Color}
~Green (Scraps) {Leaf Color}
G/6/4.00mm Crochet Hook
4” White Zipper
1/2”-3/4” D-ring
Yarn Needle
Optional Materials
Cotton Fabric
Fabric Glue
Sealant Spray
Gauge
Not important for this project
Finished Measurements
3.25″D x 3″H
Stitch Guide
arnd = around
ch(s) = chain(s)
dc = double crochet
hdc = half double crochet
sc = single crochet
sl st(s) = slip stitch(es)
Skill Level
Confident Beginner
Written in U.S. Terms


Notes
- Beginning ch-1 does not count as a stitch
- If changing your base color, you may want to also change the zipper color.
- Colors are completely optional as all combinations will look great! Although, make sure you still have green.
Instructions
BASE (Make 2)
With White (or chosen base color),
R1. Make a magic ring, ch 1, 6 sc in ring (6)
R2. 2 sc arnd (12)
R3. *2 sc, sc* arnd (18)
R4. *2 sc, sc x 2* arnd (24)
R5. *2 sc, sc x 3* arnd (30)
R6. *2 sc, sc x 4* arnd (36)
R7. *2 sc, sc x 5* arnd (42)
R8. BLO sc arnd, sl st x 2 in both loops; Fasten. (42)
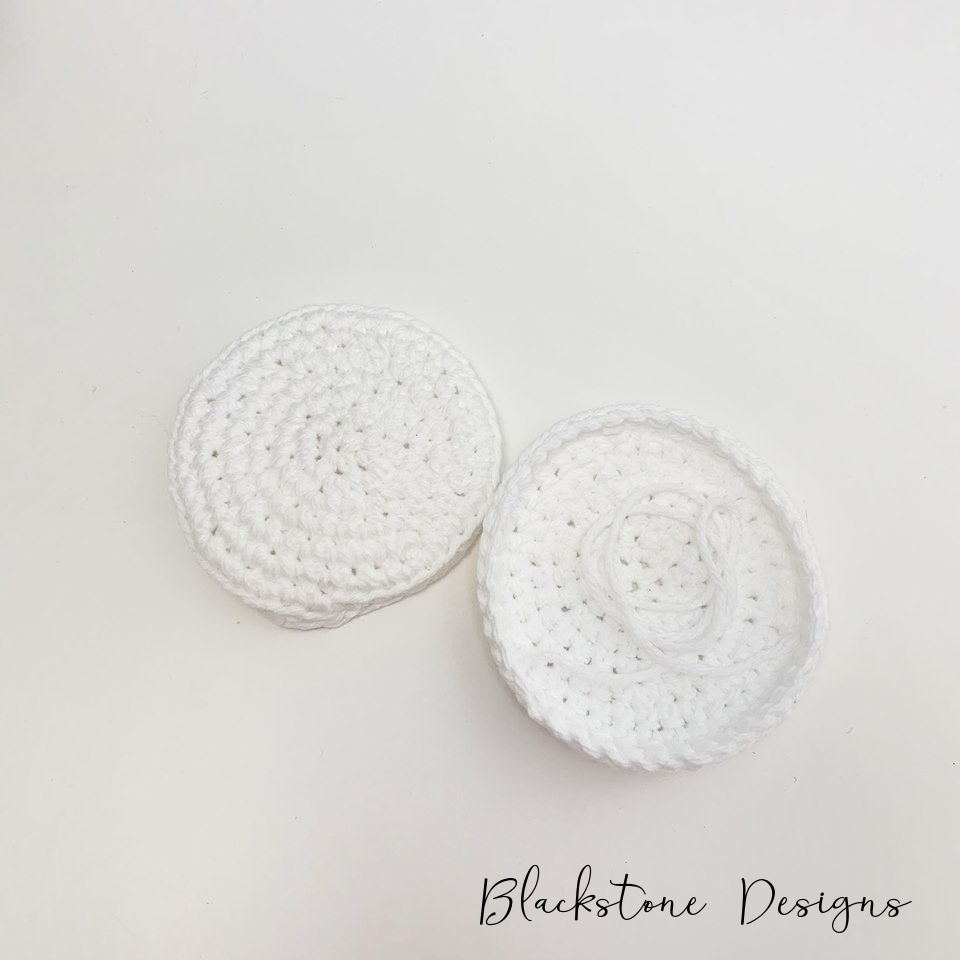
>>Line the inside/wrong side of each base circle with cotton fabric as desired. I used fabric glue to attach mine.

ROSE
With Red (or desired color),
R1. Ch 51, sc in 2nd ch from hook, *ch 2, skip next sc, sc in next* across, sc in last sc, turn (26)
R2. Ch 1, sc x 2 *(sl st, hdc, dc, hdc) in ch-2 space, sl st in sc* across; Fasten. (24 petal, 24 sl st)
Roll up the rose, using the end with 2 scs as the center and working out.


LEAVES (Make 3)
With Green,
Ch 6, dc in 2nd ch from hook, hdc x 2, sc x 2, ch 1, turn and work down opposite side of ch: sc x 2, hdc x 2, dc, sl st to the bottom of the 1st dc; Fasten. (10 sts, 1 ch-1)

SMALL STRIP
With White (or main color),
R1. Ch 3, sc in 2nd ch from hook and in last ch, turn (2)
R2. Ch 1, sc across; Fasten. (2)
LONG STRIP
With White (or main color),
R1. Ch 16, sc in 2nd ch from hook and in each st across, turn (15)
R2. Ch 1, sc across; Fasten. (15)
ASSEMBLY
Place one side of the zipper on the inside edge of one base piece (pin if desired) and sew from tip to tip on the fabric portion of the zipper by weaving in and out of the stitches.
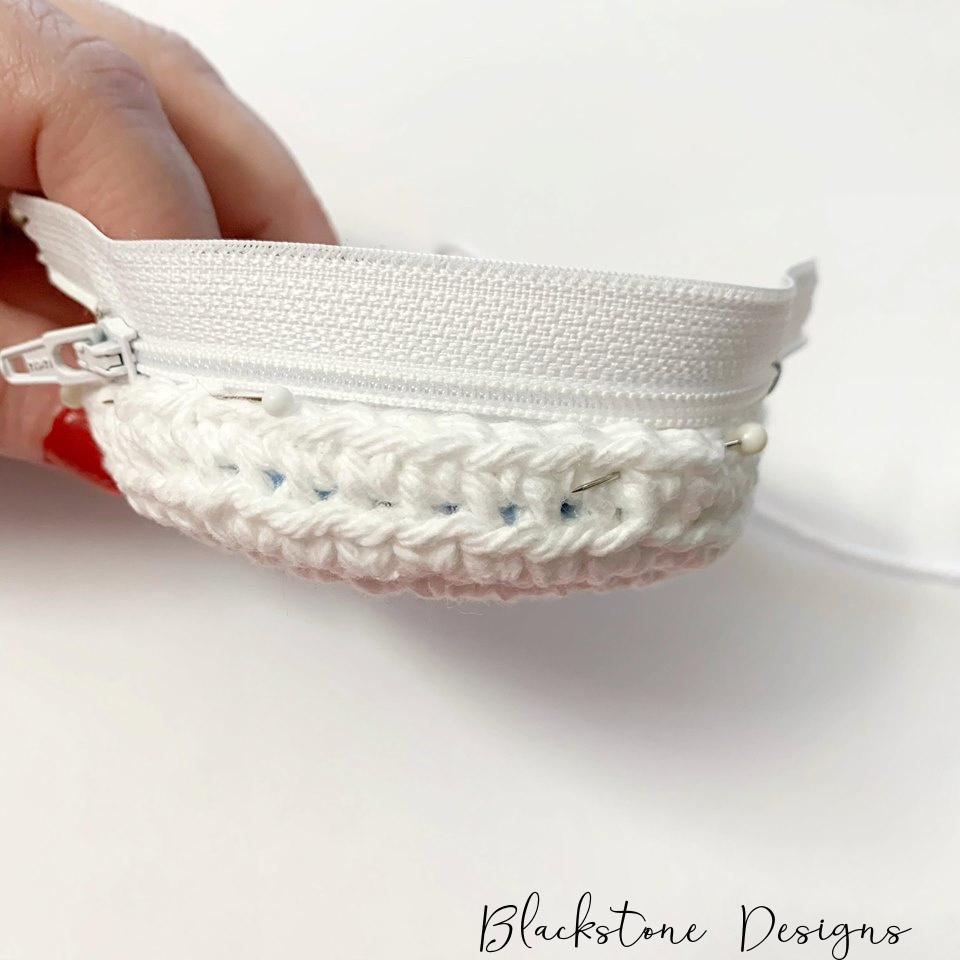

Next, place the other side of the zipper into the other base piece and repeat.

Unzip the zipper, fold the base pieces back, so they are right sides together and sew from the bottom of the zipper stops (working through the zipper fabric again) around all of the unworked base stitches to the top zipper stops.
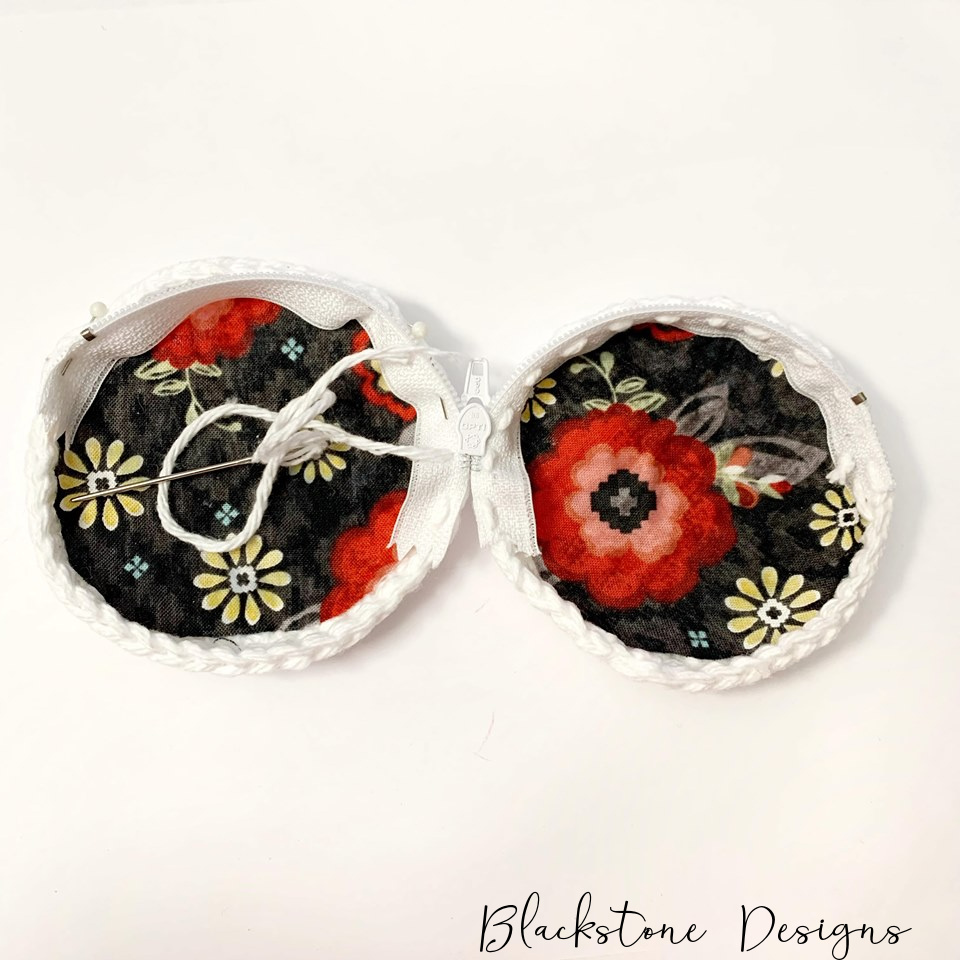

Turn right side out and add leaves to the top in desired locations (either side can be the top)

Add the rose to the top center over the leaves.

Loop the small strip around the D-ring, then sew it beneath the zipper, up against the edge.
Loop the large strip around the other side of the D-ring, then sew the short ends of the strip together to fasten it around the loop.


Optional: spray your new Rose Coin Purse with sealant spray to protect it from getting stained with dirt. I did this because I used white cotton.

So, what do you think? Do you love your new Crochet Rose Coin Purse?
I adore mine and I want another. I was thinking a black one with a yellow rose would be cute. Or maybe a cream with a lavender rose.

Thank you for joining in on another fun mini mystery crochet along!

Written pattern and photographs © 2020 Sonya Blackstone of Blackstone Designs. Please do not sell, share, or modify this pattern, but instead share the link to where the pattern can be found. You may sell items you make with this pattern. This pattern, as with all Blackstone Designs/Sonya Blackstone patterns, are not for educational use without written permission from the designer.
Sonya Blackstone is a participant in the Amazon Services LLC Associates Program, an affiliate advertising program designed to provide a means for us to earn fees by linking to Amazon.com and affiliated sites.


On the strips to the mini mystery. Do you make them in the white?
Hi Regina!
Yes, it should be made in White (main color).
-Sonya