
Reindeer Ornament – Free Crochet Pattern
With the countdown to Christmas underway, there’s plenty on the to-do list. And while you may have more to do than time allows, these Reindeer Ornaments take no time at all!
Also be sure to visit all of the previously posted articles, which featured some great Christmas/holiday products! Save a little time and get some shopping for your loved ones, or yourself. checked off your holiday list!
This post contains affiliate links. At no extra cost to you, I may receive a small commission from purchases made through affiliate links, which helps me to keep bringing awesome free content!
Each week from November 13th to December 11th 2015, two Makers will be featuring their best Christmas/Holiday Products and sharing them with you! Not sure you follow everyone? That’s okay! Follow Mad Mad Makers on Facebook, Twitter or G+.
This week has been a busy one for me. I have been working on making Christmas gifts for my family and designing new patterns for all crocheters to enjoy!
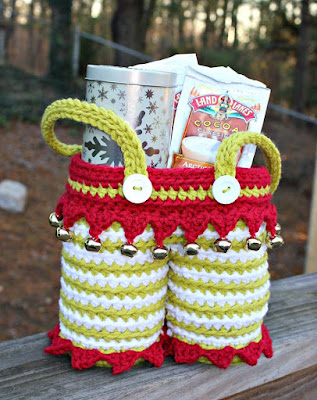
My most recent design is the Christmas themed gift baskets. They are perfect for so many different gifts and for people of all ages.


And I also have this cute new Reindeer Ornament pattern for you to enjoy for free! You can hang them on your tree, attach them to your gifts, or use them as appliques on your Ugly Christmas Sweater!
REINDEER ORNAMENT


Materials
Worsted Weight Yarn (#4)
- Brown – 20 yds
H/8/5.00mm Crochet Hook
Chenille Sticks
Fabric Paint
Optional Materials:
Gauge
Not important for this project
Size
Approx. 1.5” diameter
Stitch Guide
arnd = around
ch = chain
sc = single crochet
sl st(s) = slip stitch(es)
Skill Level
Beginner
Written in U.S. Terms
Notes
- This pattern is worked in the round with no joins or chains
- Reindeer shown were made using Lion Brand Vanna’s Choice in Toffee.
Instructions
1. Magic ring, 6 sc in ring (6)
2. 2 sc in each st arnd (12)
3. *2 sc, sc* arnd (18)
4. *2 sc, sc x 2* arnd (24)
5. Ch 3, sl st in same space as ch, sl st x 5, ch 3, sl st in same space as ch. Fasten. <Ears Created>
Finishing
- Cut chenille stick into 3 even length pieces (one stick makes 3 antlers).
- Make zig zag creases in both sides of the chenille stick, leaving ¾” flat section in the center.
- Glue to front top center of head (between ears).
- With fabric paint: make eyes and nose
- Optional: Use google eyes, felt, and/or mini buttons for facial features.
- Hide Strings
I hope you like them!!! They work us so fast, you could add them to all of your gifts!
Thanks for hopping along with the Makers! Happy Holidays!
Come on over and join the Blackstone Designs Crochet Community on Facebook!
And don’t forget to add this pattern to your Ravelry favorites so you can always find it!

Written Pattern © 2015 Sonya Blackstone of Blackstone Designs. Please do not sell, share, or modify this pattern, but instead share the link to where the pattern can be found. You may sell items you make with this pattern. This pattern, as with all Blackstone Designs/Sonya Blackstone patterns, are not for educational use without written permission from the designer.
Sonya Blackstone is a participant in the Amazon Services LLC Associates Program, an affiliate advertising program designed to provide a means for us to earn fees by linking to Amazon.com and affiliated sites.


