
How to Make Your Own Kitty Cat Hat – Free Crochet Pattern
Make your own Kitty Cat Hat—or Pink Cat Hat—in just a few short hours! This free crochet cat beanie pattern is a quick and easy project that adds a playful twist to your winter wardrobe. Whether you’re looking for a fun everyday accessory, a themed hat for an event, or simply want to crochet something unique for gifting, this pattern is the perfect pick.
This post contains affiliate links. At no extra cost to you, I may receive a small commission from purchases made through affiliate links, which helps me to keep bringing awesome free content!
When I first came across a call for pink “cat” hats, I noticed that most patterns were written for knitters. I knew crocheters needed a version too! Since then, many crochet cat hats have appeared, but I still wanted to share my own take on the design. It’s simple, fast, and totally customizable, which means you can make it in any color you like—from classic black or gray to bright rainbow shades.
Why You’ll Love This Cat Beanie
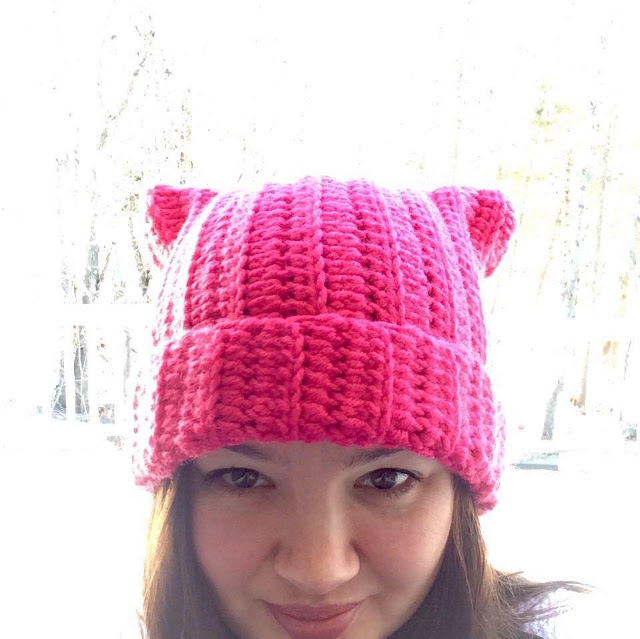
One of the best things about this crochet pattern is how versatile it is. The ribbed texture gives the hat a snug, stretchy fit, while the square shape creates those iconic kitty ears once you put it on. No extra shaping is needed—the design does all the work for you!
Giftable: A fun handmade hat for kids, teens, or adults.
Easy Crochet: If you know basic stitches, you’ll be able to whip this up easily.
Quick finish: You can complete the hat in a single evening.
Customizable: Choose your favorite yarn weight and colors to create endless variations.
Don’t love the cat look? No problem! Just add pom-poms to the top corners instead and you’ll instantly transform it into a playful, cozy beanie with a totally different vibe. It’s like getting two patterns in one!
Perfect for Any Occasion
Cozy, Costume-Ready, and Cat-Lover Approved
This crochet Kitty Cat Hat isn’t just for one movement or occasion—it’s a year-round accessory that fits right into your handmade wardrobe. The thick ribbed stitches and stretchy fit make it a cozy choice for both fall and winter weather, keeping you warm whether you’re raking leaves in October or braving snowy sidewalks in January.
It also doubles as a fun Halloween costume piece—just pair it with black clothes or whisker face paint, and you have an instant cat costume that’s cute, comfortable, and reusable long after the candy is gone.
Beyond seasonal wear, this pattern is perfect for cat lovers and animal advocates. Imagine crocheting a set of these hats for a fundraiser or adoption event at your local animal shelter—they’d make the purr-fect statement piece to raise awareness and show your love for our feline friends.
How to get the Kitty Cat Crochet Hat Pattern

Kitty Cat Crochet
Hat Pattern
Option 1: Continue scrolling for free pattern instructions on this site
Option 2: Purchase the ad-free PDF that includes tutorial photos from one of my shops
About the Materials
For the Kitty Cat Hat crochet pattern, you will need a heavy worsted weight or a lighter chunky weight yarn that meets gauge. The hat shown was made using Big Twist Yarn Premium in Fuchsia, which is now discontinued, and I always referred to it as a 4.5 weight, because it falls right in the middle of worsted weight and bulky weight. The best substitute I have found for this yarn is WeCrochet Brava Bulky.
The Crochet Pattern
Keep reading for a list of what you need to make the Kitty Cat Hat, including the stitch pattern instructions!


Gauge
13 sts x 8 rows = 4″
Sizes
Child / Tween (20″ Head Circumference)
Teen / Adult (22″ Head Circumference)
Stitch Guide
ch = chain
ehdc = See Special Stitches
hdc = half double crochet
sl st = slip stitch
YO = yarn over
Skill Level
Easy
Written in U.S. Crochet Terms
Notes
- Although it is commonly practiced to ch-2 before a hdc, I do not work my stitches that way because it makes the stitches taller than I like. If you choose to work the standard chains, you will have to remove some of the final rows, or your finished project will be too big.
- This pattern is written for child-teen size, with adult size written in parenthesis.
- The hat shown was made using Big Twist Premium Yarn in Fuchsia.
Special Stitches
Extended Half Double Crochet (ehdc) – YO, insert hook in stitch indicated, YO, draw up a loop, YO, draw through 1st loop on hook, YO, draw through all 3 loops on hook.
Instructions
R1. Ch 71(75), hdc in 2nd ch from hook and in each ch across, turn
R2. Ch 1, ehdc in BLO of each st across, turn
R3. Ch 1, hdc in BLO of each st across, turn
R4-17(21). Repeat 2 & 3. Fasten at the end of row 17.
Finishing
- Fold rectangle in half and sew the (long) sides together.
- Put hat on, so the seams are on the sides of your head, and until it’s pulled all the way down (folded crease of the hat is touching the top of your head).
- Roll up the excess brim. Ears are formed automatically when hat is pulled on all the way.
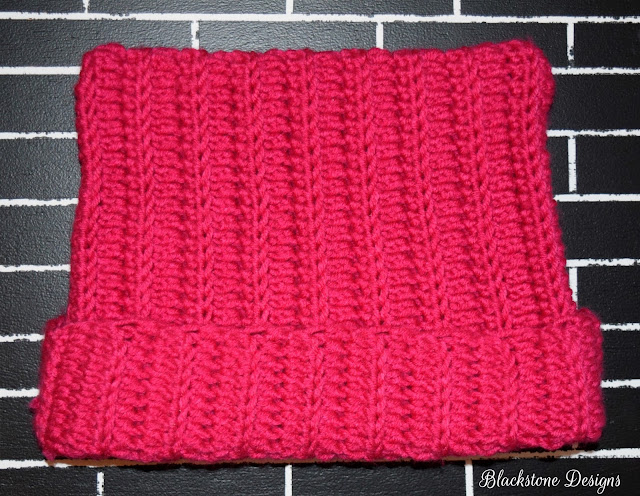
Voila! A crochet Kitty Cat Hat!
If you’re searching for a free crochet cat hat pattern that’s fun, functional, and easy to make, this one has you covered. Pick your yarn, grab your hook, and in just a few hours you’ll have a cozy hat with personality built right in.

Looking for more crocheted hats?
You might like these:
Come on over and join the Blackstone Designs Crochet Community on Facebook to stay up to date on shop happenings (new releases, sales, giveaways…etc.)
Don’t forget to add this pattern to your Ravelry favorites, so you can always find it!

Written pattern © 2016 Sonya Blackstone of Blackstone Designs. Do not sell, share, or modify this pattern. Please share the link to where this pattern can be found. When sharing items made from this pattern, please give designer credit by sharing this link. You may sell items you make with this pattern and are encouraged to do so. This pattern, as with all patterns written by Sonya Blackstone, are not for educational use without written permission from the designer.
We are a participant in the Amazon Services LLC Associates Program, an affiliate advertising program designed to provide a means for us to earn fees by linking to Amazon.com and affiliated sites.
If you’re interested in learning more about the movement, donating, or just showing your solidarity, you can get the details here: Pussyhat Project


How do you sew the sides together? With a single stitch? How do you do the second side?
Hi Kim!
I turn the hat inside out and use the whip stitch if I sew with a needle and a single crochet or slip stitch if I’m crocheting through both layers to close. Once the seams are joined, I turn the hat right side out again.
It’s been a while, so I’m not sure how exactly I finished this hat, but I hope that helps!
-Sonya
Hello! For the hdc, since you do not chain 2, do you just chain 1? Thank you!
Hi Emily!
I do chain 1 for hdcs!
-Sonya
Can this be made so that it doesn’t have kitty ears or Pom poms?
Hi Deb!
This particular pattern can’t be made without, but I have a similar hat pattern that finishes more like a standard beanie!
https://blackstone-designs.com/how-to-make-the-beginner-half-double-crochet-hat-free-crochet-pattern/
-Sonya
What type of stitch did you use to make the gauge?
Hi Beth!
The gauge comes right from the finished project, so the ehdc/hdc.
-Sonya
Halfway through before I noticed it said BLO, would some extra rows make it doable, or should I frog it?
Hello!
The finished look will not be ribbed, but it shouldn’t effect the sizing.
-Sonya
Does the chain one at the beginning of a row count as a stitch? In other words, should I skip the first stitch at the beginning of each row?
Hi Daniela!
Whenever you see a ch 1, you will not count that as a stitch.
-Sonya
Hi! I am wondering what is the approximate length and width measurements for both the tween and adult hats are?
Hi Serafima!
The approximate measurements are: child = 20″ circumference x 8.5″ crown, adult = 22″ circumference x 10.5″ crown.
-Sonya
Hi!
Do you have the measurements of the rectangle before you sew it together?
Hi Candice!
The rectangle should measure 20″ for a child and 22″ for an adult (or measure the head and use that measurement as close to it without going over).
-Sonya
Hi Sonya
I appreciate it’s been a few yrs since you posted this pattern but I’m so confused on how the ears can be formed without stitches either side? The instructions indicate just to see the sides together then put it on & Voila……..
Pls help as I’m loosing the plot lol
Hi Allyson,
That’s it! You just sew the sides together, put it on, and the ears naturally form at the top corner.
However, you can choose to add stitches diagonally across the corners to make more defined ears if you prefer.
-Sonya