
Crochet Shark Doll Costume Pattern
If you’re looking for the perfect ocean-inspired outfit for your doll, look no further—this Crochet Shark Doll Costume is equal parts adorable and hilarious! Whether you’re crafting for playtime, display, or a themed gift set, this tiny shark suit will have jaws dropping (pun totally intended).
This post contains affiliate links. At no extra cost to you, I may receive a small commission from purchases made through affiliate links, which helps me to keep bringing awesome free content!
This pattern is part of the Crochet Shark Week event!
Go to the Main Post for event details!
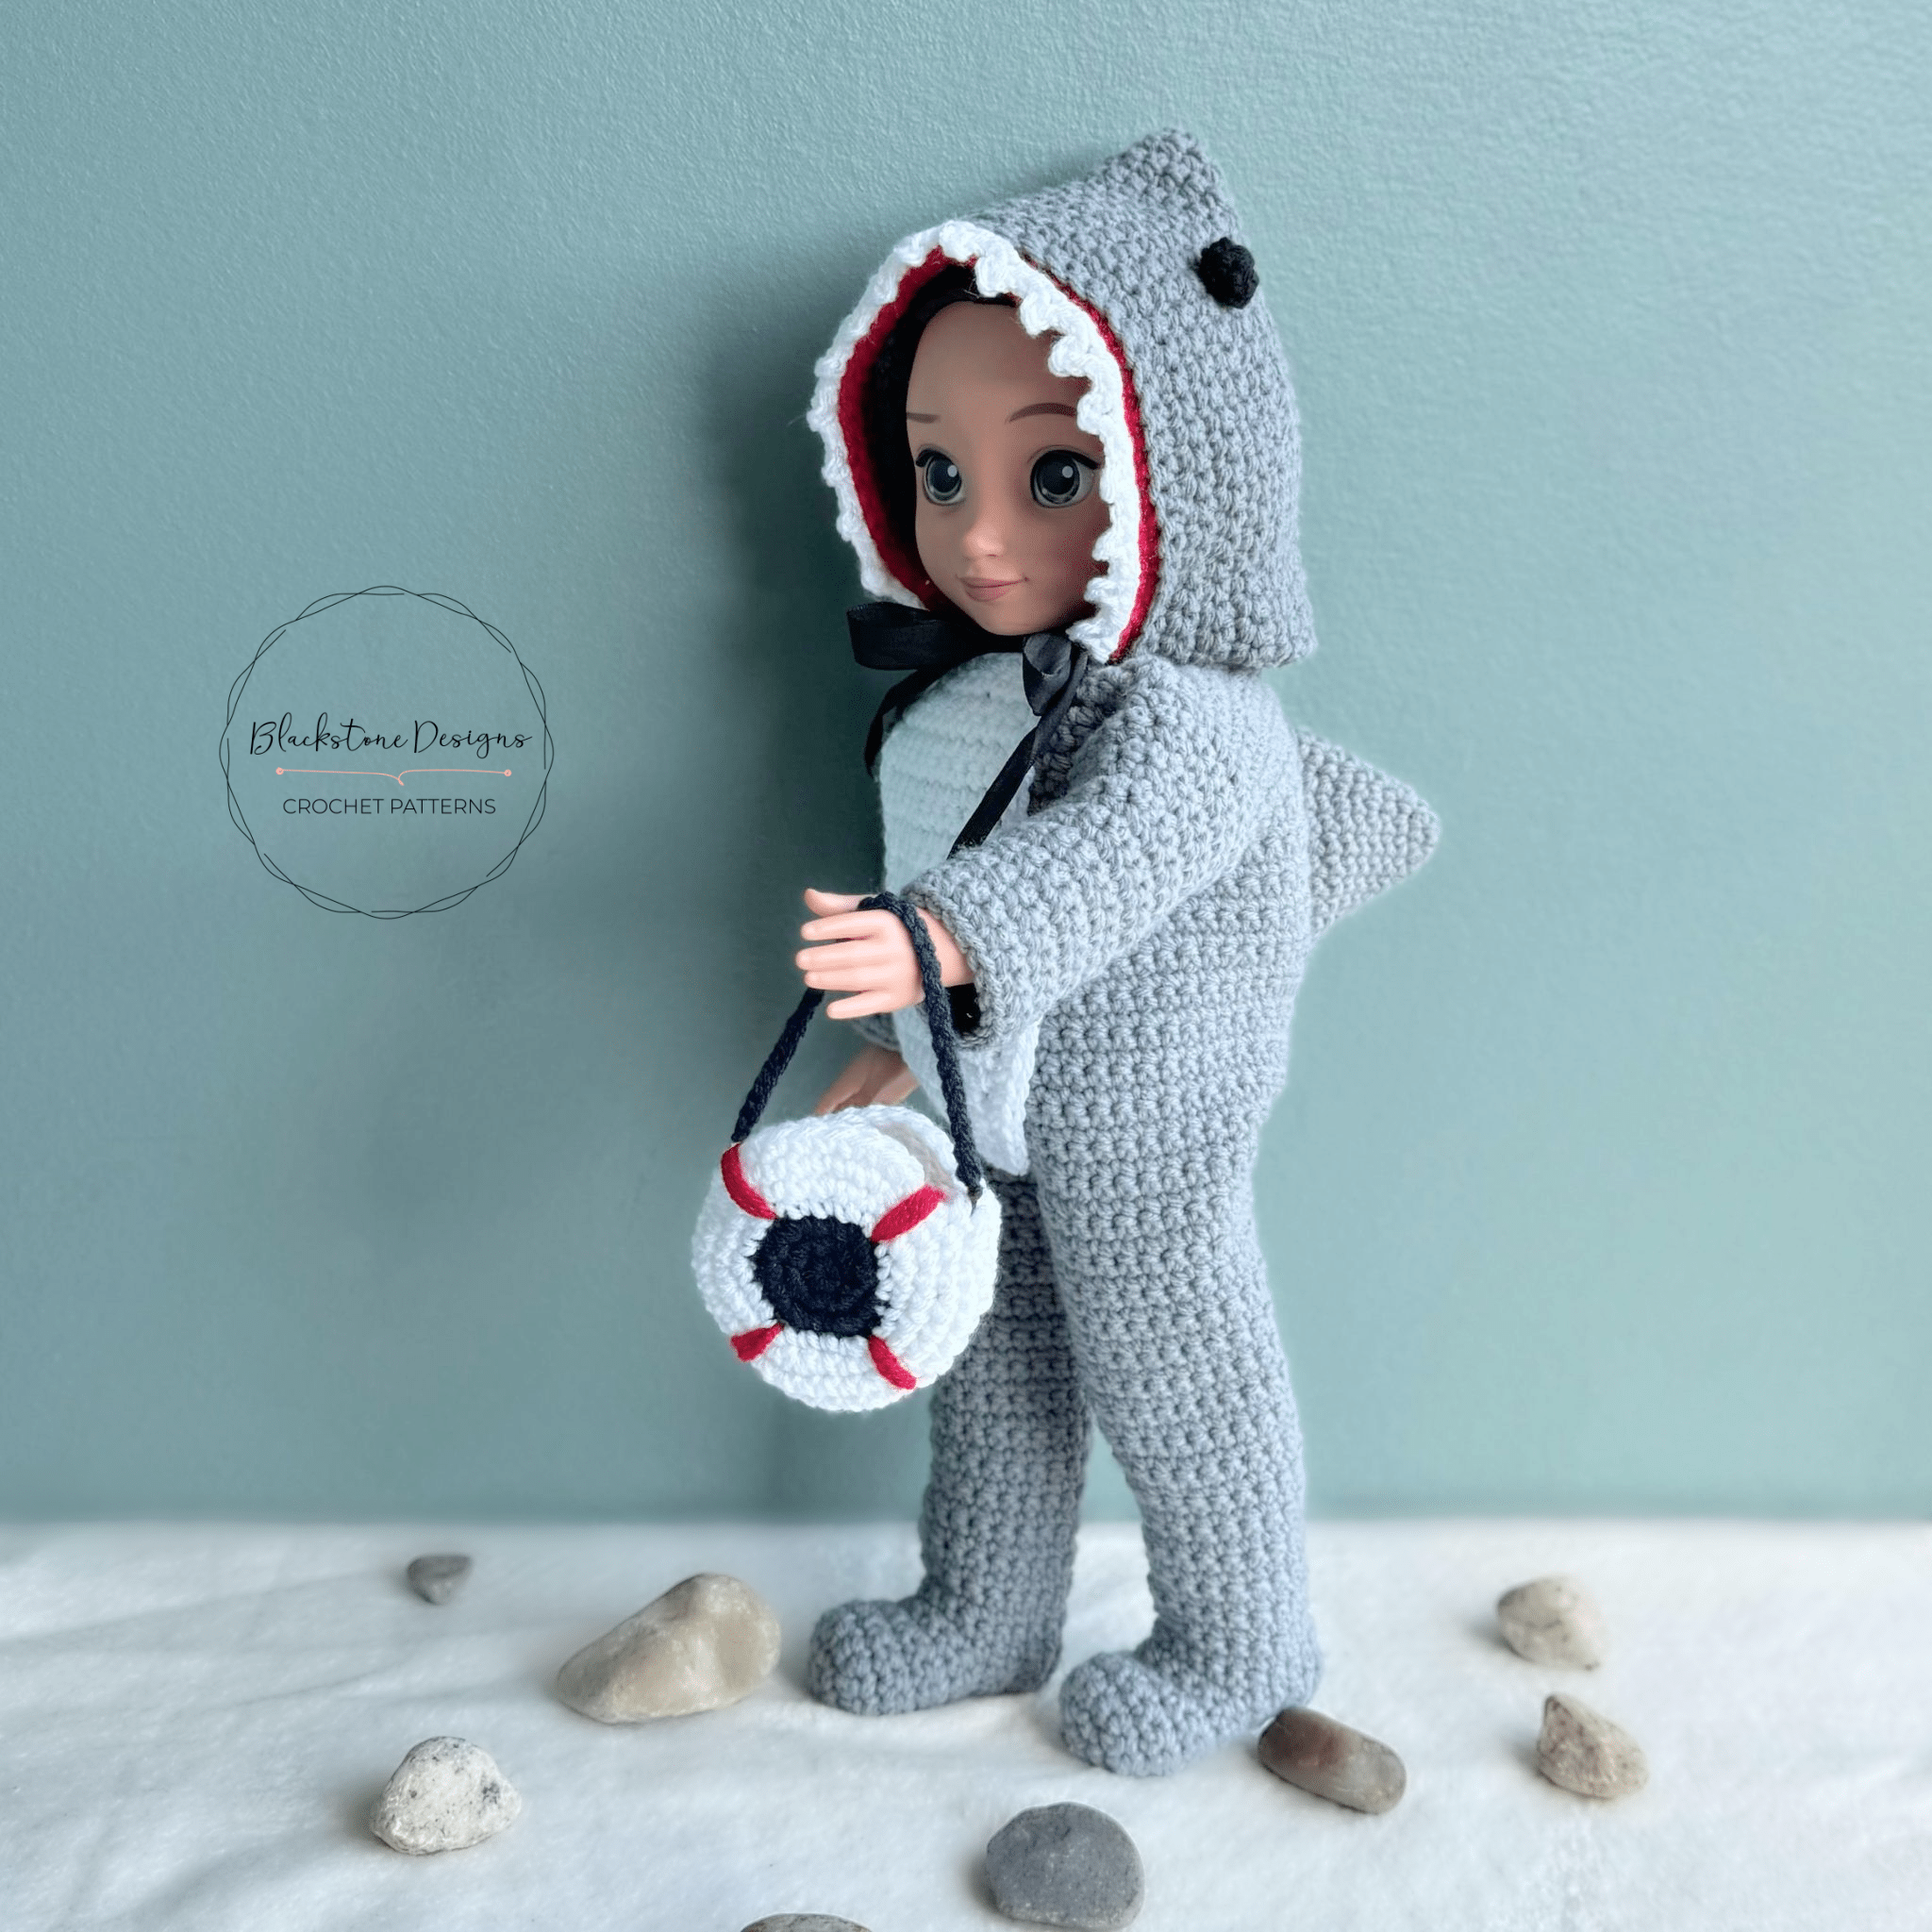
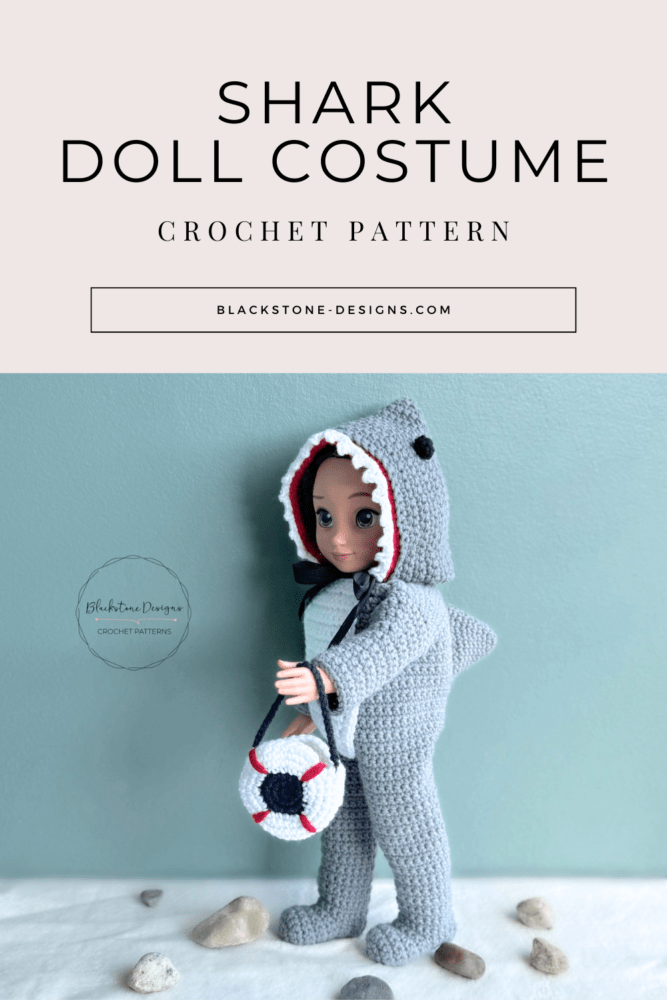
This crochet pattern turns your doll into the cutest little sea predator, complete with dorsal fin, tail, and teeth-lined hood. And let’s not forget the mini life preserver bag! It’s the kind of outfit that brings smiles, sparks imagination, and earns loads of “where did you get that?!” questions.
Why You’ll Love This Crochet Shark Doll Costume
This pattern has it all:
Bonus accessory: That mini life preserver bag? So cute it deserves its own spotlight.
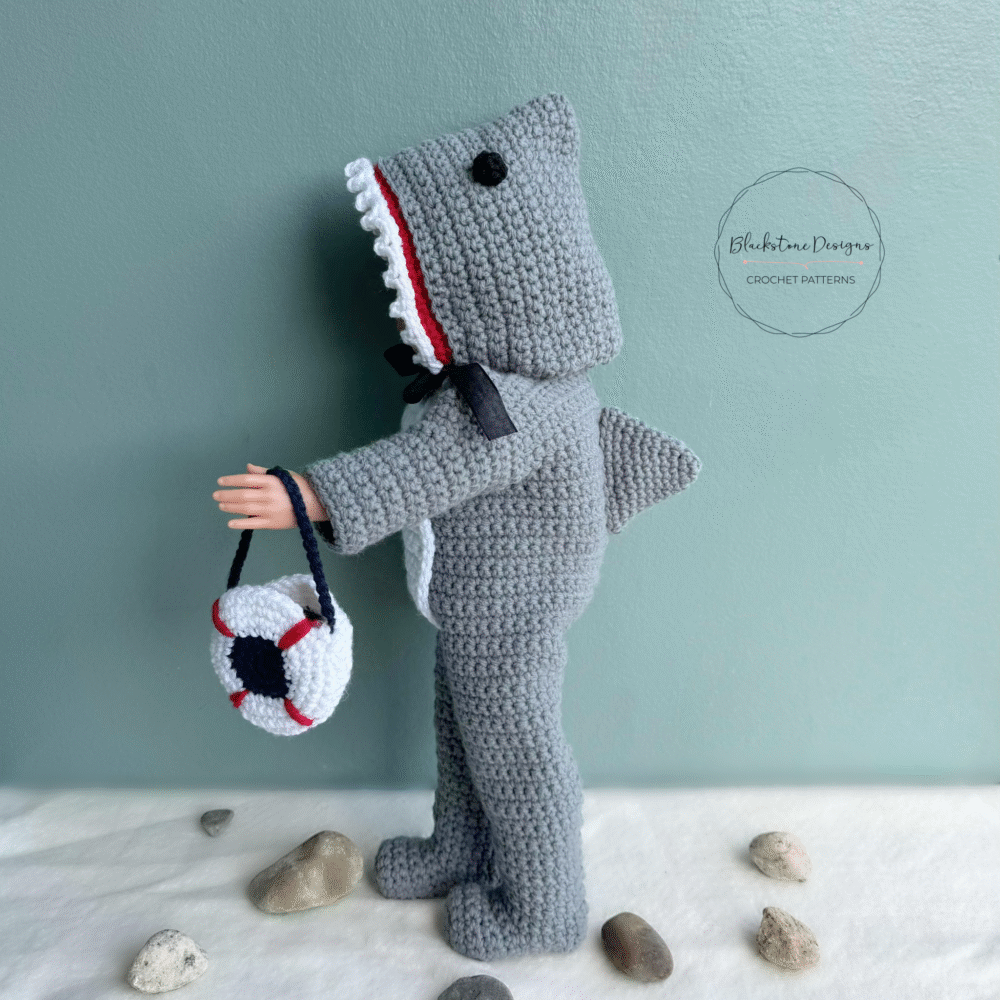
Fun design: It’s a full-body shark suit with realistic details, like a side fin, tiny tail, and a hood that mimics a shark’s head—with teeth!
Great fit: Designed to fit standard 18” dolls (like American Girl®), the suit slips right on, no fuss.
Perfect for gifting: Whether you’re making it for a child who loves sharks, an ocean-themed party, or even just for fun, it’s a standout project.
Let’s Talk About the Pieces
The Shark Hood
The hood is what makes this costume shine. It features:
- A rounded shark head with safety eyes
- A red lining for that “open mouth” effect
- A row of crocheted white teeth to really sell the look
Plus, the hood can be adjusted slightly to sit snugly around your doll’s head or be left a little loose if you prefer easy on-and-off play.
The Body Suit
The body of the suit is worked in one piece and features:
- Shaping at the legs and torso
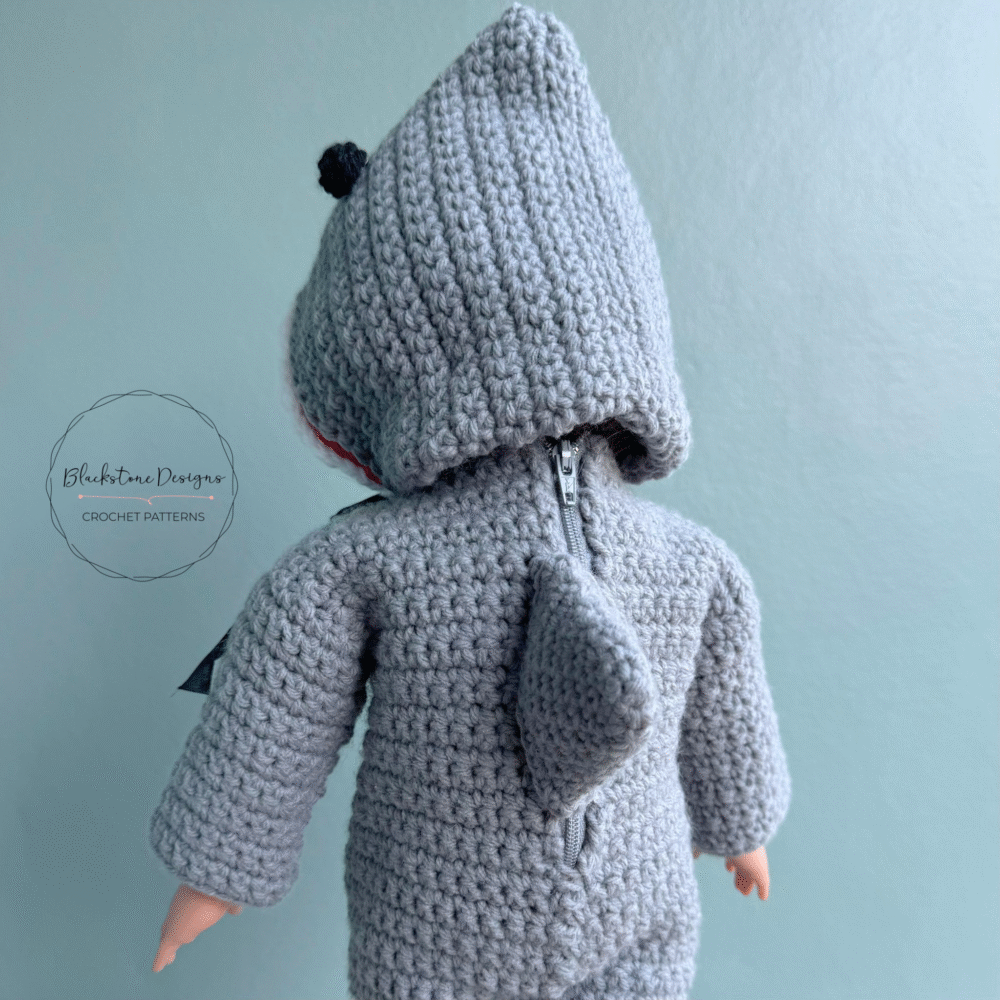
- A side fin on the back for that classic shark silhouette
- A tail fin that gives the perfect finishing touch
It fits snugly on an 18″ doll without being too tight, and it allows for movement and posing.
Life Preserver Bag
This adorable little accessory pulls the whole theme together. It’s made in:
- White yarn with red stripe details
- A dark blue strap for the doll to carry
You could even customize it with initials or tiny embellishments if you want to go all out.
Tips for Making the Crochet Shark Doll Costume
For a fun twist, use sparkly yarn for the fins or glow-in-the-dark yarn for the teeth!
Use stitch markers to keep track of shaping changes, especially on the hood.
Choose soft yarn if the doll is meant for young kids to ensure maximum cuddles.
How to get the Crochet Shark Doll Costume Pattern
Crochet Shark
Doll Costume Pattern
Option 1: Continue scrolling for free pattern instructions on this site
Option 2: Purchase the ad-free PDF that includes tutorial photos from one of my shops
Option 3: Purchase the “15 Shark Crochet Patterns” ebook.
Frequently Asked Questions
Can I adjust this pattern to fit a different sized doll?
Yes! If you’re experienced, you can adapt the stitch counts and shaping to fit smaller or larger dolls. However, the pattern is written for 18″ dolls, so you’ll need to adjust carefully.
Is this suitable for beginners?
The pattern is written with helpful notes, but beginners might want to practice shaping and joining pieces before diving in. If you’re confident with the basics, go for it!
Can I sell finished items?
Absolutely! You’re welcome to sell items made from this pattern in small quantities. Just credit the pattern design in your product description when possible.
This pattern is such a fun twist on doll fashion. Whether you’re crocheting for a birthday gift, prepping for a craft fair, or just adding to your doll’s wardrobe, this shark costume will be a fin-tastic addition.
It’s creative, a little quirky, and full of character—just like the best crochet projects always are!
So dive in and get hooking—your doll is about to become the cutest shark in the sea.
What Materials do I need?
The Crochet Shark Doll Costume was made using a 100% acrylic worsted weight yarn. I like sturdier brands like Premier Basix, because it helps hold the shape and gives the piece more durability.
The Crochet Pattern
Keep reading for a list of what you need to make this Crochet Shark Doll Costume, including the stitch pattern instructions!
Materials
Worsted Weight Yarn (#4)
- Gray (Skin Color) [375yds]
- White (Belly) [125yds]
- Red/Pink (Gums) [25yds]
- Black (Eyes) [25yds]
- Life Preserver Color A [20yds]
- Life Preserver Color B [20yds]
Gauge
7.5 sc x 9 rows = 2”
Finished Measurements
Fits most 18” dolls
Stitch Guide
arnd = around
ch = chain
dc = double crochet
FLO = front loop only
sc = single crochet
sl st(s) = slip stitch(es)
st(s) = stitch(es)
Skill Level
Intermediate
Written in U.S. Terms

Notes
- Beginning chains do not count as stitches
- Join and chain only where indicated.
- Where asterisks appear, repeat the instructions between them.
- Tutorial photos are at the end of the pattern.
Shark Costume Instructions
LEG (Make 2) – H Hook
Working with Gray,
R1. Magic Ring, 5 sc in ring (5)
R2. 2 sc in each st arnd, sl st to join, turn (10)
R3. Ch 1, *2 sc, sc* arnd, sl st to join, turn (15)
R4-9. Ch 1, sc in each st, arnd, sl st to join, turn (15)
R10. Ch 1, sc x 7 (leave remaining sts unworked), turn (7)
R11-15. Ch 1, sc across, turn (7)
R16. Ch 1, fold heel flaps back (folding right sides of R15 together, so 1st & 7th stitch match up), hold them together, and slip st down the seam, turn, slip st back up the seam, fold heel RS out.
[SEE TUTORIAL PHOTO]
R17. Ch 1, sc in each st and row end arnd, sl st to join, turn (20)
R18-28. Ch 1, sc in each st arnd, sl st to join, turn (20)
R29. Ch 1, *2 sc, sc x 9* 2X, sl st to join, turn (22)
R30-34. Ch 1, sc in each st arnd, sl st to join, turn (22)
R35. Ch 1, *2 sc, sc x 10* 2X, sl st to join, turn (24)
R36-45. Ch 1, sc in each st arnd, sl st to join, turn; Fasten. (24)
WAIST – H Hook
Continuing with Gray,
R1. With one leg: count 6 sts to the right of the seam, attach yarn in 6th st, ch 1, sc in same space and in each st arnd, do not join, keep working loop — pick up 2nd leg, count 7 sts to the left of the seam, sc in 7th st and each st arnd, sl st to join in 1st sc on 1st leg, turn (48) [SEE TUTORIAL PHOTO]
R2-10. Ch 1, sc in each st arnd, sl st to join, turn (48)
R11. Ch 1, sc in each st arnd, do not join here or throughout, turn (48)
R12-22. Ch 1, sc in each st arnd, turn; Continue to chest:
CHEST – H Hook
Continuing with Gray,
R1. Ch 1, sc x 12 (leave remaining sts unworked), turn (12)
R2-12. Ch 1, sc across, turn; Fasten at the end of row 14 and leave long tail for sewing (12) <1st Back Panel Complete>
R13. Attach yarn to next unworked sts on R22 of waist: Ch 1, sc x 24, turn (24)
R14-24. Ch 1, sc across, turn; Fasten at the end of row 24 and leave a long tail for sewing (24) <Front Panel Complete>
R25. Attach yarn to next unworked sts on R22 of waist: Ch 1, sc x 12, turn (12)
R26-36. Ch 1, sc across, turn; Fasten at the end of row 36. (12)
<2nd Back Panel Complete>
Turn suit inside out, insert one long tail into yarn needle, and sew 7 sts across the shoulder, working from armhole side toward neck hole. Repeat on other side.
BUTTON PLACKET – H Hook (Optional, to add buttons instead of a zipper)
Continuing with Gray,
R1. Attach yarn to top corner on rigt side of back opening: Ch 1, sc in same space and in the end of each row down, ch 1, turn
R2. Ch 1, sc in 1st st, ch 1, skip next st, *sc x 2, ch 1, skip 1* across, sc in last st, turn <Buttonholes Created>
R3. Ch 1, sc in each st and ch-space across; Fasten. [SEE TUTORIAL PHOTO]
SLEEVES – H Hook
With Gray,
R1. Attach yarn to bottom of armhole; Ch 1, sc in same space and in each st and row end arnd, sl st to join, turn (24)
R2. Ch 1, sc in each st arnd, sl st to join, turn (24)
R3. Ch 1, *skip 1 st, sc x 11* 2X, sl st to join, turn (22)
R4. Ch 1, sc in each st arnd, sl st to join, turn (22)
R5. Ch 1, *skip 1 st, sc x 10* 2X, sl st to join, turn (20)
R6. Ch 1, sc in each st arnd, sl st to join, turn (20)
R7. Ch 1, *skip 1 st, sc x 9* 2X, sl st to join, turn (18)
R8-17. Ch 1, sc in each st arnd, sl st to join, turn; Fasten at the end of round 17. (18)
Repeat 1-17 on other side.
HOOD – H Hook
With Gray,
R1. Ch 55, sc in back bump of 2nd ch and each ch across, turn (54)
R2-21. Ch 1, sc in each st across, turn (54)
With Red/Pink,
R22. Ch 1, BLO sc in each st across, turn (54)
R23. Ch 1, sc in each st across; Fasten. (54)
Fold Hood in half on the long edge, with RS together, and sew up the seam. The seam is the back of the hood.
Fold the bottom 4 sts up towards the WS and sew into place to create a casing for ribbon. The casing is the bottom of the hood.
EYES – H Hook
With Black,
R1. Make magic ring, ch 1, 6 sc in ring (6)
R2. sc arnd; Fasten (6)
TEETH – H Hook
With White,
Ch 55, sl st x 2, ch 2, sl st in same space as ch, *sl st x 3, ch 2, sl st in same space as ch* across, sl st in last ch; Fasten. (18 teeth)
BELLY PATCH – H Hook
With White,
R1. (RS) Ch 7, sc in back bump of 2nd ch and each ch across, turn (6)
R2. Ch 1, sc in each st across, turn (6)
R3. Ch 1, 2 sc, sc x 4, 2 sc, turn (8)
R4. Ch 1, sc in each st across, turn (8)
R5. Ch 1, 2 sc, sc x 6, 2 sc, turn (10)
R6-22. Ch 1, sc in each st across, turn (10)
R23. Ch 1, sc, sk 1, sc x 4, sk 1, sc, turn (8)
R24. Ch 1, sc in each st and in the end of each row around outside of belly patch, sl st to join; Fasten. (8)
FIN – H Hook
With Gray,
R1. Make magic ring, ch 1, 4 sc in ring (4)
R2. 2 sc arnd (8)
R3. sc arnd (8)
R4. *2 sc x 2, sc x 2* 2X (12)
R5. sc, 2 sc x 2, sc x 4, 2 sc x 2, sc x 3 (16)
R6. sc x 2, 2 sc x 2, sc x 6, 2 sc x 2, sc x 4 (20)
R7. sc x 3, 2 sc x 2, sc x 8, 2 sc x 2, sc x 5 (24)
R8. sc x 4, 2 sc x 2, sc x 10, 2 sc x 2, sc x 6 (28)
R9. sc x 5, 2 sc x 2, sc x 12, 2 sc x 2, sc x 7 (32)
R10. sc x 6, 2 sc x 2, sc x 14, 2 sc x 2, sc x 8; Fasten. (36)
LIFE PRESERVER BAG (Make 2) – G Hook
With Color A,
R1. Make magic ring, ch 1, 6 sc in ring (6)
R2. 2 sc arnd (12)
R3. *2 sc, sc* arnd (18)
With Color B,
R4. FLO *2 sc, sc x 2* arnd (24)
R5. *sc x 3, 2 sc* arnd (30)
R6. sc, *2 sc, sc x 4* 5X, 2 sc, sc x 3 (36)
R7. sc arnd; Fasten. (36)
With Any Color,
Stitch 4 lines over R4-7, leaving approx. 8 sts between them (as shown).
Hold both panels wrong sides together, so stitch lines match up, then insert hook to the left of one line: ch 1, sc x 24, working through both layers (moving “lines” aside to get into the stitches behind them as well); Fasten. Leave remaining sts unworked for bag opening.
BAG HANDLE – G Hook
With Any Color,
Ch 30; Fasten. (30)
Finishing
- Attach eyes to top of hood, over rows 13-14, approx. 16 stitches from the bottom (leaving approx. 14 stitches between them).
- Attach teeth to front of hood over the edge of R23.
- Feed ribbon through track created on hood (by folding up the 4 sts and sewing into place). I used a wooden dowel, folded the ribbon over the tip, and then pushed it through the track.
- Attach belly patch to front center of suit; attach row 1 of belly patch to chest 3rd row from the top.
- To attach zipper to back opening: Starting at the top of the zipper teeth and working down, mark the zipper with dots ½” apart. Insert needle through the back of the zipper, up through the dot, and through the reindeer suit, one stitch in from the edge. Insert needle down through the top of the reindeer suit and down through the next marked dot on the zipper. Continue this pattern until the zipper is completely attached (repeat on opposite side of the zipper). [SEE TUTORIAL PHOTO]
- To attach buttons to back opening: Lay button placket flat across the back opening and mark where the buttonholes are. Attach a button to each of those spots, so the buttons line up with the buttonholes.
[SEE TUTORIAL PHOTO] - Attach fin to back over R18-29, attaching only the left side of the fin opening to the left side of the zipper, so it can lay over the zipper when closed.
- Attach handle to the outside of the bag, one end of handle to each side of opening.
- Hide all strings.
And that’s how you crochet the Giant Hammerhead Shark Amigurumi!
Join our crochet community group!
Come on over and join the Blackstone Designs Crochet Community on Facebook for fun CALs and giveaways, plus exclusive sales, pattern support, and so much more!
Don’t forget to share!
Tag me on Instagram at @blackstone_designs or use the hashtag #BlackstoneDesignsCrochet so I can share your makes with the community!
Happy Crocheting!

Written pattern and photographs © 2024 Sonya Blackstone of Blackstone Designs. Do not sell, share, or modify this pattern, but instead share the link to where the pattern can be found. You may sell items you make with this pattern. This pattern, as with all Blackstone Designs/Sonya Blackstone patterns, are not for educational use without written permission from the designer. All rights reserved.
Sonya Blackstone is a participant in the Amazon Services LLC Associates Program, an affiliate advertising program designed to provide a means for us to earn fees by linking to Amazon.com and affiliated sites.
Written pattern and photographs © 2024 Sonya Blackstone of Blackstone Designs. Do not sell, share, or modify this pattern, but instead share the link to where the pattern can be found. You may sell items you make with this pattern. This pattern, as with all Blackstone Designs/Sonya Blackstone patterns, are not for educational use without written permission from the designer. All rights reserved.
Sonya Blackstone is a participant in the Amazon Services LLC Associates Program, an affiliate advertising program designed to provide a means for us to earn fees by linking to Amazon.com and affiliated sites.


