
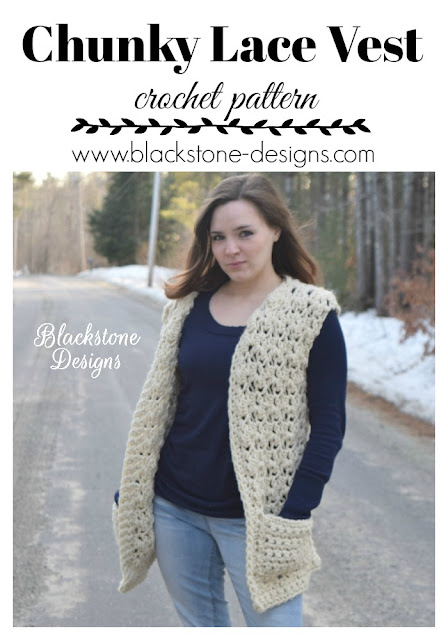
How to Make the Chunky Lace Vest – Free Crochet Pattern
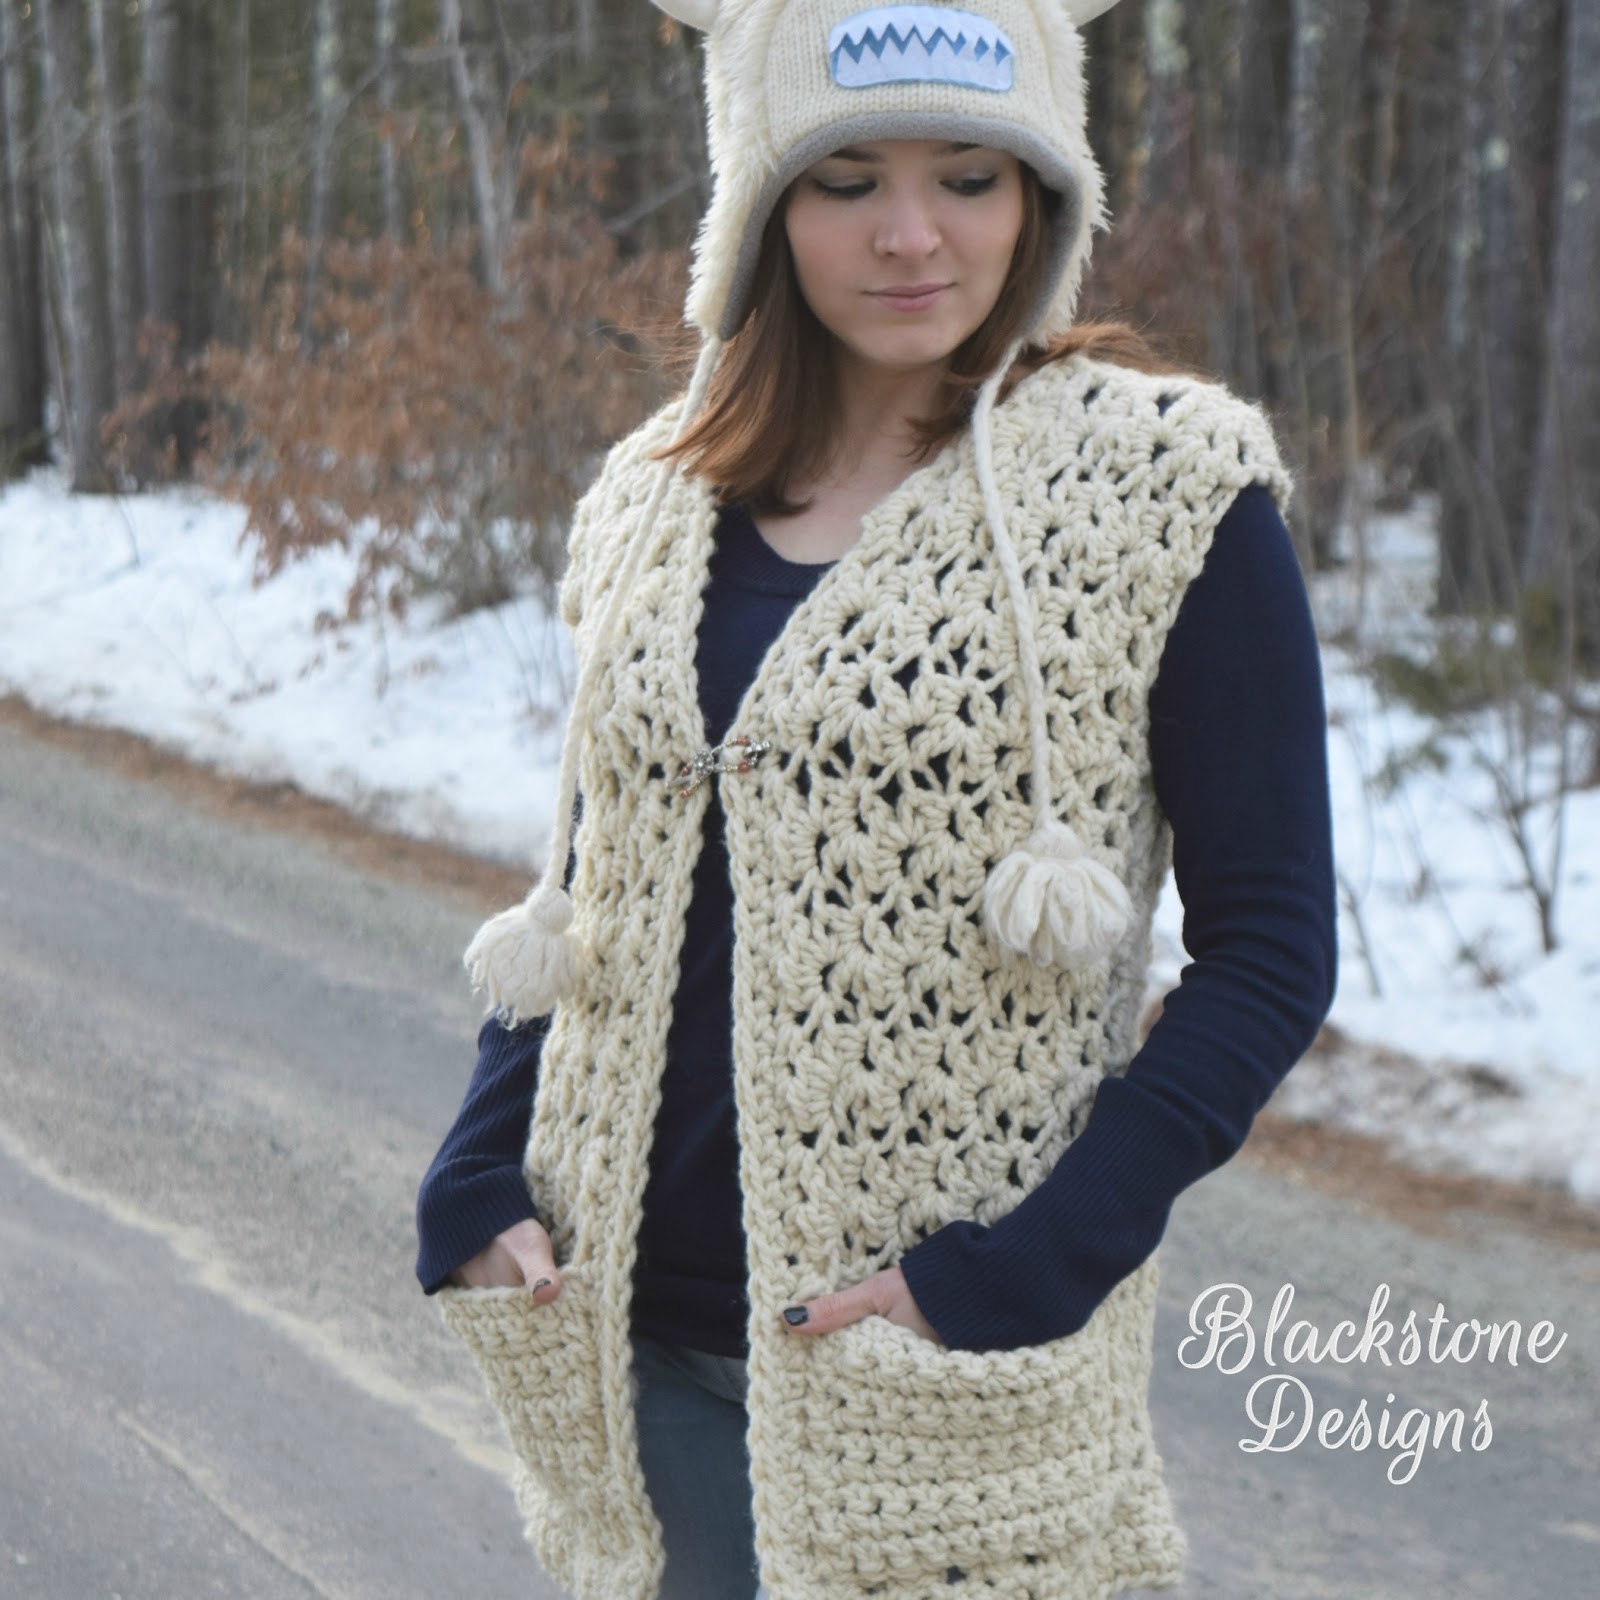
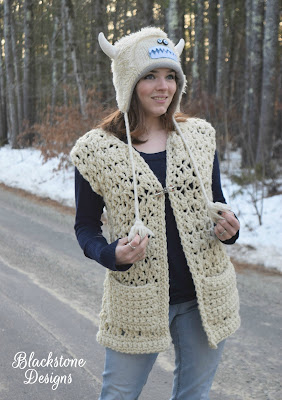
This Chunky Lace Vest is a great outerwear piece! It features an openwork lace crochet stitch pattern and it’s made with super bulky yarn, so it works up quickly!
This post contains affiliate links. At no extra cost to you, I may receive a small commission from purchases made through affiliate links, which helps me to keep bringing awesome free content!
This crochet pattern was designed for the Make it for Me event hosted by ELK Studio. I look forward to this event each year, because I really love the sentiment!
Why is this the perfect make it for me project? Because we often times make great projects for other people and not for ourselves.
We all deserve to add beautiful new pieces to our wardrobe! And this one is so quick to work up, there’s no time to feel guilty!
I really hope you enjoy it!
Get the ad-free version from one of the shops below!


Let’s make the Chunky Lace Vest!
Materials
Super Bulky Yarn (#6)
- 400, 500, 600, 700, 800, 925, 1050, 1175, 1300 yards
Optional Materials
2-1” Buttons for Pocket Decoration
2” Button or Shawl Pin for Closure
Gauge
5 sts x 4 rows = 4”
Sizes
Women’s (Bust)
XS (28-30”)[71-76cm]
S (32-34”)[81-86cm]
M (36-38”)[91-96cm]
L (40-42”)[102-107cm]
XL (44-46”)[112-117cm]
2X (48-50”)[122-127cm]
3X (52-54”)[132-137cm]
4X (56-58”)[142-147cm]
5X (60-62”)[152-157cm]
Stitch Guide
arnd = around
ch = chain
dc = double crochet
hdc = half double crochet
hdc2tog = See Special Stitches
sc = single crochet
sc2tog = See Special Stitches
sk = skip
sl st(s) = slip stitch(es)
st(s) = stitch(es)
YO = yarn over
Skill Level
Intermediate
Written in U.S. Terms

Notes
- This vest is oversized with an approximate 4” positive ease.
- Vest is worked side to side.
- Where asterisk appear: repeat the instructions between them as indicated.
- If you prefer a longer vest, add multiples of 3 to your beginning chain.
- If you prefer a pullover: leave off the last row of the front panels and then sew them together.
- Decrease side of front panel is the top-inner side/neck hole.
- Vest shown was made using Lion Brand Wool-Ease Thick and Quick in Fisherman.
Special Stitches
Single Crochet Two Together (sc2tog) = insert hook in 1st st indicated, YO, draw up a loop, insert hook in next stitch indicated, YO, draw up a loop, YO, draw through all loops on hook.
Half Double Crochet Two Together (hdc2tog) = YO, insert hook in 1st st indicated, YO, draw up a loop, YO, insert hook in next stitch indicated, YO, draw up a loop, YO, draw through all loops on hook.
Instructions
1st FRONT PANEL
R1. Ch 36(36,36,36,36,39,39,42,42), sk 2 chs (cts as hdc), (sc, hdc, dc) in the back bump of the 3rd ch from hook, sk 2 chs, *(sc, hdc, dc), sk 2* across, hdc in last ch, turn (XS-XL: 11 CL, 2 hdc|2-3X: 12 CL/ 2 hdc|4-5X: 13 CL/2 hdc)
R2. Ch 1, hdc in hdc, (sc, hdc, dc) in each dc across, hdc in beginning ch, turn (XS-XL: 11 CL, 2 hdc|2-3X: 12 CL/ 2 hdc|4-5X: 13 CL/2 hdc)
R3. Ch 1, hdc in hdc, (sc, hdc, dc) in each dc across, hdc in hdc, turn (XS-XL: 11 CL, 2 hdc|2-3X: 12 CL/ 2 hdc|4-5X: 13 CL/2 hdc)
R4-5(6,7,8,9,10,11,12,13). Repeat row 3
R6(7,8,9,10,11,12,13,14). Ch 1, sc2tog over the 1st hdc and 1st dc, (sc, hdc, dc) in each dc across, hdc in hdc, turn (XS-XL: 10 CL, 2 hdc|2-3X: 11 CL/ 2 hdc|4-5X: 12 CL/2 hdc)
R7(8,9,10,11,12,13,14,15). Ch 1, hdc in hdc, (sc, hdc, dc) in each dc across, hdc2tog over last dc and dec, turn (XS-XL: 9 CL, 2 hdc|2-3X: 10 CL/ 2 hdc|4-5X: 11 CL/2 hdc)
R8(9,10,11,12,13,14,15,16). Ch 1, sc2tog over the 1st hdc and 1st dc, (sc, hdc, dc) in each dc across, hdc in hdc, turn (XS-XL: 8 CL, 2 hdc|2-3X: 9 CL/ 2 hdc|4-5X: 10 CL/2 hdc)
R9(10,11,12,13,14,15,16,17). Ch 1, hdc in hdc, (sc, hdc, dc) in each dc across, hdc2tog over last dc and dec; Fasten. (XS-XL: 7 CL, 2 hdc|2-3X: 8 CL/ 2 hdc|4-5X: 9 CL/2 hdc)
2nd FRONT PANEL
R1. Ch 36(36,36,36,36,39,39,39,39), sk 2 chs (cts as hdc), (sc, hdc, dc) in the back bump of the 3rd ch from hook, sk 2 chs, *(sc, hdc, dc), sk 2* across, hdc in last ch, turn (XS-XL: 11 CL, 2 hdc|2-3X: 12 CL/ 2 hdc|4-5X: 13 CL/2 hdc)
R2. Ch 1, hdc in hdc, (sc, hdc, dc) in each dc across, hdc in beginning ch, turn (XS-XL: 11 CL, 2 hdc|2-3X: 12 CL/ 2 hdc|4-5X: 13 CL/2 hdc)
R3. Ch 1, hdc in hdc, (sc, hdc, dc) in each dc across, hdc in hdc, turn (XS-XL: 11 CL, 2 hdc|2-3X: 12 CL/ 2 hdc|4-5X: 13 CL/2 hdc)
R4-5(6,7,8,9,10,11,12,13). Repeat row 3
R6(7,8,9,10,11,12,13,14). Ch 1, hdc in hdc, (sc, hdc, dc) in each dc across, hdc2tog over last dc and hdc, turn (XS-XL: 10 CL, 2 hdc|2-3X: 11 CL/ 2 hdc|4-5X: 12 CL/2 hdc)
R7(8,9,10,11,12,13,14,15). Ch 1, sc2tog over the dec and 1st dc, (sc, hdc, dc) in each dc across, hdc in hdc, turn (XS-XL: 9 CL, 2 hdc|2-3X: 10 CL/ 2 hdc|4-5X: 11 CL/2 hdc)
R8(9,10,11,12,13,14,15,16). Ch 1, hdc in hdc, (sc, hdc, dc) in each dc across, hdc2tog over last dc and dec, turn (XS-XL: 8 CL, 2 hdc|2-3X: 9 CL/ 2 hdc|4-5X: 10 CL/2 hdc)
R9(10,11,12,13,14,15,16,17). Ch 1, sc2tog over the dec and 1st dc, (sc, hdc, dc) in each dc across, hdc in hdc; Fasten. (XS-XL: 7 CL, 2 hdc|2-3X: 8 CL/ 2 hdc|4-5X: 9 CL/2 hdc)
BACK PANEL
R1. Ch 36(36,36,36,36,39,39,42,42), sk 2 chs (cts as hdc), (sc, hdc, dc) in the back bump of the 3rd ch from hook, sk 2 chs, *(sc, hdc, dc), sk 2* across, hdc in last ch, turn (XS-XL: 11 CL, 2 hdc|2-3X: 12 CL/ 2 hdc|4-5X: 13 CL/2 hdc)
R2. Ch 1, hdc in hdc, (sc, hdc, dc) in each dc across, hdc in beginning ch, turn (XS-XL: 11 CL, 2 hdc|2-3X: 12 CL/ 2 hdc|4-5X: 13 CL/2 hdc)
R3. Ch 1, hdc in hdc, (sc, hdc, dc) in each dc across, hdc in hdc, turn (XS-XL: 11 CL, 2 hdc|2-3X: 12 CL/ 2 hdc|4-5X: 13 CL/2 hdc)
R4-18(20,22,24,26,28,30,32,34). Repeat row 3; Fasten at the end of row 18(20,22,24,26,28,30,32,34).
>>Sew front panels to back panels, starting at row 1 of the front panel and working across to row 5(6,7,8,9,10,11,12,13). <Shoulders created>
>>Measure from shoulder-down 7(7.5,8,8.5,9,9.5,10,10.5,11)”, sew from this point to the bottom.
<Arm holes created>
BOTTOM TRIM
R1. Ch 1, *2 sc, sc x 2* in the end of the rows across (as many times as you can evenly); sc in any remaining row ends, turn
R2. Ch 1, sc in each st across, turn
R3. Repeat row 2; Fasten.
FOR CARDIGAN: NECK HOLE & PANEL TRIM
R1. Attach yarn to bottom corner of either side of panel, sc in each sc up the panel, sc LOOSELY in each row end arnd the neck hole, and down the other panel; Fasten.
FOR PULLOVER: NECK HOLE
R1. Attach yarn to one stitch at the bottom of the ‘V’, LOOSELY sc in each row end arnd, sl st to join; Fasten.
POCKETS
R1. Ch 11, sc in back bump of 2nd ch and in each ch across, turn (10)
R2. Ch 1, sc across, turn (10)
R3-10. Repeat row 2; Fasten at the end of row 10.
SLEEVES
If you prefer sleeves:
R1. Attach yarn to bottom of armhole, sc in the each st arnd, sl st to join, turn
R2. Ch 1, sc arnd, sl st to join, turn
>>Repeat row 2 to desired length; Full sleeves = 16.5, 17,17,17.5,17.5,18,18,18.5,18.5”
>>For a more fitted sleeve: Work 4”, then add one decrease to every other row.

Finishing
- Sew pockets to desired location; one on each front panel.
- Hide all strings.
- Block as needed.
And that’s how you make the Chunky Lace Vest!
Join the Blackstone Designs Crochet Community group on Facebook to stay up to date, receive special offers, pattern support, and so much more! Hope to see you there!
Happy Crocheting!

Written Pattern and Images © 2018 Sonya Blackstone of Blackstone Designs. Do not sell, share, or modify this pattern, but instead share the link to where the pattern can be found. You may sell items you make with this pattern. This pattern, as with all Blackstone Designs/Sonya Blackstone patterns, are not for educational use without written permission from the designer.
Sonya Blackstone is a participant in the Amazon Services LLC Associates Program, an affiliate advertising program designed to provide a means for us to earn fees by linking to Amazon.com and affiliated sites.


Sonya, can you explain “front panel’ R4-5 (11). Repeat row 3.
What does (6thru13) mean?
Thanks,
Kathy
Hi Kathy!
This depends on the size you’re making. If you’re making the smallest size, you will work Rows 4 & 5 only. If you’re making size XL, you will work Rows 4 – 9… etc.
-Sonya
I wish you had a tutorial for this & other projects. Maybe give it some thought?
Thank you.
Suzanne.
Hi Suzanne!
Do you mean a video tutorial? Or more photos?
I am working on improving my patterns and offerings daily!
-Sonya
I love this! It’s just what I need. Love the texture.
Yes! So cozy!
Absolutely LOVE this vest! It’s on my “must make” list. Random question, what kind of boots is the model wearing?! They are EXACTLY what I’ve been wanting! ❤️
Hi Sonia!
I asked her and she said they were so old she cannot remember. LOL!
I’m happy to hear you love the vest!
-Sonya
Hi! I am confused. The two front panels seem to stop at row 13 yet the back panel stops at row 26?
What am I missing?
I am making an XL.
Thanks
Laura
Hi Laura!
The back panel is 26 rows, then the front panel is also 26 rows, but split up into two panels (each being 13 rows), so that there is an opening in the front.
-Sonya
So I turn the front pieces sideways to attach to the back?
Help!
Laura