
Shark Crochet Sunglass Pouch Pattern
Meet the Shark Crochet Sunglass Pouch – a soft, zip-top (or buttoned, if you prefer) crochet case shaped like a chubby shark that’s ready to chomp…uh, protect…your favorite sunglasses! Whether you’re headed to the beach, pool, lake days with the kids, or just living your best Shark Week life at home, this playful pouch is a silly-smart way to store eyewear and small essentials.
This post contains affiliate links. At no extra cost to you, I may receive a small commission from purchases made through affiliate links, which helps me to keep bringing awesome free content!
In this post, I’ll walk you through what the Shark Sunglass Pouch is, why you’ll love making it, fun ways to customize yours, and tips for success. I’ll also share gift ideas, craft fair selling angles, frequently asked questions, and suggestions for styling & photographing your finished pouch for social media. No step-by-step instructions or material lists here – you’ll find those in the pattern – but this post will help you get inspired, stay motivated, and get the most out of your make!
What is the Shark Crochet Sunglass Pouch?
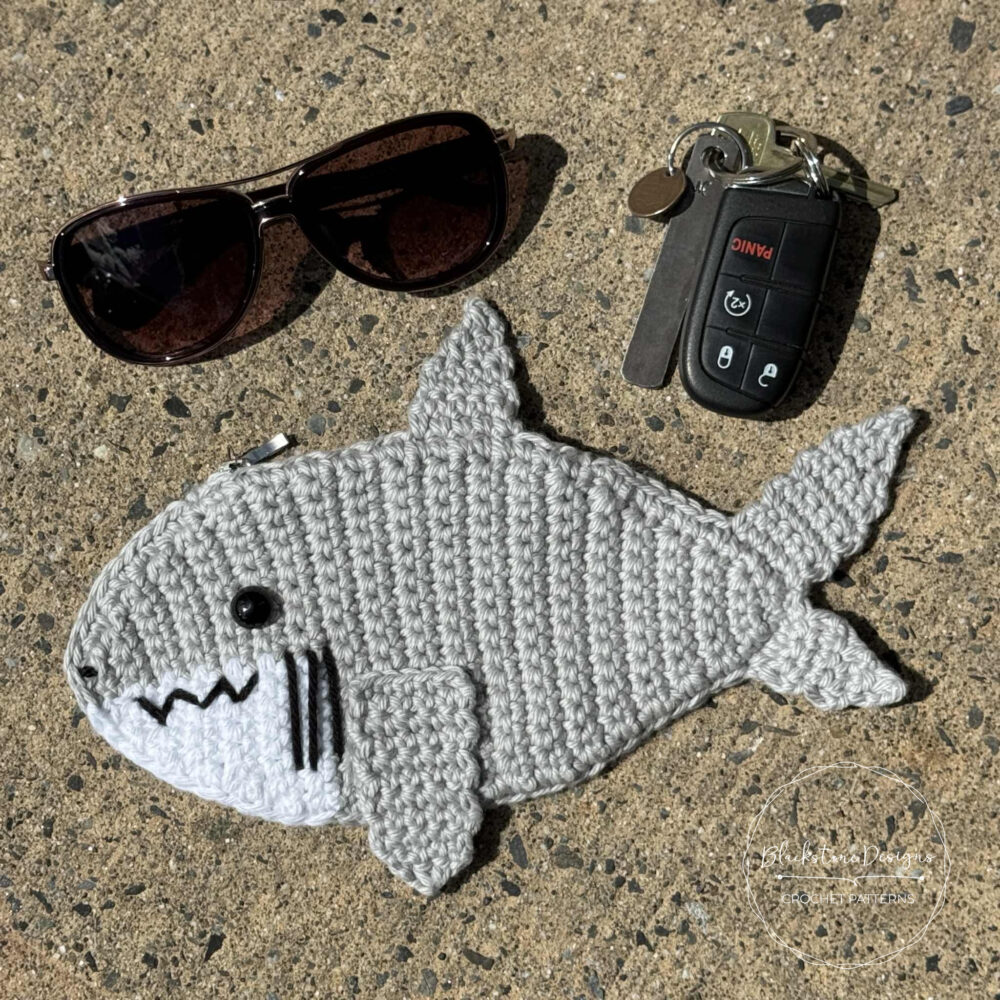
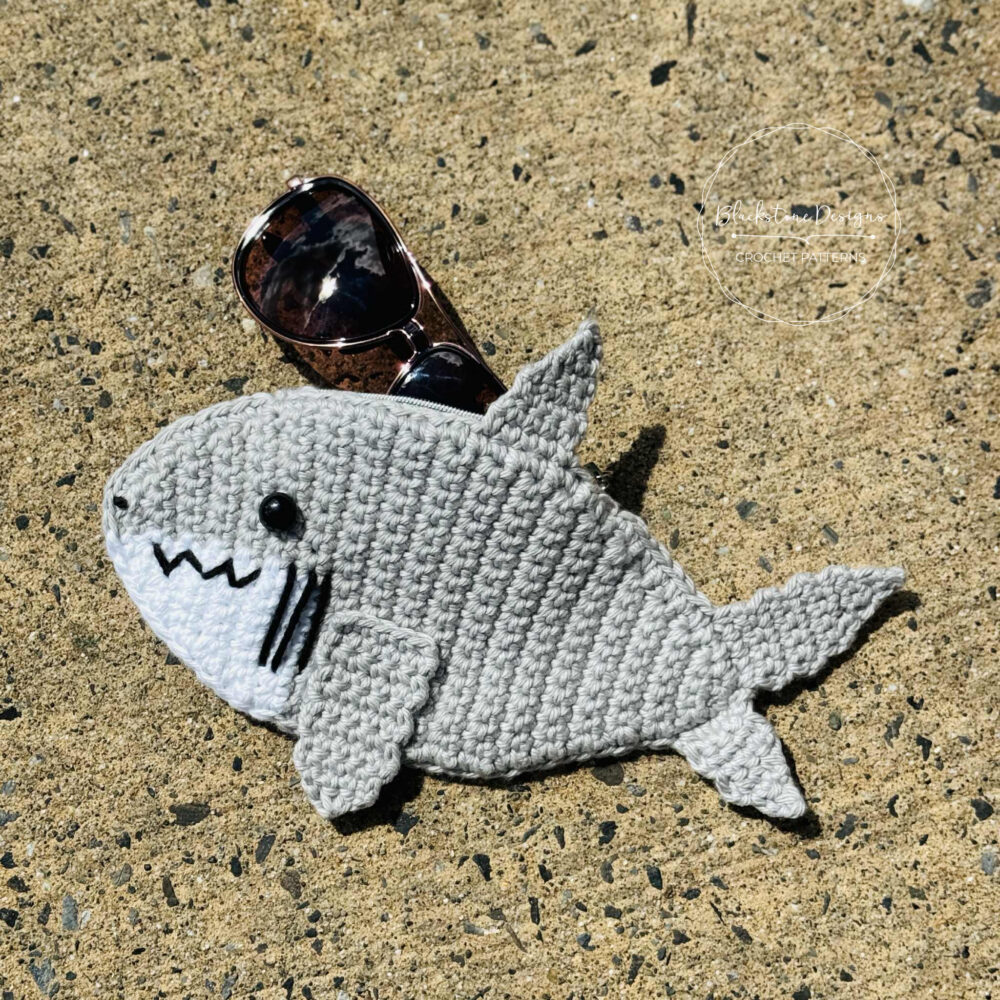
The Shark Sunglass Pouch is a soft, lightly structured crochet case shaped like a plump little shark. The opening runs along the top of the body (think dorsal seam), so you can slide in a pair of sunglasses, readers, or even small craft tools. The shark’s smiling face, embroidered gills, safety eye (or stitched eye), and top/bottom fins bring the whole design to life. It’s part novelty, part practical storage – and all summer fun.
Because it’s crocheted in yarn instead of being a hard-eyeglass case, it’s lightweight and flexible. Toss it in your beach tote, backpack, or car console. Add a clip and attach it to a pool bag. It’s cushy enough to help keep lenses from getting scratched by keys or loose change, but still soft enough to squish into tight spaces.
Why You’ll Love the Shark Pouch
If you’ve hung out here very long, you already know I love designing crochet patterns that balance whimsy with function – and this shark pouch checks both boxes. Here’s why it’s a keeper:
Perfect for Summer Makes: Sharks + sunshine + sunglasses = seasonal crochet win.
Kid-Approved Gift: Kids love grabbing their own “shark bag” before outings.
Fast Finish: Great between-big-projects palate cleanser.
Scrap Friendly: Use partial skeins for the body, belly, and face details.
Customizable Personality: Sweet, fierce, sleepy, goofy – your shark, your vibe.
Great for Themed Events: Shark Week parties, ocean classroom themes, beach weddings (yes, really – as favor pouches!).
Market Seller Friendly: Small, eye-catching, and easy to batch-make for craft fairs.
Skill Level Breakdown
I’m calling the Shark Sunglass Pouch an easy skill level project. If you can single crochet, increase, decrease, sew simple seams, and do basic embroidery/finishing, you’re in great shape. The shaping is more about simple increases in the right spots than complicated stitch patterns. The fins and tail are small, so you’ll get good practice with mini pieces without committing to hours of work.
You should be comfortable with:
- Working flat
- Simple color changes (for the white belly section).
- Attaching small appliqué-style pieces (fins, tail, facial features).
- Installing a zipper or working an alternative closure like a button flap, snap, or drawstring ribbon (closures are totally optional).
Not there yet? No worries. Scroll to the Tips section for beginner-friendly hacks that make assembly less intimidating.
Customization Ideas
Want your shark to stand out in a sea of gray? Try these ideas.
Color Play
Classic Gray + White: Great white energy! (Pictured.)
Blue Reef Shark: Use tonal blues for body + pale belly.
Rainbow Shark: Self-striping yarn makes a psychedelic “coral reef party” shark.
Team Spirit Shark: School or sports team colors for summer camps.
Glow Shark: Pair glow-in-the-dark thread in the teeth or gill embroidery.
Texture Tweaks
Use a lightly speckled cotton blend for a freckled skin look.
Add a strand of silver thread for a wet, shimmery “fresh out of the water” vibe.
Try a boucle or fuzzy yarn just for the dorsal fin for silly cartoon texture.
Facial Personality Swaps
Friendly Smile: Soft curve with embroidered teeth.
Fierce Chomp: Zig-zag teeth + angled brow stitches.
Sleepy Shark: Closed eyelid line + blush cheeks.
Goofy Shark: Tongue stitch in pink yarn peeking out between teeth.
Fin Drama
Make the dorsal fin oversized (cartoon style) for photo props.
Add tiny back fin ridges down the spine for a “prehistoric” look.
Attach a mini loop tag to the tail fin for clipping onto bags.
Other Uses
Want to turn your Shark Sunglass Pouch into a fully featured travel buddy? Try one (or several) of these upgrades.
Wrist or Crossbody Strap
Sew (or crochet) a small D-ring tab into the side seam and clip on a wrist strap. For kids at water parks, add a long I-cord or macramé strap and wear crossbody.
Key Clip or Carabiner
Add a lobster clasp to the tail fin or dorsal tab so you can snap the pouch to a beach bag, stroller, or life-jacket loop.
Fabric Lining (Optional but Nice)
A simple fabric lining helps block sand, keeps the inside smooth for lenses, and adds structure. Pick a fun ocean print fabric for extra personality. If you’re sewing in a zipper anyway, lining is easy to add at the same time.
Personalized Labels
Stitch in a faux leather tag (“Handmade”, “Shark Squad”, child’s name, boat name, etc.) for gifting or selling.
Other Uses
Yes, it’s called a Sunglass Pouch – but don’t stop there! Makers are so creative with storage. Here are other things that fit nicely inside:
Reading glasses or blue-light glasses.
Crochet hooks & small scissors (travel tool kit!).
Mini sunscreen tubes or lip balm bundles.
Spare car key + cash for the beach.
Small first-aid items (bandages, wipes, motion tabs).
Earbuds (in case), charging cables, and a small power adapter.
Snacks. (Okay, maybe not melty ones. But your secret gummy stash? Safe with Sharky.)
Care and Washing Tips
Fiber care depends on the yarn you choose (see the pattern for fiber suggestions), but here are general rules of thumb:
- Remove sunglasses first (ha!).
- Spot clean mild dirt with a damp cloth.
- Hand wash cool water + gentle soap if heavily soiled.
- Reshape the fins while damp and lay flat to dry.
- Avoid tossing into a hot dryer if using cotton yarn.
If you’ve added a zipper and lining, wash gently and avoid soaking metal pieces for long.
How to Get the Crochet Shark Sunglass Pouch Pattern:

Crochet Shark Sunglass Pouch Pattern
Option 1: Continue scrolling for free pattern instructions on this site
Option 2: Purchase the ad-free PDF that includes tutorial photos from one of my shops
About the Materials
The Shark Crochet Sunglass Pouch was made with 100% Cotton Worsted Weight Yarn, specifically I Love this Cotton. Good substitutes for this yarn are Knit Picks Dishie, Paintbox Cotton Aran, and Lily Sugar ‘n Cream. Acrylic yarns can also be used for this project and are a great option, because they are more stain resistant than cottons.
You will also need an G/6/4.00mm crochet hook, yarn needles for stitching on details and hiding loose tails.
The Crochet Pattern
Keep reading for a list of what you need to make the Shark Crochet Sunglass Case, including the stitch pattern instructions!
Materials
100% Cotton Worsted Weight Yarn (#4)
- Gray [2oz/105yds]
- White [1oz/55yds]
- Black [Scraps]
Optional Materials
Gauge
16 sts x 18 rows = 4”
Gauge is not critical for this project
Finished Measurements
8.25″W x 4.25″H before fins
10.25”W x 6.75”H with fins
Stitch Guide
arnd = around
ch = chain
dec = single crochet decrease
sc = single crochet
sl st(s) = slip stitch(es)
Skill Level
Easy
Pattern Written in U.S. Terms

Notes
- Beginning chains do not count as stitches.
- Where asterisks appear, repeat the instructions between them.
- Shark body is worked from tail to nose.
- Mod Podge Multi All-in-one Gloss finish was used for the sealer on the backside of the fins. This hardens the fabric and helps it keep its shape.
Instructions
SHARK BODY (Make 2)
With Gray,
R1. Ch 3, sc in the back bump of the 2nd ch and across, turn (2)
R2. Ch 1, 2 sc x 2, turn (4)
R3. Ch 1, 2 sc, sc x 2, 2 sc, turn (6)
R4. Ch 1, sc across, turn (6)
R5. Ch 1, 2 sc, sc x 4, 2 sc, turn (8)
R6. Ch 1, sc across, turn (8)
R7. Ch 1, 2 sc, sc x 6, 2 sc, turn (10)
R8. Ch 1, sc across, turn (10)
R9. Ch 1, 2 sc, sc x 8, 2 sc, turn (12)
R10. Ch 1, sc across, turn (12)
R11. Ch 1, 2 sc, sc x 10, 2 sc, turn (14)
R12. Ch 1, sc across, turn (14)
R13. Ch 1, 2 sc, sc x 12, 2 sc, turn (16)
R14-25. Ch 1, sc across, turn (16)
R26. With White: ch 1, sc x 7, With Gray: sc x 9, turn
R27. With Gray: ch 1, sc x 9, With White: sc x 7, turn
R28. Repeat R26
R29. With Gray: ch 1, dec, sc x 7, With White: dec, sc x 5, turn (14)
R30. With White: ch 1, sc x 6, With Gray: sc x 8, turn (14)
R31. With Gray: ch 1, dec, sc x 6, With White: dec, sc x 4, turn (12)
R32. With White: ch 1, sc x 5, With Gray: sc x 7, turn (12)
R33. With Gray: ch 1, dec, sc x 5, With White: dec, sc x 3, turn (10)
R34. With White: ch 1, sc x 4, With Gray: sc x 6, turn (10)
R35. With Gray: ch 1, dec, sc x 4, With White: dec, sc x 2, turn (8)
R36. With White: ch 1, dec, sc, With Gray: dec, sc x 3, turn (6)
R37. With Gray: ch 1, dec, sc x 2, With White: dec, turn (4)
With Gray,
R38. Ch 1, dec x 2; Fasten. (2)
R39. Hold both panels together, so white “jaw” is on the bottom and nose is pointing to the left Attach yarn to the topside end of R30 and working through both panels: Ch 1, sc in same space and in the end of each row and in each st around to the topside end of R11.
R40. Ch 1, sc across the ends R12-R29 of front panel, turn and work sc across the end of R29-R12 of back panel, sl st to join in 1st sc; Fasten.
DORSAL FIN
With Gray,
R1. Attach yarn to end of R15 on topside and work towards R19: Ch 1, sc in same space as join and in the end of the next 4 rows, turn (5)
R2-3. Ch 1, sc across, turn (5)
R4. Ch 1, sc x 3, dec, turn (4)
R5. Ch 1, dec, sc x 2, turn (3)
R6. Ch 1, sc, dec, turn (2)
R7. Ch 1, dec; Fasten. (1)
TOP CAUDAL FIN
With Gray,
R1. Attach yarn to end of R1 on topside and work towards R5: Ch 1, sc in same space as join and in the end of the next 4 rows, turn (5)
R2-6. Ch 1, sc across, turn (5)
R7. Ch 1, sc x 3, dec, turn (4)
R8. Ch 1, dec, sc x 2, turn (3)
R9. Ch 1, sc, dec, turn (2)
R10. Ch 1, dec; Fasten. (1)
BOTTOM CAUDAL FIN
With Gray,
R1. Attach yarn to end of R1 on bottomside and work towards R4: Ch 1, sc in same space as join and in the end of the next 3 rows, turn (4)
R2-4. Ch 1, sc across, turn (4)
R5. Ch 1, dec, sc x 2, turn (3)
R6. Ch 1, sc, dec, turn (2)
R7. Ch 1, dec; Fasten. (1)
PECTORAL FIN
With Gray,
R1. Ch 6, sc in 2nd ch from hook and across, turn (5)
R2-7. Ch 1, sc across, turn (5)
R8. Ch 1, dec, sc, dec, turn (3)
R9. Ch 1, sc3tog; Fasten. (2)
Finishing
- Finish Shark:
- Hide all strings.
- Optional:Attach zipper to the opening (PHOTOS BELOW).
- Open zipper, bring top stop all the way to the front of the opening, and sew one side of the fabric portion of the zipper to the inside of front panel by weaving in and out of the stitches, making sure the zipper teeth stay above the top of the stitches.
- Then sew the other side of the zipper to the inside of back panel (make sure top stops line up!).
- Close zipper and cut excess zipper from the end, leaving ½” excess.
- Tuck the ½” excess inside the pouch, then sew from the outside of the pouch, over the top of the zipper excess, through the crochet stitches and the zipper fabric at the same time. Make a few passes to secure and create a new zipper stop. Repeat on other end of zipper.
- Secure yarn tails.
- Optional: Use glue sealer and paint the backside of the fins to stiffen them, so they keep their shape.
That’s the Shark Crochet Sunglass Pouch Pattern!

Don’t forget to share!
If you make this Shark Sunglass Pouch, I’d love to see it! Be sure to tag your photos with #BlackstoneDesigns and #SharkSunglassPouch on Instagram and Facebook, or share it in the Blackstone Designs Crochet Community group. I love seeing all the creative twists you come up with!
Join our crochet community group!
Come on over and join the Blackstone Designs Crochet Community on Facebook for fun CALs and giveaways, plus exclusive sales, pattern support, and so much more!
Happy Crocheting!

Written pattern and photographs © 2025 Sonya Blackstone of Blackstone Designs. Do not sell, share, or modify this pattern, but instead share the link to where the pattern can be found. You may sell items you make with this pattern. This pattern, as with all Blackstone Designs/Sonya Blackstone patterns, are not for educational use without written permission from the designer. All rights reserved.
Sonya Blackstone is a participant in the Amazon Services LLC Associates Program, an affiliate advertising program designed to provide a means for us to earn fees by linking to Amazon.com and affiliated sites.


