
Blooming Easter Basket Free Crochet Pattern
There’s just something magical about spring crochet projects, isn’t there? The colors get brighter, the textures get softer, and suddenly everything starts looking like it belongs in a sunny field somewhere.
The Blooming Easter Basket crochet pattern is exactly that kind of project.
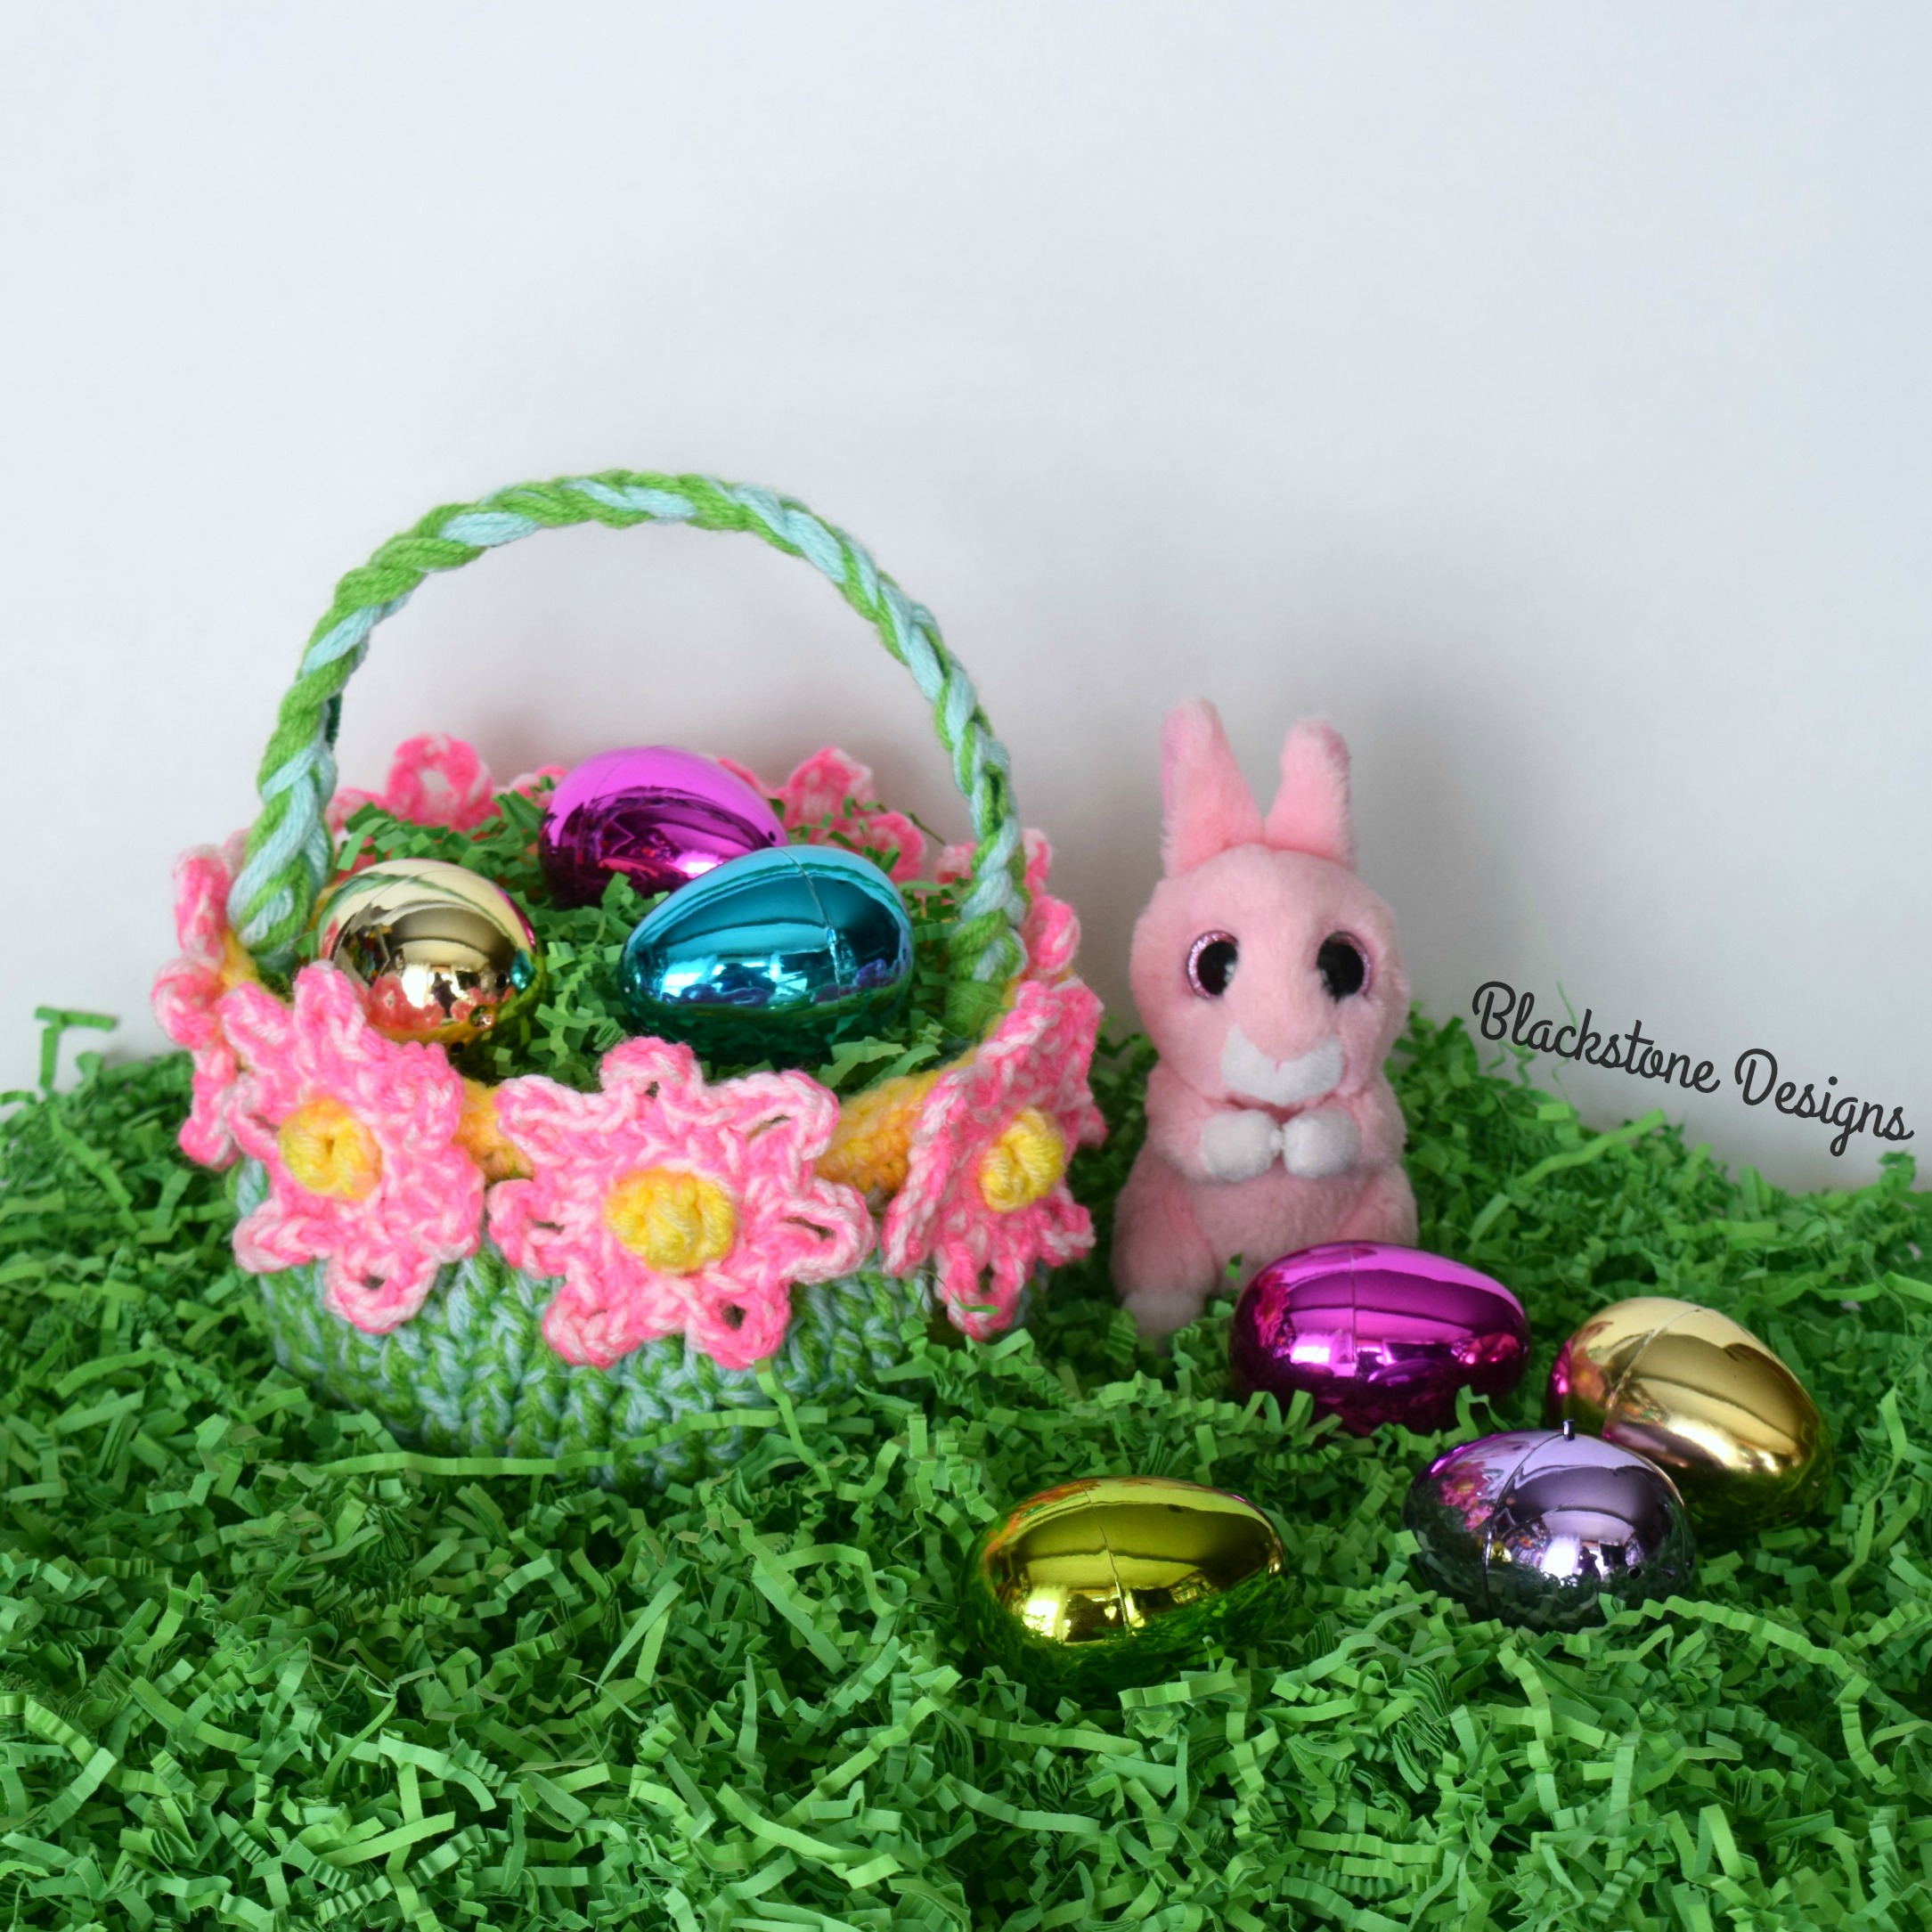
This small crochet Easter basket is designed to look like a field of flowers. The centers of the flowers are worked directly into the basket itself, and then the petals are added afterward as appliques — giving it dimension, texture, and that “blooming garden” feel that makes it completely irresistible.
This post contains affiliate links. At no extra cost to you, I may receive a small commission from purchases made through affiliate links, which helps me to keep bringing awesome free content!
And yes… it’s just as fun to make as it is to display.
Whether you’re stitching this up for Easter morning, a spring centerpiece, or just because you need something cheerful on your hook, this free crochet Easter basket pattern is full of texture, color, and creative details.
Let’s talk about why this one is so special.
A Crochet Easter Basket That Looks Like a Flower Garden
This isn’t your average Easter basket.
Instead of simple stripes or basic stitches, the Blooming Easter Basket is designed to resemble a field of flowers wrapping all the way around the outside. The flower centers are crocheted directly into the basket as you go, creating built-in texture and pops of color.
Then, once the basket body is complete, the flower petals are added as crochet appliques.
That layered look gives the basket:
- Dimension
- Soft sculpted texture
- A playful, almost 3D garden effect
- And that handmade charm we all love
It truly looks like a tiny flower patch made from yarn.
And because the flowers are appliques, you can customize them. Add more. Add fewer. Change the colors. Make them pastel. Make them bold. Make them wildflower-inspired.
It’s your field.
Why this Crochet Easter Basket Is Perfect for Spring
This basket is intentionally designed to be small — which makes it incredibly versatile.
You can use it for:
- Easter egg hunts (perfect for little hands)
- Spring table décor
- Gift baskets filled with candy or small toys
- Baby’s first Easter
- Teacher or neighbor gifts
- Photo props
- Shelf styling for seasonal decorating
It’s the kind of project that feels special without being oversized or overwhelming.
Sometimes the sweetest projects come in the smallest packages.
Built for Structure: Double Strands of Yarn
One of the standout features of this crochet Easter basket is its structure.
To give the basket that firm, sturdy shape, it’s worked using two strands of yarn held together throughout the project.
Now here’s where it gets fun.
Instead of using two identical strands, you’ll use two colors from the same hue family — just slightly different shades.
So think:
- Light green + medium green
- Soft pink + brighter pink
- Pale yellow + golden yellow
They’re close in color… but not exactly the same.
That little bit of shade difference creates natural depth and contrast without being dramatic. It keeps everything cohesive and springy, but adds just enough visual interest to make people look twice.
It’s subtle.
It’s textured.
It’s kind of like how real flower fields have layers of color instead of one flat tone.
And because the basket is worked with two strands together, it naturally becomes thicker, sturdier, and more structured — perfect for holding eggs, candy, or décor pieces without collapsing.
No floppy baskets here.
Let’s Talk Texture
If you know me, you know I love texture.
The Blooming Easter Basket crochet pattern combines:
- The firmness of double-stranded stitches
- The raised look of worked-in flower centers
- The soft layering of appliqué petals
- And a braided crochet handle
The result is a basket that feels substantial in your hands but still soft and handmade.
The braided handle adds another layer of visual interest and reinforces that spring garden feel. It almost looks like vines wrapping upward — which just fits the theme perfectly.
And here’s a fun bonus…
Leave the Handle Off for a Decorative Crochet Bowl
One of my favorite things about this design?
The handle is optional.
If you leave the braided handle off, this small crochet Easter basket becomes a beautiful decorative bowl.
Use it as:
- A spring candy dish
- A yarn bowl for small projects
- A catch-all on your entry table
- A decorative shelf piece
- A centerpiece filled with faux grass and eggs
It transitions effortlessly from functional basket to seasonal décor.
And honestly? I love patterns that can multitask.
Customizing Your Blooming Easter Basket
The base design gives you that flower-field look, but you can absolutely make this your own.
Here are some fun ways to customize it:
Play With Flower Colors
Keep it soft and pastel for a classic Easter look, or go bold with bright pinks, corals, and yellows for a more vibrant spring vibe.
Change the Shade Pairing
Since you’re working with two strands from the same color family, you can experiment with:
- High contrast shades for more definition
- Very close shades for a blended look
- Speckled yarn paired with solid
Add More Flowers
Want it to look extra full? Add additional appliques between the existing ones for a denser “flower patch” look.
Make It Neutral
Yes, even this basket can go farmhouse. Think creams, soft sage, muted gold centers. It becomes subtle spring décor instead of playful Easter.
Adjust the Size
Work it slightly taller for more egg capacity, or keep it small and sweet for a minimalist look.
The possibilities are endless — and that’s what makes this pattern so much fun.
Perfect for Easter Egg Hunts
If you’re making this for a child, the small size is ideal.
It’s:
- Lightweight
- Easy to carry
- Structured enough to hold eggs
- Not oversized or cumbersome
Plus, let’s be honest — there is something so special about a handmade Easter basket.
Store-bought baskets are cute.
But a crochet Easter basket that looks like a blooming flower field? That’s heirloom-level sweet.
A Great Scrap Yarn Project
Because this basket uses double strands, it’s a fantastic way to use up partial skeins in coordinating shades.
Have two greens that are close but not identical?
Perfect.
Leftover yellow for flower centers?
Use it.
Bits of pink or coral?
Turn them into petals.
Spring crochet projects are the perfect excuse to play with color — and this one gives you plenty of opportunity.
How to get the Blooming Easter Basket Crochet Pattern
Blooming Easter Basket Crochet Pattern
Option 1: Continue scrolling for free pattern instructions on this site
Option 2: Purchase the ad-free PDF that includes tutorial photos from one of my shops
About the Materials
This crochet Easter Basket was made with 100% Acrylic Worsted Weight Yarn, specifically Red Heart Super Saver. Good substitutes for this yarn are Knit Picks Brava, Lion Brand Pound of Love, and I Love This Yarn.
You will also need an H/8/5.00mm crochet hook, yarn needles for stitching on the flowers (or hot glue, which is what I used). In addition you will need a pair of scissors.
The Crochet Pattern
Keep reading for a list of what you need to make the Blooming Easter Basket, including the stitch pattern instructions!


Materials
Worsted Weight Yarn (#4)
- Light Green
- Bright Green
- Light Yellow
- Bright Yellow
- Light Flower/Star Color
- Bright Flower/Star Color
K/10.5/6.50mm Crochet Hook
H/8/5.00mm Crochet Hook
Green Chenille Sticks
Yarn Needle
Scissors
Optional Materials:
Plastic Canvas circle or Cardboard (for basket bottom)
Gauge
Not Important for this project
Stitch Guide
arnd = around
BLO = Back Loop Only
ch = chain
dc = double crochet
FPdc = Front Post double crochet
hdc = half double crochet
sc = single crochet
sl st = slip stitch
trc = treble crochet
Written in U.S. Terms
Skill Level
Easy
Instructions
SMALL BASKET
Using K Hook,
Holding both greens together,
R1. Magic Ring, 7 sc in ring (7)
R2. 2 sc arnd (14)
R3. *2 sc, sc* arnd (21)
R4. *2 sc, sc x 2* arnd (28)
R5. *2 sc, sc x 3* arnd (35)
R6. *2 sc, sc x 4* arnd (42)
R7. *2 sc, sc x 5* arnd (49)
R8. BLO: sc arnd (49)
R9. dc arnd (49)
R10-11. *FPdc x 3, dc x 4* arnd (49)
R12-13. *dc x 3, FPdc x 4* arnd (49)
Switch to Yellows (Hold both together),
R14. *sc x 6, 3 trc* arnd (63)
R15. sc arnd (63); Fasten.
LARGE BASKET
Using K Hook,
Holding both greens together,
R1. Magic Ring, 7 scin ring (7)
R2. 2 scarnd (14)
R3. *2 sc, sc* arnd (21)
R4. *2 sc, sc x2* arnd (28)
R5. *2 sc, sc x3* arnd (35)
R6. *2 sc, sc x4* arnd (42)
R7. *2 sc, sc x5* arnd (49)
R8. *2 sc, sc x6* arnd (56)
R9. *2 sc, sc x7* arnd (63)
R10. BLO: scarnd (63)
R11. dc arnd (63)
R12-13. *FPdc x 3, dc x4* arnd (63)
R14-15. *dc x 3, FPdc x4* arnd (63)
R16-17. *FPdc x 3, dc x4* arnd (63)
Switch to Yellows (Hold both together),
R18. *sc x 6, 3 trc* arnd (81)
R19. sc arnd (81); Fasten.

FLOWERS (Make 7 for Small, Make 9 for Large)
Using H Hook,
Holding light and dark together,
R1. Ch 14, sl st to form ring
R2. Working in chain loops:*(sc, ch 5), sc in next st* arnd (7 petals); Fasten.
STARS (Make 7 for Small, Make 9 for Large)
Using H Hook,
Holding both blues together,
R1. Ch 15, sl st to form ring
R2. Working in chain loops: *Ch 4, (sc, hdc, dc) down ch 4, sk next 2 sts of ring, scin next st* arnd (5 point); Fasten.
HANDLE
*Cut 24 strings (12 L. Green, 12 B. Green) 25” long for short handles, 40″ long for long handles.
*Separate them into 3 groups of 8 and braid them together with a chenille stick in the middle.
*Separate ends into two groups of 12, insert one group into a stitch (outside to inside), sk 3 sts and repeat with the other 12 strings. Tie together both sections on the inside of basket. Repeat on other side (going around set of 3 trc’s ).
Finishing
- Sew Flowers or Stars onto basket over “bobbles” (so bobbles become the flower/star centers).
- Hide all Strings
And that’s how you make the Blooming Easter Basket!

Looking for more Easter Patterns?
You might like these:
Easter Egg Pot Holder
Bun Buns the Simple Easter Bunny
Bunny Head Treat Bags
I love seeing your finished projects! Join the Blackstone Designs Crochet Community or share them to my Facebook page!
Hope to see you there!!
And don’t forget to add this pattern to your Ravelry favorites and Pin it for later, so you can always find it!

Written pattern and photographs © 2014 Sonya Blackstone of Blackstone Designs. Please do not sell, share, or modify this pattern, but instead share the link to where the pattern can be found. You may sell items you make with this pattern. This pattern, as with all Blackstone Designs/Sonya Blackstone patterns, are not for educational use without written permission from the designer.
Sonya Blackstone is a participant in the Amazon Services LLC Associates Program, an affiliate advertising program designed to provide a means for us to earn fees by linking to Amazon.com and affiliated sites.


OH MY GOSH!! This is the cutest little basket I think I have ever seen!!
Thank you!!