Child’s Oversized Granny Stitch Cardigan – Free Crochet Pattern for Kids

Sharing is caring!

If you’re looking for the perfect layering piece for your kiddo, this Child’s Oversized Granny Stitch Crochet Cardigan might just be your next favorite make! With a cozy fit, breathable fabric, and timeless stitch pattern, this cardigan is as stylish as it is practical.

This post contains affiliate links. At no extra cost to you, I may receive a small commission from purchases made through affiliate links, which helps me to keep bringing awesome free content!


It’s made using the beloved granny stitch, worked up in panels, and designed with 4 inches of positive ease for that relaxed, oversized fit kids can grow into. Whether you’re making one for your toddler or your pre-teen, this crochet cardigan is a fun and satisfying project for makers of all levels.

In this post, I’ll walk you through what makes this pattern a must-make, how to customize it, what sizes are included, and styling ideas for all seasons!


Why You’ll Love This Crochet Cardigan for Kids

Here’s why this oversized children’s cardigan is about to become your new go-to crochet project:

  • Includes 6 sizes: 2, 4, 6, 8, 10, and 12
  • Roomy fit with 4″ positive ease for comfort and layering
  • Simple construction – made in panels and seamed
  • Uses basic stitches – great for beginners
  • Easy to customize sleeve or body length
  • Makes a wonderful gift or handmade wardrobe staple

This kid-friendly crochet cardigan works up surprisingly quickly and is just as fun to make as it is to give!


Sizing Details

The pattern includes the following sizes: 2T (4T, 6Y, 8Y, 10Y, 12Y)

Each size includes a 4-inch positive ease, which means it will fit a little loose and slouchy. That’s great news for parents — because it leaves room to grow!

Example:
If your child has a chest measurement of 24″, the size 4 (which measures about 28″) will fit perfectly with room to spare.

The oversized fit also makes this cardigan easy to layer over other clothes, which is ideal for seasonal transitions.

And you could follow this pattern for a fitted style for larger sizes. For example, the 2T would be fitted on a 6Y. A 12Y would be fitted on a medium sized woman.


Matching with the Adult Version

Here’s the best part — there’s a matching adult-sized granny stitch cardigan pattern too! That means you can crochet a cardigan for yourself and your mini-me for an adorable mommy-and-me look! Or matching sibling cardis!

Matching handmade sweaters? Yes, please!

Woman and Child in Oversized Granny Stitch Cardigans


Construction Overview

This children’s crochet cardigan is an easy make:

  1. One body piece
  2. Two sleeves
  3. Seamed together, then the trim is added

Each panel is worked in rows using the granny stitch, and the sleeves can be made flat or in the round, depending on your preference, but the instructions are specific to a flat work.

Because of its straight-edge design and minimal shaping, it’s a great pattern for anyone new to crochet garments.

Personalizing Your Child’s Cardigan

The possibilities are endless when it comes to customizing this cardigan!

Here are a few fun ways to make it extra special:

  • Use stripes: Alternate colors every few rows for a rainbow or color-block effect
  • Add patch pockets: Kids love pockets (and so do grown-ups!)
  • Sew on fun buttons or appliques: Give it a personalized flair
  • Make it longer: Add extra rows to the body for a duster-style look

And if you’re making one for siblings, cousins, or friends, you can match the colors or switch them up for a coordinated set!


Styling Tips

This granny stitch kids’ cardigan is perfect for year-round wear. Depending on your yarn choice, you can make it light and breathable or warm and snuggly.

Here are just a few outfit ideas:

  • Over a sundress for chilly summer nights
  • Paired with leggings and a tee for a cozy school day outfit
  • Layered under a jacket in winter
  • Tossed over PJs for lounging at home

And because it’s oversized, it’s comfy enough to wear like a blanket on the go — perfect for car rides, camping trips, or chilly classrooms.

Tips for Success

Here are a few extra tips to help your cardigan turn out perfectly:

  • Make a gauge swatch – this ensures your sizing is accurate
  • Choose yarn wisely – soft, non-scratchy yarn is best for kids
  • Use measurements, not just ages – kids grow at different rates!
  • Mark your panels – stitch markers help with lining everything up
  • Pre-wash your yarn – especially if it’s hand-dyed or multi-color

Take your time, enjoy the process, and don’t worry about perfection. Handmade garments are special because they’re made with love.

Time Commitment and Skill Level

This is an Intermediate skill level crochet project. The granny stitch is beginner-friendly, and the basic shaping is easy, but since it is a garment that does include some shaping, I mark it as intermediate.

As for time, the child size 12Y took me a total of 18 hours or maybe a little less, so I think the size 2T would take me an afternoon.

How to Get the Child’s Oversized Granny Stitch Cardigan Pattern

Child's Oversized Granny Stitch Cardigan free crochet pattern for kids sweater
how to get the

Child’s Oversized Granny Stitch Cardigan Crochet Pattern

Option 1: Continue scrolling for free pattern instructions on this site

Option 2: Purchase the ad-free PDF, that includes tutorial photos and schematics, from one of my shops


About the Materials

The Child’s Oversized Granny Stitch Cardigan was made with Cotton-Bamboo DK Weight Yarn, specifically Lion Brand Coboo, but any fibers can be used! Other good options are Valley Yarns Southwick, WeCrochet Swish DK, and Debbie Bliss Cotton DK!

You will also need an I/9/5.50mm and H/8/5.00mm crochet hooks, stitch markers to section off the panels, sewing clips for adding the sleeves, yarn needles for joining panels and sleeves, plus hiding loose tails, and of course a good pair of scissors!


The Crochet Pattern

Keep reading for a list of what you need to make the Child’s Oversized Granny Stitch Cardigan, including the stitch pattern instructions!

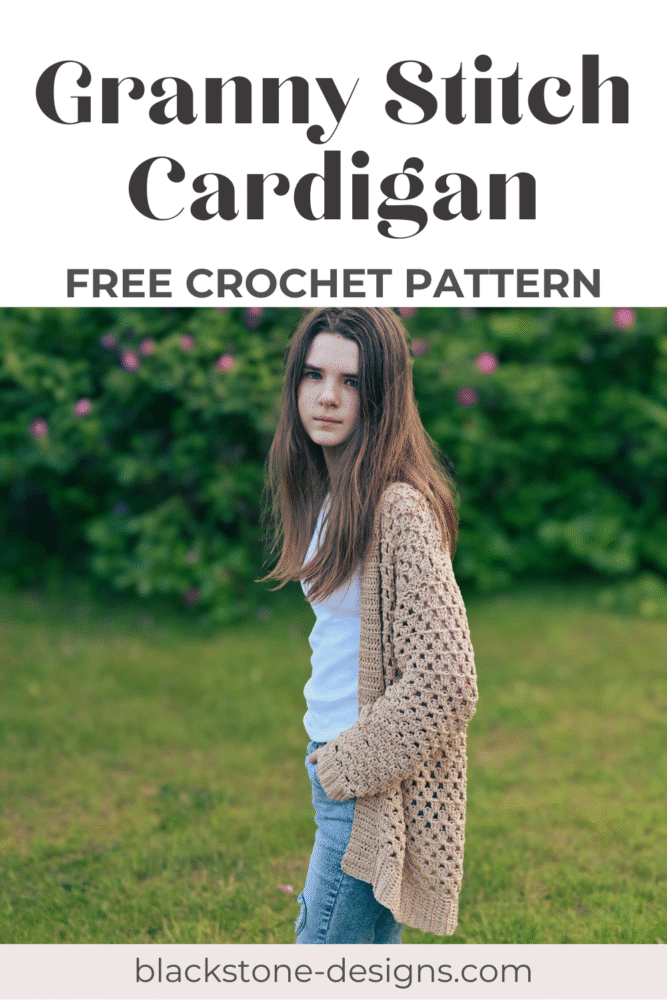
pin it to pinterest
Oversized Crochet Cardigan Granny Stitch Sweater


Materials

DK Weight Yarn (#3)

  • 580(690,810,920,1040,1150)yds 

I/9/5.50mm Hook (Body)

H/8/5.00mm Hook (Trim)

Stitch Markers

Yarn Needle

Scissors

Optional Materials

Sewing Clips


Gauge

4 clusters x 8 rows = 4”


Sizes

Child’s (Chest) 

2T (21”)[53cm]

4T (23”)[58cm]

6Y (25”)[63.5cm]

8Y (26.5”)[67cm]

10Y (28”)[71cm]

12Y (30”)[76cm]


Stitch Guide

arnd = around

alt. dc = See Special Stitches

ch(s) = chain(s) 

CL = See Special Stitches

dc = double crochet

hdc = half double crochet 

sc = single crochet 

st(s) = stitch(es) 

YO = yarn over


Skill Level

Intermediate


Pattern Written in U.S. Terms


Notes
  • Chain 2 can be used in place of alternate double crochet.
  • This pattern is worked from the bottom-up.
  • Where asterisks appear, repeat the instructions between them.
  • Pattern is written for smallest size, with changes for larger sizes in parenthesis.
  • Pay close attention at the end of the sleeves; sizes are separated out because they each finish a bit differently.
  • This cardigan has a 4” positive ease.
  • To make a gauge swatch: ch 18, work given instructions for 9 rows total.
  • Bottom, Panels, and Sleeves are made using a 5.50mm Hook; All Trim pieces are made using a 5.00mm Hook.
  • To adjust the length: add or remove rows from the bottom portion, before moving to panel instructions.
  • Lion Brand Coboo was used for cardigan shown.


Special Stitches

Alternate Double Crochet (alt. dc) – Place a single crochet in the indicated stitch, then place another single in the center of the first one.
Cluster (CL) – Place three double crochet in the same space.


Instructions

BOTTOM

R1. (RS) Ch 78(83,89,95,98,104), sc in 2nd ch from hook and in each ch across, turn (77)[82,88,94,97,103]

R2. Alt. dc, skip 2 sc, *CL, skip 2 sc* across, dc in last sc, turn (24 CL, 2 dc)[26 CL, 2 dc//28 CL, 2 dc//30 CL, 2 dc//31 CL, 2 dc//33 CL, 2 dc]

R3. Alt. dc in dc, CL between dc and 1st CL, *CL between CLs* across, CL between last CL and alt. dc, dc in alt. dc, turn (25 CL, 2 dc)[27 CL, 2 dc//29 CL, 2 dc//31 CL, 2 dc//32 CL, 2 dc//34 CL, 2 dc]

R4. Alt. dc in dc, skip 1st CL, *CL between CLs* across, skip last CL, dc in top of alt. dc, turn (24 CL, 2 dc)[26 CL, 2 dc//28 CL, 2 dc//30 CL, 2 dc//31 CL, 2 dc//33 CL, 2 dc]

R5-16(18,20,22,24,26). Repeat R3-4;

Continue to front panel 1

FRONT PANEL 1
R1. Alt. dc in dc, CL between dc and 1st CL, *CL between CLs* 4(5,5,6,6,7)X, skip last CL, dc in next space, turn; Leave remaining sts unworked (5 CL, 2 dc)[6 CL, 2 dc//6 CL, 2 dc//7 CL, 2 dc//7 CL, 2 dc//8 CL, 2 dc]

R2. Alt. dc in dc, CL between alt. dc and 1st CL, *CL between CLs* across, skip last CL, dc in top of alt. dc, turn (5 CL, 2 dc)[6 CL, 2 dc//6 CL, 2 dc//7 CL, 2 dc//7 CL, 2 dc//8 CL, 2 dc]

R3. Alt. dc in dc, skip 1st space and 1st CL, CL in next space, *CL between CLs* across, skip last CL, dc in top of alt. dc, turn (5 CL, 2 dc)[6 CL, 2 dc//6 CL, 2 dc//7 CL, 2 dc//7 CL, 2 dc//8 CL, 2 dc]

R4. Alt. dc in dc, CL between alt. dc and 1st CL, *CL between CLs* across, skip last CL and space, dc in top of alt. dc, turn (5 CL, 2 dc)[6 CL, 2 dc//6 CL, 2 dc//7 CL, 2 dc//7 CL, 2 dc//8 CL, 2 dc]

R5-9(10,11,12,13,14). Repeat R3-4 until only 3(4,4,5,5,5)CL remain, then stop decreasing and work rows to total amount listed in row count; Fasten, leave a long tail for sewing.

Continue to front panel 2.

FRONT PANEL 2
Flip cardigan over and join yarn in dc from end of R16(18,20,22,24,26).

Repeat same instructions as Front Panel 1.

Continue to back panel.

BACK PANEL

Join yarn in same space R1 from Front Panel 1 ended in: 

R1. Alt. dc in same space as join, skip 1st CL, *CL between CLs* across, dc in same space R1 from Front Panel 2 ended in, turn (12 CL, 2 dc)[12 CL, 2 dc//14 CL, 2 dc//14 CL, 2 dc//15 CL, 2 dc/15 CL, 2 dc]

R2. Alt. dc in same space, CL between dc and 1st CL, *CL between CLs* across, CL between last CL and alt. dc, dc in alt. dc, turn (13 CL, 2 dc)[13 CL, 2 dc//15 CL, 2 dc//15 CL, 2 dc//16 CL, 2 dc/16 CL, 2 dc]

R3. Alt. dc in dc, skip 1st CL, *CL between CLs* across, dc in top of alt. dc, turn (12 CL, 2 dc)[12 CL, 2 dc//14 CL, 2 dc//14 CL, 2 dc//15 CL, 2 dc/15 CL, 2 dc]

R4. Alt. dc in same space, CL between dc and 1st CL, *CL between CLs* across, CL between last CL and alt. dc, dc in alt. dc, turn (13 CL, 2 dc)[13 CL, 2 dc//15 CL, 2 dc//15 CL, 2 dc//16 CL, 2 dc/16 CL, 2 dc]

R5-9(10,11,12,13,14). Repeat R3-4; leave a long tail for sewing.

Sew front panels to back panel by lining up the edges and sewing across the shoulder (Armholes formed).

BOTTOM TRIM

With H Hook,

R1. Attach yarn to either bottom corner st, ch 7(9,9,9,11,11) hdc in 2nd ch from hook and across, sl st x 3 on bottom of cardi, turn (6)(8,8,8,10,10)

R2. Ch 1, BLO hdc across hdcs, turn (6)(8,8,8,10,10)

R3. Ch 1, BLO hdc across, sl st x 3 on bottom of cardi, turn (6)(8,8,8,10,10)

Repeat R2&3 to other corner; Fasten.

SLEEVES (Make 2)

R1. (RS) Ch 20(20,26,26,32,32), sc in 2nd ch from hook and in each ch across, turn (19)[19,25,25,31,31]

R2. Alt. dc, skip 2 sc, *CL, skip 2 sc* across, dc in last sc, turn (5 CL, 2 dc)[5 CL, 2 dc//7 CL, 2 dc//7 CL, 2 dc//9 CL, 2 dc//9 CL, 2 dc]

R3. Alt. dc in dc, CL between dc and 1st CL, *CL between CLs* across, CL between last CL and alt. dc, dc in alt. dc, turn (6 CL, 2 dc)[6 CL, 2 dc//8 CL, 2 dc//8 CL, 2 dc//10 CL, 2 dc//10 CL, 2 dc]

R4. Alt. dc in dc, skip 1st CL, *CL between CLs* across, skip last CL, dc in top of alt. dc, turn (5 CL, 2 dc)[5 CL, 2 dc//7 CL, 2 dc//7 CL, 2 dc//9 CL, 2 dc//9 CL, 2 dc]

R5-6. Repeat R3&4

R7. Alt. dc in dc, ch 1, CL between dc and 1st CL, *CL between CLs* across, CL between last CL and alt. dc, ch 1, dc in alt. dc, turn (6 CL, 2 dc)[6 CL, 2 dc//8 CL, 2 dc//8 CL, 2 dc//10 CL, 2 dc//10 CL, 2 dc]

R8. Alt. dc in dc, CL in ch-1 space, skip 1st CL below, *CL between CLs* across, skip last CL below, CL in ch-1 space, dc in top of alt. dc, turn (7 CL, 2 dc)[7 CL, 2 dc//9 CL, 2 dc//9 CL, 2 dc//11 CL, 2 dc//11 CL, 2 dc]

R9-11. Repeat R4&3

[Odd rows repeat R4, Even rows repeat R3](Stitch count will match R7&8)

R12. Repeat R7 

R13. Repeat R8 (8 CL, 2 dc)[8 CL, 2 dc//10 CL, 2 dc//10 CL, 2 dc//12 CL, 2 dc//12 CL, 2 dc]

Continue to Individual Sizes

2T ONLY:

R14. Repeat R4 (7 CL, 2 dc)

R15. Repeat R7 (8 CL, 2 dc)

R16. Repeat R8 (9 CL, 2 dc)

R17. Repeat R4 (8 CL, 2 dc)

R18. Repeat R7 (9 CL, 2 dc)

R19. Alt. dc in dc, ch 1, CL in ch-1 space, skip 1st CL below, *CL between CLs* across, skip last CL below, CL in ch-1 space, ch 1, dc in top of alt. dc, turn (10 CL, 2 dc)

R20. Repeat R19 (11 CL, 2 dc); Continue to Cuff

4T ONLY:

R14. Repeat R4 (7 CL, 2 dc)

R15. Repeat R3 (8 CL, 2 dc)

R16. Repeat R4 (7 CL, 2 dc)

R17. Repeat R7 (8 CL, 2 dc)

R18. Repeat R8 (9 CL, 2 dc)

R19. Repeat R4 (8 CL, 2 dc)

R20. Repeat R7 (9 CL, 2 dc)

R21. Alt. dc in dc, ch 1, CL in ch-1 space, skip 1st CL below, *CL between CLs* across, skip last CL below, CL in ch-1 space, ch 1, dc in top of alt. dc, turn (10 CL, 2 dc)

R22. Repeat R21 (11 CL, 2 dc)

R23. Repeat R21 (12 CL, 2 dc); Continue to Cuff


6Y ONLY:

R14-16. Repeat R3&4 (Odd rows repeat R3, Even rows repeat R4)

R17. Repeat R7

R18. Repeat R8 (11 CL, 2 dc)

R19. Repeat R4 (10 CL, 2 dc)

R20. Repeat R7 (11 CL, 2 dc)

R21. Repeat R8 (12 CL, 2 dc)

R22. Repeat R4 (11 CL, 2 dc)

R23. Repeat R7 (12 CL, 2 dc)

R24. Repeat R8 (13 CL, 2 dc); Continue to Cuff

8Y ONLY:

R14-16. Repeat R3&4 (Odd rows repeat R3, Even rows repeat R4)

R17. Repeat R7

R18. Repeat R8 (11 CL, 2 dc)

R19. Repeat R4 (10 CL, 2 dc)

R20. Repeat R7 (11 CL, 2 dc)

R21. Repeat R8 (12 CL, 2 dc)

R22. Repeat R4 (11 CL, 2 dc)

R23. Repeat R7 (12 CL, 2 dc)

R24. Alt. dc in dc, ch 1, CL in ch-1 space, skip 1st CL below, *CL between CLs* across, skip last CL below, CL in ch-1 space, ch 1, dc in top of alt. dc, turn (13 CL, 2 dc)

R25. Repeat R8 (14 CL, 2 dc)

R26. Repeat R4 (13 CL, 2 dc); Continue to Cuff

10Y ONLY:

R14-16. Repeat R3&4 (Odd rows repeat R3, Even rows repeat R4)

R17. Repeat R7

R18. Repeat R8 (13 CL, 2 dc)

R19. Repeat R4 (12 CL, 2 dc)

R20. Repeat R3 (13 CL, 2 dc)

R21. Repeat R4 (12 CL, 2 dc)

R22. Repeat R7 (13 CL, 2 dc)

R23. Repeat R8 (14 CL, 2 dc)

R24. Repeat R4(13 CL, 2 dc)

R25. Repeat R3 (14 CL, 2 dc)

R26. Repeat R4 (13 CL, 2 dc)

R27. Repeat R7 (14 CL, 2 dc)

R28. Repeat R8 (15 CL, 2 dc); Continue to Cuff

12Y ONLY:

R14-16. Repeat R3&4 (Odd rows repeat R3, Even rows repeat R4)

R17. Repeat R7

R18. Repeat R8 (13 CL, 2 dc)

R19. Repeat R4 (12 CL, 2 dc)

R20. Repeat R3 (13 CL, 2 dc)

R21. Repeat R4 (12 CL, 2 dc)

R22. Repeat R7 (13 CL, 2 dc)

R23. Repeat R8 (14 CL, 2 dc)

R24. Repeat R4(13 CL, 2 dc)

R25. Repeat R3 (14 CL, 2 dc)

R26. Repeat R4 (13 CL, 2 dc)

R27. Repeat R7 (14 CL, 2 dc)

R28. Repeat R8 (15 CL, 2 dc)

R29. Repeat R4 (14 CL, 2 dc)

R30. Repeat R7 (15 CL, 2 dc)

R31. Repeat R8 (16 CL, 2 dc); Continue to Cuff

CUFFS

With H Hook,

R1. Attach yarn to either bottom corner st, ch 7(9,9,9,11,11) hdc in 2nd ch from hook and across, sl st x 3 on bottom of cardi, turn (6)(8,8,8,10,10)

R2. Ch 1, BLO hdc across hdcs, turn (6)(8,8,8,10,10)

R3. Ch 1, BLO hdc across, sl st x 3 on bottom of cardi, turn (6)(8,8,8,10,10)

Repeat R2&3 to other corner; Fasten.

COLLAR

With H Hook

R1. Attach yarn to either bottom corner st, ch 1, *2 sc, sc* up the front panel, across the top of the back panel, and down the other front panel. [I placed 2 sc in the dc with a space next to them, and 1 sc in the dc with a cluster next to it].

R2. Ch 7(9,9,9,11,11) hdc in 2nd ch from hook and across, sl st x 3 on bottom of cardi, turn (6)(8,8,8,10,10)

R3. Ch 1, BLO hdc across hdcs, turn (6)(8,8,8,10,10)

R4. Ch 1, BLO hdc across, sl st x 3 across scs, turn (6)(8,8,8,10,10)

Repeat R2&3 up front panel, across top of back panel, and down other front panel to corner; Fasten.

Finishing
  • Fold sleeves in half, wrong sides together, and sew along the long edge to join. Turn right side out.
  • Attach Sleeve: With Cardigan wrong side out, lay flat and find the shoulder crease, then mark it with a stitch marker. Insert sleeve (still right  side out) into armhole from the inside of the cardigan, so that the seam is facing down and matches up to the space between dcs (where front and back panel split/bottom of armhole) and the top crease of the sleeve matches with the shoulder crease. Optional: place sewing clips at the shoulder crease, sleeve seam, one centered on front panel of armhole and one centered on back panel of armhole to hold the sleeve in place. Sew the sleeve into the armhole. [See Photo Below]
  • Hide all strings.
  • Turn cardigan right side out and attach any leather tags or sizing tags! 

That’s the Child’s Oversized Granny Stitch Cardigan Crochet Pattern!

Child's Oversized Granny Stitch Cardigan in Tan Coboo Yarn on a girl at a lake


Don’t forget to share!

If you make the Oversized Granny Stitch Cardigan, I’d love to see them! Tag me on Instagram at @blackstone_designs or use the hashtag #GrannyStitchCardi so I can share your makes with the community.


Join our crochet community group!

Come on over and join the Blackstone Designs Crochet Community on Facebook for fun CALs and giveaways, plus exclusive sales, pattern support, and so much more!


Written pattern and photographs © 2025 Sonya Blackstone of Blackstone Designs. Do not sell, share, or modify this pattern, but instead share the link to where the pattern can be found. You may sell items you make with this pattern. This pattern, as with all Blackstone Designs/Sonya Blackstone patterns, are not for educational use without written permission from the designer.  All rights reserved.

Sonya Blackstone is a participant in the Amazon Services LLC Associates Program, an affiliate advertising program designed to provide a means for us to earn fees by linking to Amazon.com and affiliated sites.

Similar Posts

Leave a Reply

Your email address will not be published. Required fields are marked *
