Road Trip Beanie Crochet Pattern
If you’re looking for the perfect project to take on your next adventure—or just something comfy to whip up on a cozy weekend at home—you’re going to fall in love with the Road Trip Beanie! This free crochet pattern is fun, textured, and just the right blend of rustic and stylish. Whether you’re off to see the autumn leaves or just dreaming of winding country roads, this beanie has all the chill road trip vibes you need.
This post contains affiliate links. At no extra cost to you, I may receive a small commission from purchases made through affiliate links, which helps me to keep bringing awesome free content!
In this post, I’m going to share all the details about the Road Trip Beanie crochet pattern, including what makes it unique, what yarn to use, how to customize it, and a step-by-step breakdown so you’re totally ready to dive in. Let’s hit the road (with hooks in hand)!
Why You’ll Love the Road Trip Beanie
There’s just something about this beanie that screams “fall getaway,” right? Between the texture, the color play, and that dreamy faux fur pom on top, it’s basically a Pinterest mood board come to life.
Here’s why this pattern is a must-make:
- Textured stitches that look fancy but are super easy to do.
- Scrap yarn-friendly – mix and match colors or go for a gradient vibe!
- Perfect for gifting – everyone loves a good beanie.
- FREE pattern – because who doesn’t love a good freebie?
The Inspiration Behind the Design
This beanie was designed with adventure in mind. Think cozy cabins, warm drinks, scenic views—and of course, a project bag packed with yarn. I wanted a hat that felt warm and homey but also stylish enough to wear on those crisp photo-worthy hikes or farmer’s market strolls.
The stitch pattern reminds me of winding roads and layers of fallen leaves, which makes this hat perfect for those transitional months when you’re just starting to feel the chill.
The Stitches
The Road Trip Beanie crochet pattern was designed using the unique spider stitch for a soft, textured look. Don’t worry, this pattern isn’t complicated! You’ll need to know just a few basic stitches:
- Single crochet (sc)
- Double crochet (dc)
- Front post double crochet (fpdc)
- Back post double crochet (bpdc)
These post stitches are what create that gorgeous ribbed brim. They give the beanie structure and that classic cozy look.
The main body of the hat uses a repeating combo that’s super fun once you get the rhythm going. It’s relaxing, repetitive, and perfect for road trip crocheting (just don’t crochet while you’re the one driving!).
The crochet spider stitch gives it just the right amount of stretch and warmth, making it a comfortable fit for any season. Perfect for both casual and dressed-up looks, this striped beanie is an essential accessory for chilly days. Whether you’re gifting it or adding it to your own collection, it’s sure to be a favorite!
Of course these hats can be made in one or two solid colors if you prefer, but the look of self striping or variegated yarn as an accent color makes me swoon!
Available in five sizes, from baby to large adult, the Road Trip Beanie is the perfect accessory for the whole family!
Why should you crochet the Road Trip Beanie?
Unique Texture: The spider stitch gives the beanie a beautiful, almost woven texture that stands out from other crochet stitches, making the hat visually interesting and soft to the touch.
Perfect for Practice or Learning: If you’re new to the spider stitch, this project is an ideal way to learn and master it. The beanie’s manageable size lets you work on stitch consistency and develop your technique.
Stylish and Versatile: The striped design adds a fun, modern twist, letting you play with colors to match any style or season. Plus, beanies are super versatile—they work with everything from casual outfits to more dressed-up looks.
Great Gift Idea: Handmade gifts are always special. A striped, spider-stitch beanie makes a thoughtful, cozy gift that friends and family will appreciate and cherish.
Quick and Satisfying Project: If you’re looking for a project that you can complete in just a few sittings, this hat is perfect. You’ll get a sense of accomplishment with a finished, wearable item that’s both functional and stylish.
Seasonal Staple: With cooler weather, a warm, soft beanie is essential. Crocheting your own gives you control over fit, color, and yarn type, ensuring it’s exactly the style and comfort you want!
Let’s Talk Yarn Options
The Road Trip Beanie was made with a fun worsted weight roving yarns, but as long as you match gauge, you can use any yarn you like!
Here are a few yarns that work great:
If you want a really luxe texture, try something with a little wool content. It’ll keep the warmth in and give your stitches a nice bounce.
Color Customization Ideas
This beanie pattern shines with stripes, but it’s super versatile. Here are some fun ideas to play with:
- Neutral Base + Bright Stripes – Think cream + mustard, burgundy, or teal.
- Ombre Fade – Use yarn cakes or gradient skeins for a slow color transition.
- Team Colors – Perfect for game day or school spirit.
- Holiday Vibes – Go with red and green for Christmas, or orange and black for Halloween.
Want to keep it classic? Just stick with one solid color for a timeless look.
Make It a Set
If you’re like me, you can’t stop at just one accessory. Try pairing the Road Trip Beanie with a matching scarf or mitts for a cozy cold-weather set. You can even make a mini version for kids to match the adults!
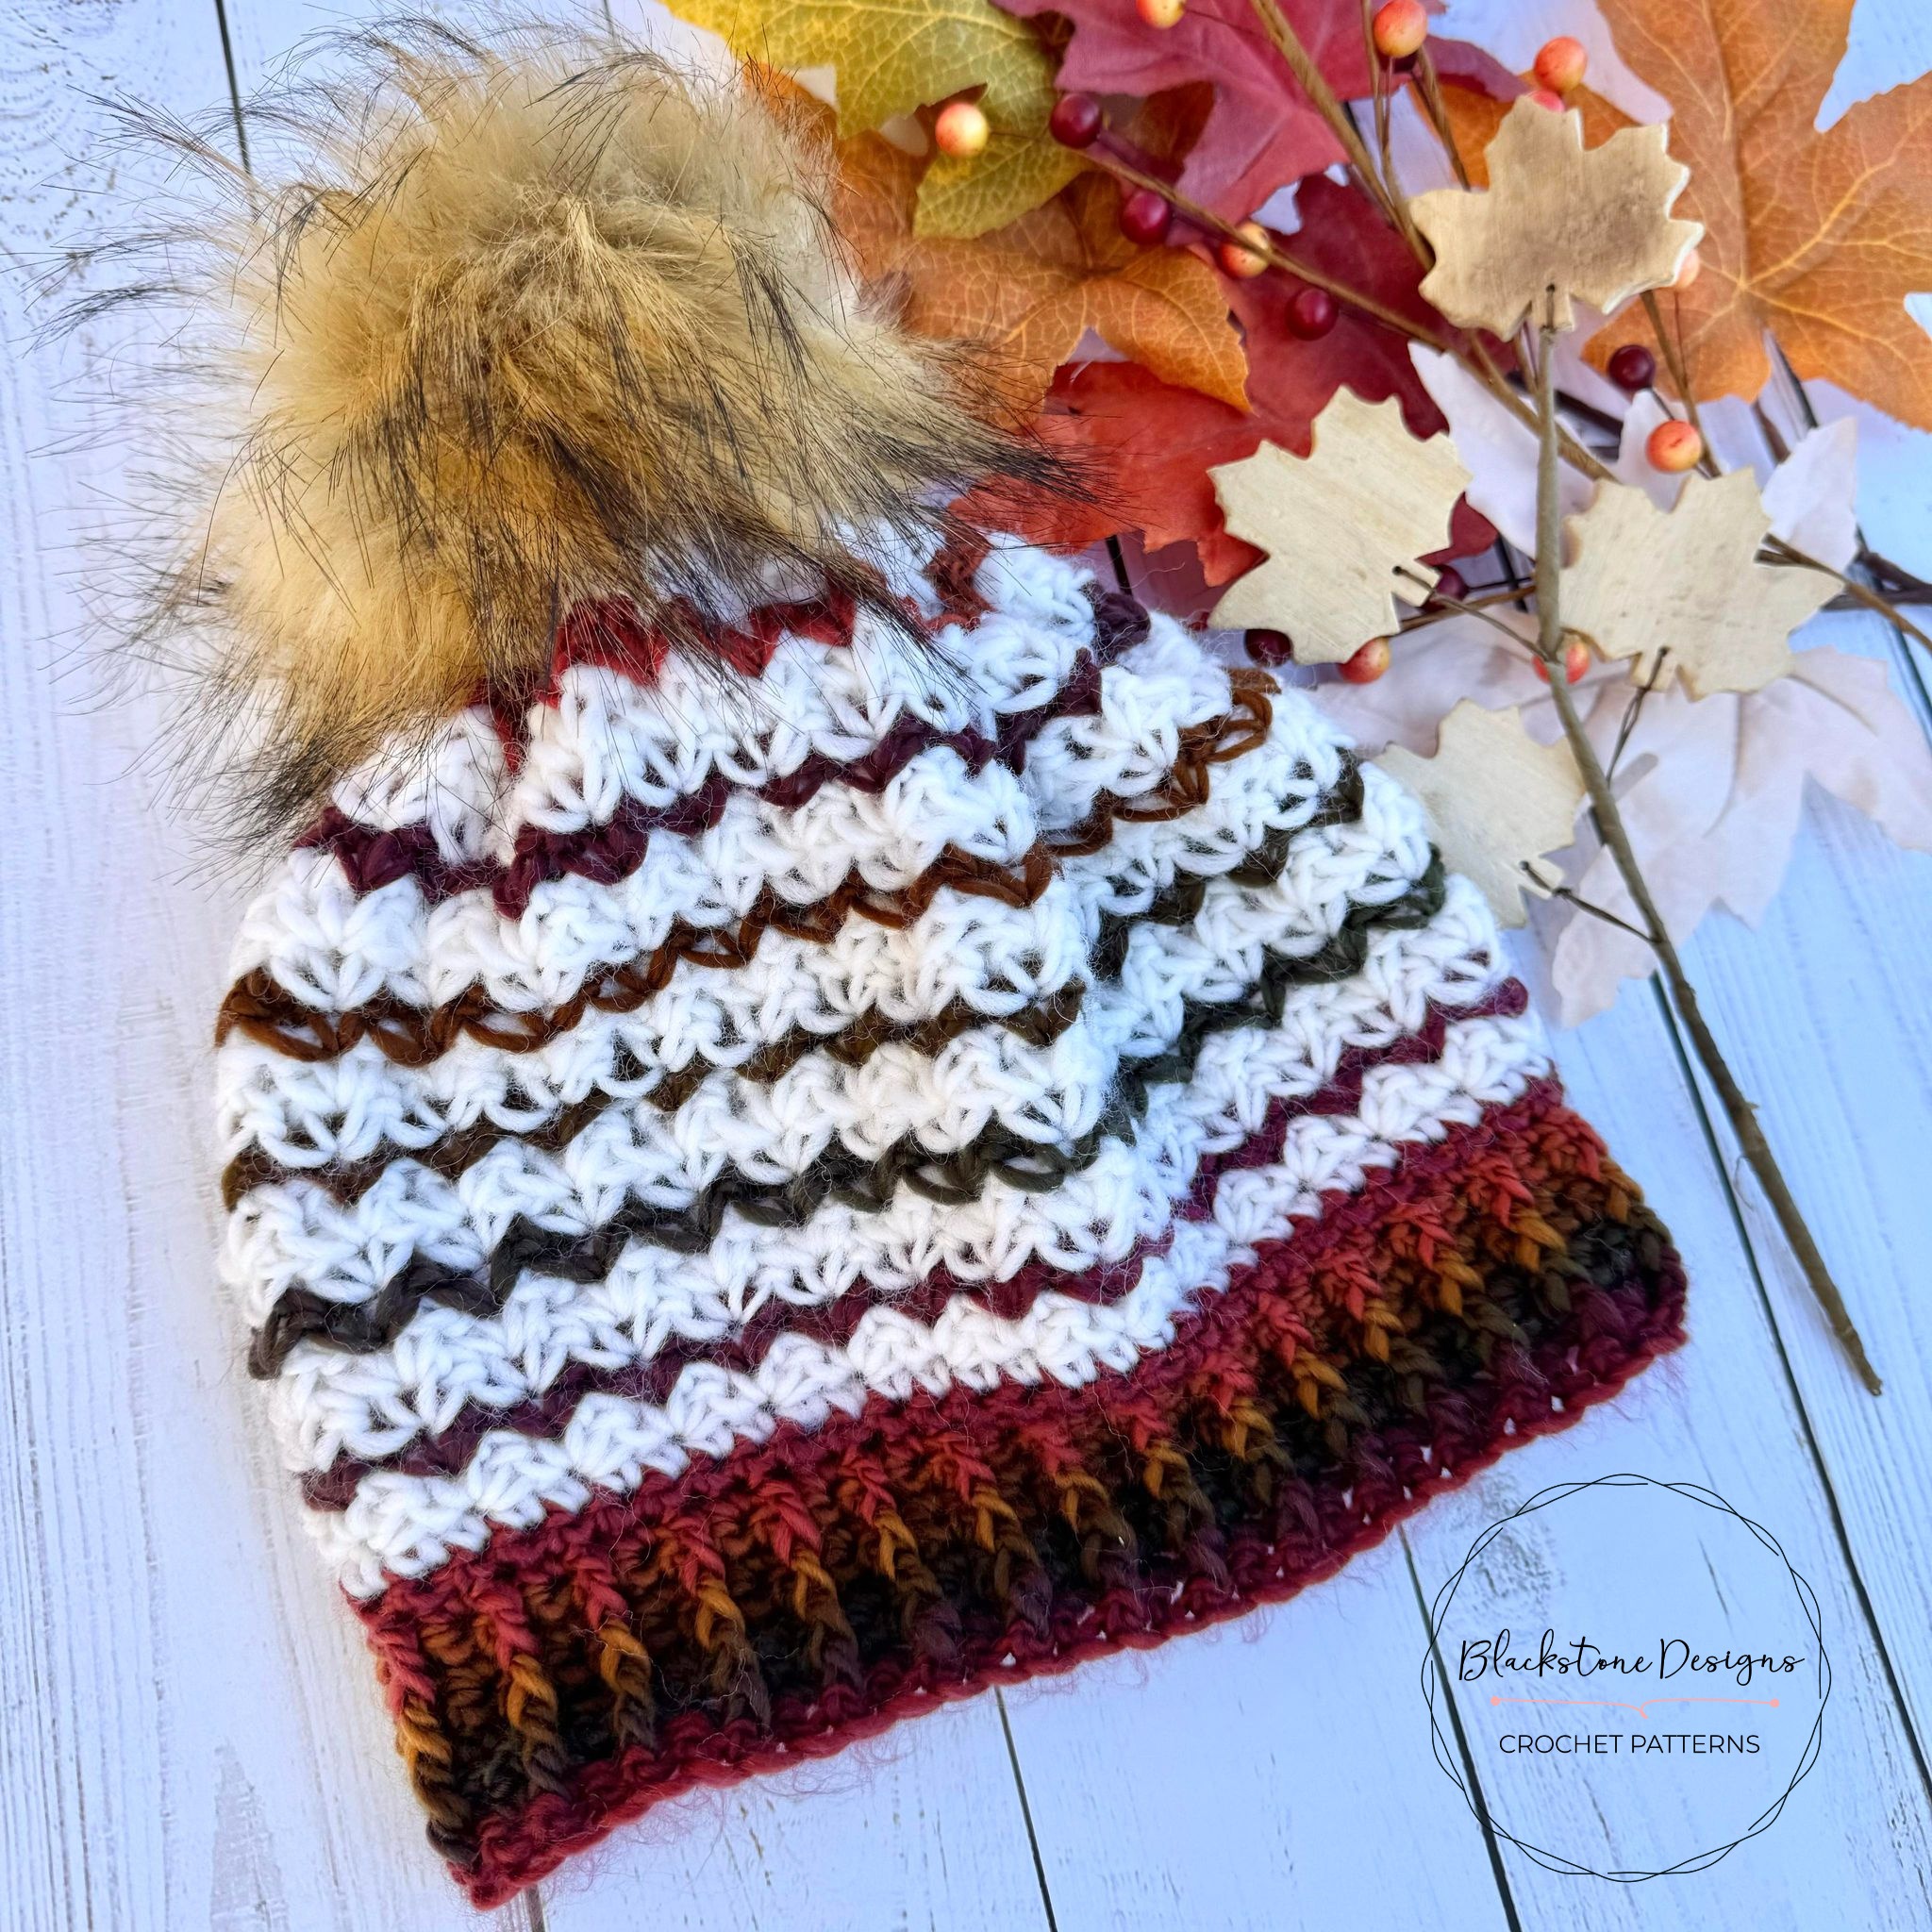
Road Trip Beanie
Crochet Pattern
Option 1: Continue scrolling for free pattern instructions on this site
Option 2: Purchase the ad-free PDF that includes tutorial photos from one of my shops
What supplies do I need?
This Road Trip Beanie was made using Lion Brand Wool Ease Roving Yarn in the color cream and Loops & Threads Facets, which is the equivalent of Lion Brand Landscapes. You will also need a J/10/6.00mm Crochet Hook and an extra large faux fur pom pom to complete this look.
The Pattern
Keep reading for a list of what you need to crochet the Road Trip Beanie, including the stitch pattern instructions!

Materials
Lion Brand Wool Ease Roving Yarn (#4)
- Solid (B) [<2oz / <120yds]
Lion Brand Landscapes Yarn (#4)
- Variegated (A) [<1.5oz /<120yds]
Optional Materials:
Gauge
5.5 spider sts x 15 rows = 4”
(When flat)
Sizes
Baby (16” Head)
Toddler (18” Head)
Child (20” Head)
Small Adult (22” Head)
Large Adult (23” Head)
Stitch Guide
arnd = around
ch = chain
FPdc = Front Post Double Crochet
sc = single crochet
sl st(s) = slip stitch(es)
st(s) = stitch(es)
Skill Level
Easy
Written in U.S. Terms


Pattern Notes
- Beginning chains do not count as stitches.
- Sizes are separated out.
- When asterisks appear, repeat steps between them: *to*.
- This hat is worked from the bottom-up.
- To work a gauge swatch:
R1. Chain 14, (sc, ch 1, sc), *skip next ch, (sc, ch 1, sc)* across, turn.
R2. (sc, ch 1, sc) in each ch-1 space across, turn. Repeat R2 for 15 total rows. - The hat shown was made using Lion Brand Wool Ease Roving in Cream (Affiliate Link) and Loops & Threads Facets (same yarn as LB Landscapes).
Instructions
BABY SIZE CROCHET BEANIE
With Color A,
R1. Ch 39, sc in 2nd ch from hook and across, turn (38)
R2. Ch 1, *FPdc, sc* across, turn (38)
R3. Ch 1, sc across, turn (38)
R4-6. Repeat R2-3
R7. Ch 1, sc across, turn (38)
With Color B,
R8. Ch 1, sc across, turn (38)
R9. Ch 1, *skip 1, (sc, ch 1, sc)* across, turn (38)
With Color A,
R10. Ch 1, *skip 1, (sc, ch 1, sc)* across, turn (38)
With Color B,
R11-12. Ch 1, *skip 1, (sc, ch 1, sc)* across, turn (38)
R13-24. Repeat R10-12 (making color changes as indicated)
With Color B,
R25. Repeat R11; Fasten.
TODDLER SIZE CROCHET BEANIE
With Color A,
R1. Ch 45, sc in 2nd ch from hook and across, turn (44)
R2. Ch 1, *FPdc, sc* across, turn (44)
R3. Ch 1, sc across, turn (44)
R4-6. Repeat R2-3
R7. Ch 1, sc across, turn
With Color B,
R8. Ch 1, sc across, turn (44)
R9. Ch 1, *skip 1, (sc, ch 1, sc)* across, turn (44)
With Color A,
R10. Ch 1, *skip 1, (sc, ch 1, sc)* across, turn (44)
With Color B,
R11-12. Ch 1, *skip 1, (sc, ch 1, sc)* across, turn (44)
R13-27 . Repeat R10-12 (making color changes as indicated)
With Color B,
R28. Repeat R11; Fasten.
CHILD SIZE CROCHET BEANIE
With Color A,
R1. Ch 51, sc in 2nd ch from hook and across, turn (50)
R2. Ch 1, *FPdc, sc* across, turn (50)
R3. Ch 1, sc across, turn (50)
R4-8. Repeat R2-3
R9. Ch 1, sc across, turn
With Color B,
R10. Ch 1, sc across, turn (50)
R11. Ch 1, *skip 1, (sc, ch 1, sc)* across, turn (50)
With Color A,
R12. Ch 1, *skip 1, (sc, ch 1, sc)* across, turn (50)
With Color B,
R13-14. Ch 1, *skip 1, (sc, ch 1, sc)* across, turn (50)
R15-29. Repeat R12-14 (making color changes as indicated)
With Color B,
R30. Repeat R13; Fasten.
SMALL ADULT SIZE CROCHET BEANIE
With Color A,
R1. Ch 57, sc in 2nd ch from hook and across, turn (56)
R2. Ch 1, *FPdc, sc* across, turn (56)
R3. Ch 1, sc across, turn (56)
R4-8. Repeat R2-3
R9. Ch 1, sc across, turn
With Color B,
R10. Ch 1, sc across, turn (56)
R11. Ch 1, *skip 1, (sc, ch 1, sc)* across, turn (56)
With Color A,
R12. Ch 1, *skip 1, (sc, ch 1, sc)* across, turn (56)
With Color B,
R13-14. Ch 1, *skip 1, (sc, ch 1, sc)* across, turn (56)
R15-32. Repeat R12-14 (making color changes as indicated)
With Color B,
R33. Repeat R13; Fasten.
LARGE ADULT SIZE CROCHET BEANIE
With Color A,
R1. Ch 63, sc in 2nd ch from hook and across, turn (62)
R2. Ch 1, *FPdc, sc* across, turn (62)
R3. Ch 1, sc across, turn (62)
R4-8. Repeat R2-3
R9. Ch 1, sc across, turn
With Color B,
R10. Ch 1, sc across, turn (62)
R11. Ch 1, *skip 1, (sc, ch 1, sc)* across, turn (62)
With Color A,
R12. Ch 1, *skip 1, (sc, ch 1, sc)* across, turn (62)
With Color B,
R13-14. Ch 1, *skip 1, (sc, ch 1, sc)* across, turn (62)
R15-35. Repeat R12-14 (making color changes as indicated)
With Color B,
R36. Repeat R13; Fasten.
Finishing
- Fold strip in half (right side together) and sew side edges together.
- Weave tail in and out of top, pull strings to cinch, then stitch closed.
- Hide all strings.
- Optional: Attached pom pom to top center.
And that’s the Road Trip Beanie Crochet Pattern!
Join our crochet community group!
Come on over and join the Blackstone Designs Crochet Community on Facebook for fun CALs and giveaways, plus exclusive sales, pattern support, and so much more!
Don’t forget to share!
Tag me on Instagram at @blackstone_designs or use the hashtag #BlackstoneDesignsCrochet so I can share your makes with the community!
Happy Crocheting!

Written pattern and photographs © 2024 Sonya Blackstone of Blackstone Designs. Do not sell, share, or modify this pattern, but instead share the link to where the pattern can be found. You may sell items you make with this pattern. This pattern, as with all Blackstone Designs/Sonya Blackstone patterns, are not for educational use without written permission from the designer. All rights reserved.
Sonya Blackstone is a participant in the Amazon Services LLC Associates Program, an affiliate advertising program designed to provide a means for us to earn fees by linking to Amazon.com and affiliated sites.