Aren’t Flamingos so darn cute?! My daughter is completely in love with them, so I knew I had to make a Flamingo Friend her! The more I thought about making one, the more excited I became with the possibilities! What size will I make? What yarn will I use? What features will it have?
This post contains affiliate links. At no extra cost to you, I may receive a small commission from purchases made through affiliate links, which helps me to keep bringing awesome free content!
After a lot of brainstorming, I decided I really wanted it to be a big Flamingo, but I also needed to keep it pretty simple, so that it can easily be made in one week. That’s why I decided to use a thicker yarn; it will yield a bigger finished piece, with less stitch work!
Once I decided on the yarn size, I had to consider my options. I had been wanting to use Bernat Blanket yarn for quite a while, but I never had the right project. I have an afghan planned out, but I haven’t had time to work up such a large project, so that made this the perfect time to give it a try!

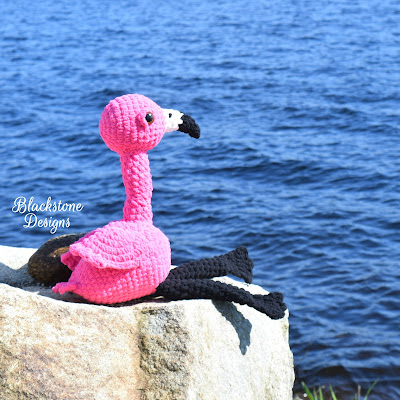
I am pleasantly surprised with how great this yarn works up into a stuffed animal! It really is the perfect yarn for stuffies. This Flamingo Friend is plush, soft, and super cute! My daughter was very excited about adding it to her collection!
A big thank you to Fairfield World generously donated the Poly-fil used to make these softies.
How to get the
Flamingo Friend Crochet Pattern:

Option 1: Continue scrolling for free pattern instructions on this site
Option 2: Subscribe to our newsletter and receive the “5 Summer Crochet Patterns” eBook, which includes this pattern.
Option 3: Purchase the PDF from one of my shops below
Gauge
Not important for this project
Finished Measurements
13” tall from top of head to bottom of body.
Legs are 9.5” long.
Body is 8.75” long.
Stitch Guide
arnd = around
ch = chain
dc = double crochet
sc = single crochet
sl st(s) = slip stitch(es)
st(s) = stitch(es)
Skill Level
Easy
WRITTEN IN US TERMS

Notes
- Beginning ch-1 does not count as a stitch
- This pattern can be worked in any yarn weight.
- Make sure to adjust to the appropriate hook size (example: G/6/4.00mm hook for worsted weight yarn)
- Round 1 of the head is the backside. The beak will go over the last round.
- Round 1 of the body is the front side.
Head
With Pink,
R1. Magic ring, ch 1, 6 sc in ring (6)
R2. 2 sc arnd (12)
R3. *2 sc, sc* arnd (18)
R4. *2 sc, sc x 2* arnd (24)
R5. *2 sc, sc x 3* arnd (30)
R6-11. sc arnd (30)
R12. *dec, sc x 3* arnd (24) – Add eyes between rows 9 & 10, approx. 11 sts apart.
R13. *dec, sc x 2* arnd (18)
R14. *dec, sc* arnd (12) – Stuff Here
R15. dec arnd (6)
R16. dec arnd (3)
Weave tail through remaining stitches; Fasten.
Body
With Pink,
R1. Magic ring, ch 1, 6 sc in ring (6)
R2. 2 sc arnd (12)
R3. *2 sc, sc* arnd (18)
R4. *2 sc, sc x 2* arnd (24)
R5. *2 sc, sc x 3* arnd (30)
R6. *2 sc, sc x 4* arnd (36)
R7. *2 sc, sc x 5* arnd (42)
R8. *2 sc, sc x 6* arnd (48)
R9-14. sc arnd (48)
R15. *dec, sc x 6* arnd (42)
R16. *dec x 2, sc x 38* arnd (40)
R17. *dec x 2, sc x 36* arnd (38)
R18. *dec x 2, sc x 34* arnd (36)
R19. *dec x 2, sc x 32* arnd (34)
R20. *dec x 2, sc x 30* arnd (32)
R21. *dec x 2, sc x 28* arnd (30) – Stuff Here
R22. *dec, sc x 3* arnd (24)
R23. *dec, sc x 2* arnd (18)
R24. Flatten opening, so that the double decrease section (rounds 16-21) is centered: sc across, working through both layers together, turn (9)
R25. Ch 1, (sc, dc, ch 3, dc, sc), *sk 3, (sc, dc, ch 3, dc, sc)* 2X; Fasten. (3 tailfeathers)
Check out some of my favorite craft supplies on Amazon!
Neck
With Pink,
R1. Magic ring, ch 1, 6 sc in ring (6)
R2. 2 sc arnd (12)
R3. sc arnd (12)
R4. 2 sc x 4, dec x 4 (12)
R5. dec, 2 sc x 4, dec x 3 (12)
R6-12. sc arnd; Fasten at the end of round 12. (12)
Wings (Make 2)
With Pink,
R1. Magic ring, ch 1, 6 sc in ring (6)
R2. 2 sc arnd (12)
R3. *2 sc, sc* arnd (18)
R4. *2 sc, sc x 2* arnd (24)
R5. *2 sc, sc x 3* arnd (30)
R6. *2 sc, sc x 4* arnd (36)
R7. Fold circle in half, sl st across, working through both layers together, turn (18)
R8. Ch 1, *(dc x 2, sc), sl st* 2X, (dc x 2, sc, sl st). Fasten. Do not stuff. (3 feathers)


Eyelids (Make 2)
With Pink,
Ch 4. Fasten.
Legs (Make 2)
With Black,
R1. Ch 8, join to form a ring, ch 1, sc in each ch arnd (8)
R2-14. sc arnd (8)
R15. *dec, sc x 2* arnd (6)
R16. Flatten opening: sc across, working through both layers, turn (3)
R17. Ch 1, dc x 2, dc, dc x 2, turn (5)
R18. Ch 1, sc across, turn (5)
R19. Ch 1, *(sc, dc, sc), sl st* 2X, (sc, dc, sc, sl st) in last st; Fasten. Do not stuff. (3 toes)
Beak
With Black,
R1. Magic ring, ch 1, 4 sc in ring (4)
R2. sc arnd (4)
R3. 2 sc arnd (8)
R4. sc, 2 sc x 2, sc, dec x 2 (8)
R5. sc arnd (8)
With White,
R6. dec, sc, 2 sc x 2, sc, dec (8)
R7-8. sc arnd; Fasten at the end of round 8.
Finishing
- Sew neck over rounds 6-11 of the body.
- Insert wooden dowel through center of neck & down into body, leave 1-2” above the neck. Stuff neck firmly.
- Sew neck to round 6-9 of the head, making sure to insert the wooden dowel up through the head.
- Attach wings to sides of body, with front tip of wings over round 7.
- Attach legs to bottom of body, to round 8, so the inner legs touch.
- Place eyelids over eyes, so the top and backside are covered.
- Stitch a dot on both sides of the beak over round 7.
- Hide all strings.
Do you love it? Drop a comment!
Looking for more stuffed animals? You might like one of these:
Mack the Moose
Bruno the Bear
Floppy Disk Cuddle Buddy
I’d love to see your finished projects! Join the Blackstone Designs Crochet Community or share them to my Facebook page!
Hope to see you there!!
And don’t forget to add this pattern to your Ravelry favorites and Pin it for later, so you can always find it!

Written pattern and photographs © 2018 Sonya Blackstone of Blackstone Designs. Please do not sell, share, or modify this pattern, but instead share the link to where the pattern can be found. You may sell items you make with this pattern. This pattern, as with all Blackstone Designs/Sonya Blackstone patterns, are not for educational use without written permission from the designer.
Sonya Blackstone is a participant in the Amazon Services LLC Associates Program, an affiliate advertising program designed to provide a means for us to earn fees by linking to Amazon.com and affiliated sites.
Will a 12 inch dowel rod work? I searched on Amazon for 10 inch dowel rods and all that came up was 12 inch.
Also, I am having a great deal of trouble on the body part at round number 24. Is there any way to word this differently for me to understand. I am relatively new to amigurumi and still learning. This is the flamingo I picked out of all of them because it was the cutest and now I’m stuck. Thank you for your time.
Hi Marna!
Before working round 24, you will want to twist the body as needed so the previously worked decreases will be top center. Then you will pinch the opening flat, so it has two rows of stitches touching. You will work across these rows at the same time to join them as one row.
-Sonya
Hi Marna!
A 12″ dowel may work, but if it’s too long you can always trim it down to size.
-Sonya
how many stitches apart for the eye placement between rows 9 and 10?
Hi Patricia!
They should be on opposite sides of each other, so approximately 11 sts between them.
-Sonya
Hello! I’m having a hard time figuring out how some things are written. (I can’t believe I’m stuck right at the beginning. ) When it says something like *2 sc, sc* arnd or *2sc,sc x 2* arnd, what does that mean?
Hi Janna!
2 sc = place 2 single crochets into one stitch/space. Sc x 2 = 1 sc in each of the next 2 stitches/spaces.
So *2 sc, sc x 2* = 2 sc in the first stitch/space, 1 sc in the next 2 stitches/spaces and repeat the instructions between the asterisks until you’re back at the beginning of the round or end of the row.
-Sonya
For the legs it says join to form a ring. What dose that mean
Hi Annalise!
Join to form a ring means to slip stitch into the top of the first stitch, so the chain is now a ring.
-Sonya
Thank you!